THE DANGERS OF NOT REMOVING DEAD TREES NEAR PUBLIC PATHS AND TRAILS


Not removing dead trees near public paths and trails can pose significant dangers to both the public and the surrounding environment. Here are some of the key dangers associated with leaving dead trees in these areas:

  1. Safety Hazards: Dead trees are at risk of falling, especially during storms or high winds. These falling trees or branches can cause serious injuries or even fatalities to people using the paths and trails. Public safety is a primary concern, and dead trees near high-traffic areas can present an immediate risk.
  2. Liability Issues: If a dead tree falls and causes harm to a person or property, the entity responsible for managing the public paths and trails may be held liable for damages. Removing dead trees proactively helps mitigate this potential liability.
  3. Trail Accessibility: Fallen or dead trees can obstruct paths and trails, making them impassable and inconvenient for users. This can lead to reduced access and dissatisfaction among trail users.
  4. Environmental Impact: Dead trees can serve as a breeding ground for pests, pathogens, and fungi that may spread to healthy trees nearby. If not removed, the infestation can spread, affecting the overall health of the forest or ecosystem.
  5. Fire Hazards: Dead trees are often dry and can become fuel for wildfires. Leaving dead trees near public paths and trails increases the risk of fire incidents, especially in regions prone to wildfires.
  6. Aesthetic Value: Dead trees can negatively affect the aesthetics and beauty of public paths and trails. Visitors may be discouraged from using the trails if they perceive them as poorly maintained or unsafe.
  7. Ecological Balance: Dead trees provide habitat and food sources for various wildlife species. However, when dead trees are excessively concentrated near public paths and trails, it can disrupt the ecological balance, leading to potential overpopulation of certain species or imbalances in the ecosystem.

To address these dangers, it’s essential to implement regular tree inspections along public paths and trails. Dead or hazardous trees should be identified and promptly removed by qualified tree care professionals to ensure public safety and maintain the integrity of the environment.

Additionally, proper management of dead trees can include:

By proactively managing dead trees near public paths and trails, communities can create safer and more enjoyable outdoor spaces for the public to enjoy while also preserving the health and balance of the natural environment.


Though people hate in general to lose any type of tree, there are just some instances when completely removing them cannot be avoided. Even just the thought of completely removing trees can bring sadness and tears to many people, whether they are die-hard nature-lovers or not. Of course, there are other ways wherein they can be still helped to grow healthily, such as pruning and trimming and trees also usually benefit from some fumigation. And the last and most drastic option, when there really is no other sound and safe reason to keep the tree around, is to remove it.

Below are the main and most common valid and acceptable reasons why trees have to be cut down or properly removed:

  1. If the tree is dead or its disease/s can no longer be treated or cured.

All people love to look at healthy and lush trees. But the ones that are dead or suffering from some diseases are pretty disheartening to look at. Dead trees are also usually serious safety hazards and can be a source of many accidents so people often decide to just have them removed.

  1. Wrong tree type at a poor location.

Some trees can be a threat when they are rooted in areas of high pedestrian and/or vehicular traffic. One particular tree is the Eucalyptus, which always have the tendency to lose or drop big branches frequently. Of course, cutting them down is not always the immediate option; if they are still very healthy, they can be removed and transplanted to a different area where they cannot cause any problems or danger with the help of local professional arborists or some tree surgeons.

  1. When a tree has become a refuge and breeding ground for big and small pests.

Dead and healthy trees can become the home of unwanted and disease-carrying pests, such as rodents and ants. Bees and wasps, which can be very dangerous insects, also tend to nest or build their hives in trees. And if people are very particular about the safety and security at their properties, especially if they are concerned about their children, then they do have a valid reason for removing them.

Trees, in addition to being wonderful and beautiful natural structures that everyone should nourish and cherish, also provide many benefits to all humans, living creatures, and the environment in general. But it is also important to look at the big picture, too. When trees have to be removed, harboring any doubts or misgivings about this course of action will not serve to help anyone. After all, your safety and good health, and your loved ones’ as well, are also important and should be your top priority.

You don’t know how it happened, but it did – you’ve got a dead tree on your hands. If you want to preserve the lush look of your landscape, then it’s time to consider hiring a tree removal service. Perhaps your majestic oak is posing a major danger for drivers, as it’s starting to lean out onto the road, or your tree is causing some serious damage to your roof – and it needs to go now.

While homeowners should consider tree removal a last-option, you’ll need to give your local tree service a call if:

Worried that this unexpected expense will break your bank account? While you can get a free estimate from most tree removal companies, you can use the following factors to estimate just how much it will cost to remove your troublesome tree:

While tree removal can be an unexpected cost, knowing what you’ll be charged for can make all the difference between a surprise invoice and an expense you’re prepared for. If you really want an exact figure for your tree removal, ask local companies for a free tree estimate. You will find that the frequent analysis of your trees will pay off, when you save large sums of cash for addressing dead or dying trees.


Tips To Maintaining Garden Trees

Few people may realize that tall ones in the garden need constant, responsible and specialized care. If not properly monitored and regularly pruned, they may quickly grow out of control and not only become unsightly, but also pose a potential danger to family, neighbors and property. For example dead ones, or trees with large dead branches that are allowed to rot, will eventually tear off or fall over (usually in high winds and storms) and can damage overhead power lines, neighbors’ fences or property, and, in the worst scenario, people.

Here are some of the basic maintenance rules for mature garden trees:

Structural Pruning of Young Trees

Structural pruning when they are young is an important elementary step to proper and proactive tree maintenance. May of the problems trees develop in later years could have been easily avoided if properly pruned and shaped when young. Pruning in young ones also encourages healthy branch formation and will require far less maintenance in the long run. For example, when pruning, many future problems can be avoided by cutting away weak branches, or directing growth away from potential future hazards such as buildings.

Maintaining Mature Trees

When pruning or shaping mature plants, there are a number of aspects to consider. For example, the species of tree, its growth habits, its situation, the time of season, and its age. Mature plants are not as responsive to pruning as young ones. When in doubt, it may be best to consult with a professional arborist to ensure that the tree is preserved rather than damaged while ensuring safety and proper health.

Removing Dead Trees

It is always a source of regret when a mature tree needs to be cut down or removed. But very often this becomes a necessity when it poses a threat to property, or parts of it have died, or the tree is dead altogether. Anyone without proper knowledge, equipment or expertise should not attempt to cut down or remove mature trees themselves. This is definitely a job for specialists, as some large ones can be extremely risky to remove (especially in urban areas) due to their proximity to people, power lines and property. Very often cranes have to be used in the case of dangerous tree removals.

If you need a tree service in Utah, you can call:
Truco Services, Inc.
4640 Commerce Drive
Murray, Utah 84107
(801) 466-8044
https://truetreeservices.com/
What Can Be Used as Removal of Tree Sap From Horses Manes?

Are you tired of dealing with sticky tree sap on your horse’s beautiful mane? Well, fret no more! In this article, we will reveal tried-and-true techniques for removing tree sap from your horse’s mane. With our expert tips and step-by-step instructions, you’ll be able to say goodbye to those pesky sap stains and restore your horse’s mane to its former glory. So, grab your tools and get ready to tackle this sticky situation head-on!

Key Takeaways

Introduction to Tree Sap Removal From Horses Manes

If your horse’s mane is covered in tree sap, you’ll need to know the best methods for removal. Tree sap can be a sticky and stubborn substance to remove from your horse’s mane, but with the right techniques and products, you can effectively get rid of it. Here are some key tips to help you in the process:

Common tree sap sources that may affect your horse’s mane include pine trees, oak trees, and maple trees. These trees produce sap that can easily get transferred onto your horse’s mane, especially when they rub against them. Understanding the sources of tree sap can help you take preventive measures to minimize its occurrence. Now, let’s delve into the fascinating history of tree sap removal techniques.

Tree Sap Removal History

To understand the history of how people have dealt with the issue of tree sap in horse manes, you might find it interesting to know that various methods have been employed over the years. Tree sap removal techniques have evolved alongside the historical uses of tree sap itself. In the past, people discovered that tree sap could be used for medicinal purposes, as a waterproofing agent, and even as a source of energy. However, when it came to removing tree sap from horse manes, different approaches were necessary.

One early method involved the use of solvents such as alcohol or turpentine. These substances were applied to the affected area and gently rubbed until the tree sap dissolved. While effective, this technique could be harsh on the horse’s skin and mane.

Another historical method involved using natural oils, such as olive oil or coconut oil, to soften the tree sap. The oil was applied to the affected area and left to sit for a period of time. This allowed the sap to loosen its grip on the horse’s mane, making it easier to remove.

Transitioning to the subsequent section about ‘tips,’ it is important to note that modern advancements have provided us with more refined and gentle methods for tree sap removal from horse manes.

Tips

When it comes to dealing with tree sap in your horse’s mane, there are several key points to consider. First, natural sap removers can be effective in safely and gently removing the sticky substance without causing harm to your horse’s hair. Second, preventing sap accumulation in the first place is crucial, and there are preventative measures you can take to minimize the chances of sap getting on your horse’s mane. Finally, professional grooming solutions can provide expert assistance in removing sap and maintaining your horse’s mane in top condition.

Natural Sap Removers

You can try applying a mixture of baking soda and water to naturally remove the tree sap from your horse’s mane. This DIY solution is an effective way to eliminate the sticky residue without causing any harm to your horse’s hair or skin. To create the mixture, combine equal parts baking soda and water until you have a paste-like consistency. Gently massage the mixture into the sap-covered areas of your horse’s mane, allowing it to sit for a few minutes. Then, rinse thoroughly with warm water and comb through the mane to remove any remaining sap. This natural sap remover is a safe and easy solution for maintaining your horse’s beautiful mane. Now, let’s move on to preventing sap accumulation.

Preventing Sap Accumulation

One way to prevent sap accumulation on your horse’s mane is by regularly applying a coat of baby oil. Baby oil is a safe and effective solution for keeping the mane sap-free. The oil creates a barrier on the hair, making it harder for the sap to stick. To apply, simply pour a small amount of baby oil onto your hands and rub it into the mane, focusing on the areas prone to sap. The oil will not only prevent sap from adhering to the hair, but it will also add shine and softness to the mane. By applying baby oil regularly, you can keep your horse’s mane sap-free and looking its best. Now, let’s explore some professional grooming solutions for removing sap from your horse’s mane.

Professional Grooming Solutions

If you want to remove sap from your horse’s mane, consider using a professional grooming solution. Professional grooming techniques offer safe and effective sap removers that can help you tackle this sticky problem. These solutions are specially formulated to break down the sap without causing any harm to your horse’s mane or skin. When using a professional grooming solution, follow the instructions carefully and apply it directly to the affected areas. Gently massage the product into the sap-covered hairs, allowing it to penetrate and dissolve the sap. After a few minutes, you can then proceed to comb or brush out the sap, being careful not to pull or tug on the mane. With the help of these professional grooming solutions, you can easily remove sap from your horse’s mane and restore it to its natural beauty.

Traits and Characteristics

The traits and characteristics of a horse’s mane can vary depending on the breed and individual horse. When it comes to grooming and maintaining your horse’s mane, it is important to consider the unique qualities of their mane. Some horses have thick, coarse manes, while others have fine, silky manes. Understanding the traits and characteristics of your horse’s mane can help you choose safe products and overcome common challenges.

For horses with thick, coarse manes, it is essential to use products that can effectively soften and detangle the hair. Look for mane conditioners and detangling sprays specifically designed for thick and coarse hair. These products can help make grooming easier and reduce the risk of breakage or damage to the mane.

On the other hand, horses with fine, silky manes require a different approach. Using lightweight, non-greasy products can help maintain the natural shine and smoothness of the hair. Be cautious not to overload the mane with heavy products that can weigh it down and make it appear flat.

Transitioning into the subsequent section about steps for effective tree sap removal, it is important to note that tree sap can be a common challenge when it comes to maintaining a horse’s mane. Here are some tips to effectively remove tree sap from your horse’s mane.

Steps for Effective Tree Sap Removal

To effectively remove tree sap from your horse’s mane, start by applying a small amount of vegetable oil or mayonnaise to the affected area. This will help to loosen the sap and make it easier to remove. Here are some effective techniques to remove tree sap from your horse’s mane:

  1. Gently massage the oil or mayonnaise into the sap-covered hair. Be sure to cover all the sap with the oil to ensure maximum effectiveness.
  2. Let the oil or mayonnaise sit on the hair for about 10-15 minutes. This will give it time to penetrate the sap and make it easier to remove.
  3. Use a wide-toothed comb or your fingers to carefully comb through the hair. Start from the bottom and work your way up to avoid breaking or pulling on the hair.
  4. Rinse the hair thoroughly with warm water to remove any remaining oil or mayonnaise. You may need to repeat the process if there is still sap left in the mane.

Goals

One important goal when working with your horse is to establish clear communication and build a trusting relationship. This not only enhances the overall training experience but also ensures the well-being and safety of both you and your horse. When it comes to grooming, specifically dealing with tree sap in your horse’s mane, it is crucial to approach the task with care and consideration. Preventing sap buildup can be achieved by regularly inspecting your horse’s mane and promptly removing any small amounts of sap before they become problematic. However, if your horse’s mane does become affected by tree sap, there are alternative sap removers that can be used. These products are specifically designed to dissolve the sap without causing any harm to your horse’s hair or skin. By effectively removing the sap from your horse’s mane, you are not only maintaining their appearance but also preventing any discomfort or irritation that may arise from the sap’s presence. Developing good habits for effective tree sap removal is essential for the overall well-being and care of your horse.

Habits for Effective Tree Sap Removal

Ensure you regularly inspect your horse’s mane for any small amounts of sap, promptly removing them to prevent buildup and discomfort. There are several effective techniques for removing tree sap from your horse’s mane, but it’s important to know the common mistakes to avoid. One common mistake is trying to scrape off the sap with a sharp object, which can damage the hair and cause pain for your horse. Instead, start by using a gentle soap or shampoo to soften the sap. Apply the soap to the affected area and gently work it into the hair, being careful not to pull or tug too hard. Let the soap sit for a few minutes to allow it to break down the sap. Then, using your fingers or a soft cloth, gently rub the area in a circular motion to loosen the sap. Rinse the area thoroughly with warm water and repeat the process if necessary. It’s important to be patient and gentle throughout the process to avoid causing any discomfort or stress for your horse. By following these effective techniques and avoiding common mistakes, you can safely and effectively remove tree sap from your horse’s mane. Now, let me share a real-life story to further illustrate the importance of proper sap removal.

A Real-Life Story

Hey, let me tell you a real-life story that will show you the importance of properly removing sap from your horse’s mane. As an experienced horse owner, I’ve encountered my fair share of challenges when it comes to tree sap removal. One summer, my horse, Bella, got into a sticky situation when she wandered too close to a pine tree. The sap quickly coated her mane, creating a tangled mess that seemed impossible to untangle. I tried various methods, but nothing seemed to work. Bella became agitated and uncomfortable, and I knew I had to find a solution fast. After consulting with other horse owners who had faced similar issues, I discovered a product specifically designed to remove tree sap from horse manes. It worked like magic, dissolving the sap without damaging Bella’s delicate mane. Seeing the relief on her face and feeling the smoothness of her mane once again, I realized the importance of proper sap removal. Quotes from other horse owners further emphasized the common challenges we face and the need for effective solutions. So, let’s delve deeper into some valuable advice and tips from fellow horse enthusiasts.

Quotes

So, you’ve heard the inspirational story of how quotes played a significant role in overcoming the challenges of removing tree sap from a horse’s mane. Now, let’s delve into the power and effectiveness of quotes in our lives.

Quotes have the ability to inspire, motivate, and uplift us during difficult times. They can offer guidance, wisdom, and a fresh perspective when we need it the most. By encapsulating profound thoughts and experiences in a concise manner, quotes have the power to touch our hearts and ignite positive change within us.

Inspirational stories often feature impactful quotes that resonate with readers on a deep level. These quotes serve as reminders of our own strength, resilience, and potential. They can provide a sense of hope and encouragement, reminding us that we are not alone in our struggles.

Moreover, quotes have a way of connecting people from different walks of life. They transcend barriers of language, culture, and geography, uniting individuals through shared experiences and emotions. By sharing quotes that have touched us, we can inspire others and create a ripple effect of positivity.

Now, let’s uncover the secrets to successfully removing tree sap from a horse’s mane, without causing any harm or discomfort to your equine friend.

Secrets

To successfully remove sticky residues from your horse’s mane, start by applying a gentle and natural solution that won’t harm their delicate skin. One of the secrets to effective tree sap removal is using a mixture of warm water and dish soap. The warm water helps to loosen the sap, while the dish soap helps to break down its sticky properties. Begin by wetting the affected area with warm water, then lather a small amount of dish soap onto a sponge or cloth. Gently scrub the sap-covered hair in circular motions, being careful not to tug or pull on the mane. Rinse the area thoroughly with warm water, making sure to remove all traces of soap. Repeat this process as needed until the sap is completely gone.

Another habit for effective tree sap removal is using a natural remedy like olive oil or coconut oil. These oils are not only safe for your horse’s skin, but they also work wonders in breaking down the sticky sap. Simply apply a small amount of oil onto the affected area and massage it into the hair. Allow the oil to sit for a few minutes, then gently comb through the mane to remove the softened sap. Finally, wash the area with warm water and shampoo to remove any remaining residue.

Insights on Tree Sap Removal From Horses Manes

One of the best ways to effectively remove sticky residues from your horse’s mane is by using natural remedies like olive oil or coconut oil. Tree sap can be a stubborn substance to remove, and it presents unique challenges when it comes to horses’ manes. Tree sap removal techniques can vary depending on the severity of the residue and the type of hair your horse has.

When dealing with tree sap on your horse’s mane, it’s important to approach the situation with patience and care. Begin by applying a generous amount of olive oil or coconut oil to the affected area. Gently massage the oil into the mane, ensuring that the sap is thoroughly coated. Allow the oil to sit for a few minutes to soften the sap. Next, use a wide-toothed comb or your fingers to carefully work through the mane, starting from the bottom and working your way up. This will help to loosen and remove the sap from the hair strands.

The challenges in removing tree sap from horses’ manes lie in the stickiness and resilience of the substance. It can be time-consuming and require repeated efforts to completely eliminate the sap. Additionally, depending on the type of hair your horse has, it may be more difficult to remove the sap without causing damage or breakage. However, with the right techniques and products, you can effectively remove tree sap from your horse’s mane without causing harm.

Removing tree sap from your horse’s mane not only improves their appearance but also benefits their overall well-being. Sap can create discomfort and irritation for your horse, causing them to itch and potentially leading to skin issues. By removing the sap, you are promoting a healthier and more comfortable environment for your horse. Additionally, maintaining a clean and sap-free mane can enhance your horse’s beauty and make them more presentable for shows or competitions.

Benefits of Tree Sap Removal From Horses Manes

Removing tree sap from your horse’s mane can lead to improved comfort, healthier skin, and a more presentable appearance for shows or competitions. Tree sap can be sticky and difficult to remove, but with the right techniques, you can successfully eliminate it and prevent reoccurrence. There are several DIY sap removal methods that you can try at home.

One effective method is to use a commercial sap remover specifically designed for horses. These products are gentle on the skin and effectively dissolve the sap without causing any harm to your horse. Simply apply the sap remover to the affected area, let it sit for a few minutes, and then gently comb or brush out the sap.

Another DIY method is to use a mixture of warm water and dish soap. Mix a small amount of dish soap with warm water to create a soapy solution. Apply the solution to the sap-covered areas and let it sit for a few minutes. Use a soft cloth or sponge to gently scrub away the sap, being careful not to tug or pull on the mane.

Once you have successfully removed the tree sap, it is important to take preventative measures to avoid future occurrences. Regularly inspect your horse’s mane and promptly remove any sap or debris that you come across. Consider using fly sheets or fly repellents to discourage insects from landing on your horse’s mane and depositing sap.

Lessons

If your horse has gotten tree sap on its mane, you’ll want to know the best way to remove it. Natural sap removers are a safe and effective option for removing tree sap from your horse’s mane. In this discussion, we will explore different natural sap removers, discuss their safety for horses, and share effective grooming techniques for removing tree sap.

Natural Sap Removers

You can try using olive oil or coconut oil as a natural sap remover for your horse’s mane. These natural remedies are effective and safe for your horse. To start, apply a generous amount of oil to the affected area and gently massage it into the mane. Allow the oil to sit for a few minutes to loosen the sap. Then, using a soft cloth or your fingers, gently rub the area to remove the sap. Repeat this process as necessary until all the sap is gone. These homemade solutions are not only gentle on your horse’s mane but also easy to find and affordable. Now, let’s move on to the next section to learn more about what products are safe for your horse’s mane.

Safe for Horse

Coconut oil and olive oil are both safe options for removing sap from your horse’s mane. When it comes to horse grooming, natural remedies can be a great alternative to harsh chemicals. Sap can be quite stubborn and difficult to remove, but with the right approach, you can effectively get rid of it without causing any harm to your horse’s mane.

To start, apply a generous amount of coconut oil or olive oil to the affected area. Gently massage the oil into the sap, making sure to cover all the sticky residue. Let it sit for a few minutes to allow the oil to penetrate and loosen the sap.

Next, use a comb or your fingers to gently work through the mane, starting from the roots and working your way down. The oil will help to break down the sap, making it easier to remove. Be patient and take your time to avoid causing any discomfort to your horse.

Once you have successfully removed the sap, it’s important to thoroughly rinse and wash the mane to remove any leftover oil residue. Use a gentle horse shampoo and warm water to cleanse the mane, ensuring that all traces of the oil and sap are gone.

Effective Grooming Techniques

Grooming your horse regularly is essential for maintaining its appearance and overall health. When it comes to grooming techniques, it is important to consider your horse’s unique traits and characteristics. Each horse may have different needs and preferences when it comes to grooming. For example, some horses may have sensitive skin and require gentle brushing, while others may have a thicker coat that requires more thorough grooming. It is important to establish a routine that works best for your horse. This routine should include regular brushing to remove dirt and debris, as well as checking for any signs of skin issues or injuries. By establishing a consistent grooming routine, you can ensure that your horse remains healthy and happy. Speaking of routines, let’s now delve into some specific routines that can benefit your horse’s well-being.

Routines

To keep your horse’s mane sap-free, it’s important to establish consistent routines for cleaning and maintenance. By incorporating effective habits for tree sap removal into your grooming routine, you can ensure that your horse’s mane remains healthy and free from sticky residue. Start by inspecting your horse’s mane regularly to identify any sap or sticky substances. Use your fingers or a comb to gently remove as much sap as possible. For stubborn sap, you can apply a small amount of baby oil or mineral oil to the affected area and let it sit for a few minutes. This will help loosen the sap and make it easier to remove. Once the sap has softened, gently comb through the mane to remove the residue. After removing the sap, it’s important to thoroughly rinse the mane with warm water to remove any remaining oil or residue. Finish by applying a detangler or conditioner to keep the mane soft and manageable. Establishing these routines will help keep your horse’s mane sap-free and maintain its overall health and appearance.

When it comes to removing tree sap from your horse’s mane, there are both pros and cons to consider. On the positive side, using routine cleaning and maintenance habits for sap removal helps keep your horse’s mane clean, healthy, and free from sticky residue. Regular inspection and gentle removal techniques can prevent the sap from causing discomfort or irritation to your horse. Additionally, using products like baby oil or mineral oil can help soften and remove stubborn sap effectively. However, it’s important to be cautious and avoid using harsh chemicals or excessive force, as this can damage the mane and cause discomfort to your horse. By incorporating these routines into your grooming routine, you can minimize the negative effects of tree sap and maintain a beautiful and healthy mane for your horse.

Pros and Cons

When it comes to removing tree sap from your horse’s mane, there are advantages and disadvantages to consider. The pros of effectively grooming your horse’s mane to remove tree sap are numerous. Firstly, removing tree sap not only improves the appearance of your horse’s mane, but it also promotes a healthier coat by preventing irritation or discomfort. Additionally, regular grooming can help build a stronger bond between you and your horse, as it provides an opportunity for bonding and trust-building. On the other hand, there are some cons to keep in mind. Removing tree sap can be time-consuming, especially if it has dried and hardened. It may require multiple attempts and different techniques to completely remove the sap, which can be frustrating and challenging. However, with the right tools and techniques, you can effectively remove tree sap from your horse’s mane without causing any harm or discomfort. Transitioning into the subsequent section about dos and don’ts of grooming, it is important to know the proper techniques and products to use when removing tree sap from your horse’s mane.

Dos and Dont’s

Now that you are familiar with the pros and cons of using natural oil remedies to remove tree sap from your horse’s mane, it’s important to understand the dos and don’ts of this process. While natural oils can be effective, it’s crucial to follow the proper guidelines to ensure your horse’s safety and well-being.

To help you navigate through this process, I have provided a table below outlining the dos and don’ts when using natural oil remedies:

Dos Don’ts
Use a small amount of oil to start with Apply excessive amounts of oil
Massage the oil gently into the sap Rub the sap vigorously, causing discomfort
Allow the oil to sit for a few minutes Leave the oil on for an extended period of time
Use a soft cloth or brush to remove sap Use harsh or abrasive tools
Rinse the mane thoroughly after treatment Skip rinsing, as it may leave residue

Mistakes to Avoid

One mistake to avoid is applying too much oil, as this can cause discomfort for your horse. It’s important to remember that when it comes to removing tree sap from your horse’s mane, less is more. Many people make the common mistake of thinking that the more oil they apply, the easier it will be to remove the sap. However, this is a common misconception. Applying too much oil not only makes the sap stickier, but it can also make your horse’s mane greasy and uncomfortable. Instead, start by applying a small amount of oil to the affected area and gently work it into the sap. Allow the oil to sit for a few minutes to soften the sap before attempting to remove it.

Another common mistake is using harsh chemicals or solvents to remove tree sap. While these may seem like a quick fix, they can be harmful to your horse’s skin and coat. Stick to natural, gentle products specifically designed for removing tree sap, such as baby oil or peanut butter. These products are safe to use on your horse and won’t cause any harm.

Key Takeaways

To effectively remove sap from your horse’s mane, remember these key takeaways. First and foremost, prevention is the best approach when it comes to sap accumulation. Regularly inspect your horse’s surroundings, especially if they spend time near trees, and remove any sap as soon as you notice it. This will help prevent it from hardening and becoming more difficult to remove. Additionally, make sure to keep your horse’s mane clean and well-groomed, as a dirty mane can attract sap more easily.

When it comes to removing sap, it’s crucial to prioritize your horse’s safety. Avoid using harsh chemicals or solvents that may irritate their skin or cause discomfort. Instead, opt for natural alternatives that are safe for your horse. Some options include using vegetable oil, baby oil, or even mayonnaise. These substances can help break down the sap and make it easier to comb or pick out of the mane.

Now that you know the key takeaways for sap removal, let’s delve into the specific action steps for tree sap removal.

Specific Action Steps for Tree Sap Removal

When it comes to removing tree sap from your horse’s mane, it’s important to approach the task with gentle grooming techniques. Using a soft brush or comb, carefully work through the affected area, being mindful not to cause any discomfort or breakage. Additionally, natural oil remedies such as olive oil or coconut oil can be applied to the sap to help dissolve it and make it easier to remove. If you’re unsure about how to proceed or if the sap is particularly stubborn, seeking professional assistance from a qualified equine groomer or veterinarian can provide the expertise and guidance needed for a successful removal process.

Gentle Grooming Techniques

Using a soft brush and gentle strokes, you can easily remove tree sap from your horse’s mane. Start by choosing gentle grooming tools, such as a soft-bristled brush or a comb specifically designed for horses. These tools will help prevent any further damage to your horse’s mane while removing the sticky sap. If the sap has hardened, you can try using homemade sap removers, like rubbing alcohol or vegetable oil. Apply a small amount to a cloth or paper towel and gently rub the sap until it loosens. Be careful not to pull or tug on your horse’s mane, as it may cause discomfort. Once the sap is loosened, continue brushing or combing through the mane to remove any remaining residue. Transitioning into natural oil remedies, these can be effective in removing stubborn sap without causing harm to your horse’s mane.

Natural Oil Remedies

Transitioning into natural oil remedies, these can be effective in getting rid of stubborn sap without causing harm to your horse’s mane. Natural oils have numerous benefits, such as moisturizing the hair and promoting a healthy scalp. When it comes to removing tree sap, there are several homemade remedies you can try. One option is to use olive oil or coconut oil. Simply apply a small amount of oil to the affected area and gently massage it into the hair. Let it sit for a few minutes to allow the oil to penetrate the sap, then use a comb or your fingers to gently remove the sap. Be patient and take your time to avoid pulling on the hair. Now that you’re familiar with natural oil remedies, let’s explore some professional assistance options for removing stubborn sap from your horse’s mane.

Professional Assistance Options

If you’re looking for help with stubborn sap, professional groomers can provide effective solutions for removing it from your horse’s mane. These experts have undergone professional training and have the knowledge and experience to handle such situations. When it comes to removing tree sap, they have a range of alternative methods at their disposal. One common approach is the use of specialized products that are specifically designed to dissolve and remove sap without causing any harm to your horse’s mane. These products are carefully formulated to be gentle yet effective. Professional groomers also have the necessary tools and techniques to safely and efficiently remove the sap without causing any discomfort or damage to your horse. So, if you’re struggling with sap in your horse’s mane, don’t hesitate to seek professional assistance. They can help you tackle the problem and restore your horse’s mane to its former glory.

Frequently Asked Questions

How Long Does It Take for Tree Sap to Dry and Harden on a Horse’s Mane?

To prevent tree sap from drying and hardening on your horse’s mane, it’s important to act quickly. Here are some tips for effectively removing tree sap: use rubbing alcohol or a specialized sap remover, carefully comb it out, and rinse thoroughly.

Can Tree Sap Removal Techniques Be Used for Other Types of Sticky Substances, Such as Glue or Honey?

To remove sticky substances like glue or honey from your horse’s mane, you can apply the same techniques used for tree sap removal. However, depending on the substance, glue may be harder to remove than honey.

Can Tree Sap Removal Methods Cause Any Harm or Discomfort to the Horse?

Tree sap removal methods may potentially cause harm or discomfort to your horse. It is important to consider your horse’s reaction to different techniques and choose a method that minimizes any negative effects.

Are There Any Natural Remedies or Homemade Concoctions That Can Effectively Remove Tree Sap?

You’re wondering if there are any natural remedies or homemade concoctions that can effectively remove tree sap from your horse’s mane. Well, let me tell you, there are a few tricks up our sleeves that can do the job just right.

How Often Should Horse Owners Check Their Horses’ Manes for Tree Sap in Order to Prevent Any Potential Issues?

To maintain optimal horse grooming and mane care, it’s crucial for horse owners to regularly check their horses’ manes for tree sap. This helps prevent potential issues and ensures your horse’s mane stays clean and healthy.

If you need a tree service in Utah, you can call:
Truco Services, Inc.
4640 Commerce Drive
Murray, Utah 84107
(801) 466-8044
https://truetreeservices.com/

How to Seed the Lawn After Tree Removal

Are you ready to transform your yard after removing that old tree? Well, get ready to roll up your sleeves and get your hands dirty because we’ve got the ultimate guide on how to seed your lawn after tree removal. In this article, we’ll walk you through the step-by-step process of rejuvenating your grass and turning your yard into a lush green oasis. So grab your shovel, put on your gardening gloves, and let’s get started!

Key Takeaways

Introduction: Lawn Seeding Techniques After Tree Removal

Seeding the lawn after tree removal can be done using a variety of techniques. When it comes to lawn seeding techniques, there are a few options to consider. Here are four methods that can help you achieve a healthy and vibrant lawn:

  1. Overseeding: This technique involves spreading grass seed over an existing lawn to fill in bare patches and improve overall density. It is a great way to rejuvenate your lawn after tree removal.
  2. Hydroseeding: Hydroseeding is a process where a mixture of grass seed, fertilizer, mulch, and water is sprayed onto the soil. This method promotes faster germination and provides better coverage, resulting in a thicker and more uniform lawn.
  3. Slice seeding: In this technique, a machine is used to create small grooves in the soil and deposit grass seed directly into them. This method ensures good seed-to-soil contact, increasing the chances of successful germination.
  4. Hand seeding: If you have a small lawn or prefer a more hands-on approach, hand seeding is a viable option. Simply spread the grass seed evenly over the soil by hand and lightly rake it in.

Once you have chosen a seeding technique, it is crucial to take proper care of your lawn post-seeding. This includes regular watering, mowing at the appropriate height, and avoiding heavy foot traffic until the new grass is well-established.

Now that you know the various lawn seeding techniques and the importance of post-seeding care, let’s delve into the history of lawn seeding techniques after tree removal.

History of Lawn Seeding Techniques After Tree Removal

When it comes to establishing a healthy and lush lawn after removing a tree, you might be interested in learning about the various techniques that have been used over time. The history of lawn seeding techniques after tree removal is a fascinating one, filled with innovation and a quest for the best practices. In the past, people would simply remove the tree stump and plant grass seeds directly on the bare ground. However, this method often resulted in uneven growth and patchy areas. Over time, experts discovered that preparing the soil before seeding is crucial for success. Traits such as proper soil aeration, removing any remaining tree roots, and adding organic matter to improve soil fertility became common practices. Nowadays, the best practice for seeding a lawn after tree removal involves several steps, including soil testing, choosing the right grass seed, and proper watering and maintenance. By following these tips, you can ensure the success of your lawn seeding project and enjoy a beautiful, healthy lawn for years to come.

Tips

When it comes to creating a lush and healthy lawn, choosing the right seeds is crucial. You want to select seeds that are well-suited to your climate and soil type, as this will ensure optimal growth and resilience. Additionally, preparing the soil is just as important as choosing the right seeds, as it provides a solid foundation for the grass to grow. This involves removing any weeds or debris, aerating the soil, and adding necessary nutrients. Once your seeds are planted and the soil is prepared, proper watering and maintenance are key to ensure successful growth. Regular watering, as well as mowing and fertilizing as needed, will help your lawn thrive and maintain its lush appearance.

Choosing the Right Seeds

To choose the right seeds for your lawn, you’ll want to consider factors like the amount of sunlight and type of soil in your yard. There are different seed varieties available, each suited for specific conditions. For areas with full sunlight, opt for sun-loving grass seeds like Bermuda or Kentucky bluegrass. If your lawn is mostly shaded, choose shade-tolerant varieties such as fine fescue or creeping red fescue. It’s also important to consider the planting method that best suits your needs. You can choose to sow seeds directly onto the soil, or you may prefer to use a seed spreader for more even distribution. Now that you have an understanding of seed varieties and planting methods, let’s move on to preparing the soil for optimal growth.

Preparing the Soil

Once you’ve chosen the right seeds for your yard, it’s important to prepare the soil properly for optimal growth. Before seeding, it’s recommended to conduct a soil test to determine its pH level and nutrient content. This will help you understand what amendments, such as lime or fertilizer, are needed to create a favorable environment for your new grass. Additionally, weed control is essential to prevent unwanted plants from competing with your lawn. Remove any existing weeds by hand or use an appropriate herbicide, following the instructions carefully. Once the soil is tested and weed-free, it’s time to prepare it for seeding. Start by loosening the top few inches of soil, either by tilling or raking, to create a fine and level surface. This will ensure good seed-to-soil contact and allow the roots to penetrate easily. With the soil prepared, you can now move on to the next step of watering and maintenance to help your newly seeded lawn thrive.

Watering and Maintenance

Make sure you’re watering your newly seeded yard regularly to keep the soil moist and promote healthy growth. Proper watering techniques are crucial for successful lawn maintenance. After seeding, it’s important to water the area frequently, but not excessively. Watering too much can lead to shallow root growth and weak grass. Aim to water your lawn deeply, allowing the water to penetrate the soil at least 6 inches. This will encourage deep root development and make your lawn more drought-resistant. It’s best to water in the early morning or late afternoon when the temperatures are cooler, to minimize evaporation. Remember to adjust your watering schedule based on weather conditions, as rain can affect the amount of water your lawn needs. Now that you understand the importance of watering, let’s move on to the traits and best practices for maintaining a healthy lawn.

Traits and Best Practices

You should always consider the traits and best practices when seeding your lawn after tree removal. Seeding your lawn is an essential step in restoring its beauty and ensuring its health. To achieve the best results, there are certain practices you should follow and common mistakes to avoid.

Firstly, one of the best practices is to choose the right grass seed for your specific lawn conditions. Consider factors such as sunlight exposure, soil type, and climate when selecting the seed. This will ensure that the new grass grows well and blends seamlessly with the existing lawn.

Another important practice is to prepare the soil properly before seeding. Common mistakes include neglecting to remove tree stumps or roots, which can hinder the growth of new grass. It is also crucial to loosen the soil and remove any debris or rocks to create a favorable environment for the seed to germinate.

Once you have prepared the soil, it is time to spread the seed evenly. This can be done by hand or using a spreader. Be sure to follow the recommended seeding rate for the specific seed you have chosen. Over-seeding or under-seeding can lead to uneven growth and patchy areas in your lawn.

Key Steps

Now that you understand the traits and best practices for lawn seeding after tree removal, let’s dive into the key steps you need to take. By following these steps, you can ensure that your newly seeded lawn flourishes and thrives.

Here are the key steps to consider:

Goals

To achieve your desired outcome, it’s important to establish clear goals for your newly seeded grass. By setting specific goals, you can create a lawn seeding timeline and ensure proper post-seeding care. Here’s a breakdown of the goals you should aim for:

Goals Timeline
Germination 7-21 days
Root development 4-6 weeks
Establishment 8-12 weeks

During the germination phase, your focus should be on providing adequate moisture and protection to the newly seeded area. Watering lightly and frequently will help keep the soil consistently moist. Once the grass starts to grow, shift your attention to root development. This is the time to gradually reduce watering frequency and increase the depth to encourage deep root growth. Finally, the establishment phase is crucial for the grass to become resilient and healthy. Continue to provide regular irrigation and mow the grass when it reaches the recommended height.

Habits for Successful Lawn Seeding After Tree Removal

Establishing a consistent watering schedule and providing adequate nutrients are essential for the successful growth of newly seeded grass after a tree is removed. To ensure the best results, here are some tips for success and common challenges to be aware of.

Firstly, it is crucial to water the newly seeded area regularly. Watering deeply and frequently will promote root development and prevent the soil from drying out. It is recommended to water the area at least once a day, keeping the soil moist but not waterlogged.

In addition to regular watering, providing adequate nutrients is vital for the healthy growth of the new grass. Applying a high-quality fertilizer specifically formulated for newly seeded lawns will help promote strong root growth and lush green grass. Be sure to follow the instructions on the fertilizer package for the correct application rate.

One common challenge when seeding a lawn after tree removal is weed competition. Weeds can quickly invade the bare soil and compete with the new grass for nutrients and water. To prevent this, consider using a pre-emergent herbicide before seeding to suppress weed growth.

Now, let’s dive into a real-life story that demonstrates the importance of these habits for successful lawn seeding after tree removal.

A Real-Life Story

Providing consistent watering and proper nutrients are crucial for the successful growth of newly seeded grass after removing a tree, as demonstrated by this real-life story. A homeowner, let’s call him John, recently had a large tree removed from his front yard. He decided to seed the area with grass to restore the beauty of his lawn. John followed the recommended steps for lawn seeding after tree removal, including preparing the soil, spreading the grass seed evenly, and covering it with a thin layer of straw. However, what truly made a difference in the success of his lawn was his dedication to watering and providing the necessary nutrients.

John diligently watered the newly seeded area every day to keep the soil moist. He also applied a slow-release fertilizer to provide the grass with the nutrients it needed to grow strong and healthy. As a result of his efforts, the grass started germinating within a week, and after a few months, a lush green lawn replaced the bare patch where the tree once stood.

This real-life story is just one of many success stories when it comes to seeding grass after tree removal. It serves as a reminder of the importance of consistent watering and proper nutrients in achieving a vibrant and thriving lawn. Now, let’s delve into some quotes from experts in the field who can further guide us in this process.

Quotes

One expert in the field emphasizes the importance of consistent watering and proper nutrients for a successful grass growth. According to this expert, “Watering is crucial for newly seeded lawns. Keep the soil consistently moist, but avoid overwatering as it can lead to disease and shallow root growth.” Additionally, providing the right nutrients is essential. The expert suggests, “Using a balanced fertilizer with a high phosphorus content can promote root development and overall grass health.”

Another expert shares some secrets for successful lawn seeding. They say, “Before seeding, make sure to prepare the soil properly. Remove any debris, rocks, or old grass to create a smooth surface for the new seeds.” They also advise, “Aeration can greatly improve seed germination. It allows better water and nutrient penetration into the soil, resulting in healthier grass growth.”

It’s important to note that these quotes highlight the significance of consistent watering, proper nutrients, soil preparation, and aeration when seeding a lawn. These secrets, when followed correctly, can greatly increase the chances of a successful grass growth.

Secrets

Now that you’ve gathered inspiration from some insightful quotes, let’s dive into the secrets of successful lawn seeding techniques after tree removal. Seeding your lawn can be a daunting task, but with the right techniques and factors for success, you can achieve a lush and thriving lawn in no time.

One important factor to consider is the timing of your seeding. The best time to seed your lawn is in the early fall or spring when the soil temperature is ideal for seed germination. This will give your grass the best chance to establish strong roots before the harsh conditions of summer or winter.

Another key secret is proper soil preparation. Before seeding, make sure to remove any debris or tree roots left behind from the removal process. Loosen the soil to a depth of six inches and mix in compost to improve drainage and nutrient levels.

When it comes to seeding, make sure to choose the right type of grass seed for your region and soil conditions. Spread the seed evenly using a seed spreader and lightly rake it into the soil for good seed-to-soil contact.

With these secrets in mind, you’re now ready to gain some valuable insights on lawn seeding techniques after tree removal.

Insights on Lawn Seeding Techniques After Tree Removal

When it’s time to seed your yard after removing a tree, it’s important to consider the timing and soil preparation for successful lawn seeding techniques. First, make sure to remove any debris left behind from the tree removal process, such as roots or rocks, as they can interfere with the growth of new grass. Once the area is clear, prepare the soil by loosening it with a garden rake or tiller. This will help create a favorable environment for the seeds to germinate.

Before seeding, check the weather forecast to ensure a few days of mild temperatures and minimal rainfall. This will give the grass seeds the best chance of establishing themselves without being washed away or damaged. After spreading the seeds evenly across the prepared soil, lightly rake them in to ensure good seed-to-soil contact.

To promote proper germination, watering is crucial. Keep the seeded area consistently moist, but avoid overwatering, as this can lead to fungal diseases and weak root development. Water the lawn daily, applying enough water to penetrate the top inch of soil. As the grass begins to grow, gradually reduce the frequency of watering while increasing the amount of water applied each time.

Post-seeding maintenance is essential for the success of your new lawn. Regularly mow the grass once it reaches a height of three to four inches, taking care not to remove more than one-third of the grass blades in a single mowing. Additionally, fertilize the lawn about six weeks after seeding to provide essential nutrients for healthy growth.

Benefits of Lawn Seeding Techniques After Tree Removal

To maximize the benefits of your lawn seeding techniques after removing a tree, it’s important to properly time the seeding process and prepare the soil accordingly. Seeding your lawn after tree removal has numerous advantages. Firstly, it helps to fill in the bare spots left behind by the tree’s roots, ensuring a more uniform and attractive lawn. Additionally, lawn seeding can help to prevent soil erosion, as the new grass roots will hold the soil in place and prevent it from washing away during heavy rain. Moreover, by seeding your lawn, you can improve the overall health and vitality of your grass, as the new seedlings will compete with weeds for resources and create a denser, healthier turf. Lastly, lawn seeding after tree removal can enhance the aesthetic appeal of your outdoor space, giving it a fresh and rejuvenated look. By implementing proper seeding techniques, such as using high-quality grass seed and providing adequate watering and fertilization, you can enjoy these benefits and have a lush, green lawn in no time. Moving forward, there are also valuable lessons to learn from this process.

Lessons

When it comes to choosing the right seeds for your lawn, there are a few key factors to consider. First, you need to determine the type of grass that is best suited for your climate and soil conditions. Next, consider the specific needs of your lawn, such as high traffic areas or shaded spots. Lastly, look for seeds that are certified and labeled for quality assurance. Once you have selected the right seeds, it is important to understand the time to germination. This can vary depending on the type of grass you have chosen, but generally, it takes between 7-21 days for seeds to germinate. During this time, it is crucial to provide proper care and attention to ensure successful growth. This includes watering regularly, avoiding foot traffic, and keeping the soil moist. Finally, after seeding your lawn, there are a few post-seeding care tips to keep in mind. Avoid mowing the lawn until the new grass has reached a height of at least 3 inches. Additionally, continue to water the lawn regularly to promote healthy growth and establish strong roots. Following these tips will help you achieve a lush and vibrant lawn that you can enjoy for years to come.

Choosing the Right Seeds

You’ll want to make sure you choose the right seeds for your lawn after tree removal. When it comes to seed varieties, there are a few factors to consider. First, think about the type of grass that is best suited for your climate and soil conditions. Common seed varieties include Bermuda grass, Kentucky bluegrass, and fescue. Each has its own characteristics, such as drought tolerance or shade tolerance. Next, consider the planting techniques. Before seeding, make sure the soil is properly prepared by removing any debris or old tree roots. Then, spread the seeds evenly using a broadcast spreader or by hand. Finally, lightly rake the seeds into the soil and water thoroughly. By choosing the right seeds and using proper planting techniques, you’ll give your lawn the best chance for success.

As you wait for the seeds to germinate, it’s important to understand the time it takes for them to sprout. The time to germination can vary depending on the type of grass you have chosen. For example, Bermuda grass typically germinates within 7-10 days, while Kentucky bluegrass may take 14-21 days. It’s important to be patient during this stage and provide the seeds with consistent moisture. Water the area regularly, keeping the soil moist but not waterlogged. Additionally, avoid walking on the newly seeded area to prevent disturbing the seeds. With proper care and attention, you’ll soon see green sprouts emerging from your lawn, signaling the successful germination of your chosen seeds.

Time to Germination

The time it takes for the seeds to germinate can vary depending on the type of grass you’ve chosen. Typically, most grasses take about 7-14 days to germinate, but some varieties may take up to 21 days. It’s important to be patient during this time, as the seeds need the right conditions to sprout and establish roots. While waiting for germination, it’s crucial to keep the soil consistently moist but not waterlogged. This will help the seeds absorb water and nutrients, promoting healthy growth. Once the grass starts to sprout, it’s a sign that the lawn recovery process has begun. From here, you can transition into the next section to learn about post-seeding care tips for maintaining a lush and thriving lawn.

Post-Seeding Care Tips

For optimal results, it’s essential to water your newly seeded grass regularly to keep the soil moist. After seeding your lawn, post-seeding care is crucial to ensure healthy growth and establish a lush, green turf. Once you’ve finished seeding, it’s recommended to water the area thoroughly, making sure the soil is consistently moist. This will aid in seed germination and prevent the soil from drying out. Continue watering the seeded area daily, keeping the soil moist but not saturated. Avoid overwatering as it can lead to shallow root growth and fungal diseases. Additionally, it’s important to avoid walking or mowing on the newly seeded grass until it has reached a height of at least 3 inches. This will allow the young seedlings to establish a strong root system. By following these post-seeding care tips, you’ll give your lawn the best chance to thrive and flourish. Now let’s move on to routines {yt} that will help maintain your lawn’s health and beauty.

Routines

Make sure to establish a consistent routine for watering the newly seeded lawn after tree removal. Establishing good watering habits is one of the secrets to success when it comes to growing a healthy and vibrant lawn. Consistency is key, as it ensures that the seeds receive adequate moisture for germination and growth.

To start, water the newly seeded lawn lightly but frequently. Aim to keep the soil consistently moist, but not overly saturated. This can be achieved by watering the lawn two to three times a day for short durations. Avoid heavy watering, as it can lead to runoff and uneven moisture distribution.

As the grass begins to germinate and grow, adjust your watering routine accordingly. Gradually reduce the frequency of watering but increase the duration. This will encourage the roots to grow deeper into the soil, ensuring better drought tolerance in the future.

It is important to monitor the moisture levels of the soil regularly. Use a moisture meter or simply dig a small hole to check the soil’s moisture content. Adjust your watering routine based on the soil’s moisture needs.

Pros and Cons

Establishing a consistent watering routine has its pros and cons when it comes to growing a healthy and vibrant lawn. Let’s start with the pros. A regular watering schedule ensures that your lawn receives the necessary amount of moisture it needs to thrive. It helps to prevent under-watering, which can lead to dry and brown patches. Additionally, a consistent watering routine promotes deep root growth, making your lawn more resilient to drought conditions.

On the other hand, there are also some cons to consider. Over-watering is a common mistake that can have detrimental effects on your lawn. Too much water can lead to shallow root development, making your turf more susceptible to disease and pests. Moreover, excessive watering can also contribute to water wastage and higher utility bills.

To strike the right balance, it’s important to understand your lawn’s specific watering needs. Factors such as grass type, soil composition, and weather conditions should all be taken into account. By monitoring the moisture levels and adjusting your watering routine accordingly, you can avoid both under-watering and over-watering.

Now that you understand the pros and cons of establishing a watering routine, let’s move on to the dos and don’ts when it comes to watering your lawn.

Dos and Dont’s

It’s important to understand the dos and don’ts when it comes to watering your lawn. Proper watering is crucial for maintaining a healthy and lush lawn, while common mistakes can lead to wasted water, overwatering, or even damaging your grass. To help you navigate this important task, here are some key dos and don’ts to keep in mind:

Dos Don’ts
Water deeply Water shallowly
Water in the morning Water in the evening
Water infrequently Water too frequently
Water evenly Water unevenly

By following these dos, you can ensure that your lawn receives the right amount of water, promoting deep root growth and overall health. On the other hand, it’s important to avoid the common mistakes listed in the don’ts column. For example, watering shallowly can lead to shallow root systems, making your lawn more susceptible to drought and disease. Watering in the evening may cause the grass to stay wet overnight, increasing the risk of fungal diseases. Overwatering can drown the roots and cause the grass to become weak and vulnerable.

Understanding these dos and don’ts will set you on the right path to proper lawn watering. But what are the specific mistakes you should avoid? Let’s take a closer look in the next section.

Mistakes to Avoid

To ensure a healthy and vibrant lawn, it’s crucial to avoid these common watering mistakes. One of the most common mistakes people make is overwatering their lawn. While it may seem like more water is better, excessive watering can lead to shallow root growth and increase the risk of diseases. Another mistake to avoid is watering at the wrong time of day. Watering your lawn during the hottest part of the day can result in most of the water evaporating before it can be absorbed by the soil. Instead, water your lawn in the early morning or late afternoon to allow the water to penetrate deeper into the soil. Additionally, be mindful of the frequency of watering. Watering too frequently can cause the soil to become waterlogged, leading to root rot and other issues. Instead, water deeply but less frequently to encourage deep root growth. Finally, make sure to properly troubleshoot any issues with your irrigation system. Check for leaks, clogs, or misaligned sprinkler heads regularly to ensure efficient and effective watering. By avoiding these common watering mistakes and troubleshooting any issues, you can maintain a lush and healthy lawn.

Key Takeaways

One of the key takeaways is that avoiding common watering mistakes and regularly troubleshooting your irrigation system are essential for maintaining a healthy and vibrant lawn. By developing good watering habits and sticking to a routine, you can ensure that your lawn receives the right amount of water it needs to thrive. It’s important to avoid overwatering, as this can lead to shallow root growth and increase the risk of disease. On the other hand, underwatering can cause the grass to become weak and susceptible to drought stress. Regularly checking your irrigation system for leaks, clogs, or malfunctioning sprinkler heads is also crucial. This will help you identify and address any issues before they cause damage to your lawn. By making these habits and routines a part of your lawn care regimen, you can maintain a lush and healthy yard.

When it comes to seeding your lawn after tree removal, specific action steps can ensure successful growth.

Specific Action Steps for Lawn Seeding After Tree Removal

When it comes to seeding your lawn after tree removal, there are a few key points to consider. First, understanding the ideal seeding timeline is crucial for the success of your lawn. Next, you’ll need to learn about soil preparation techniques to create the optimal environment for seed germination. Lastly, choosing the right seed type is important to ensure that your new lawn thrives in your specific climate and conditions. By following these steps, you’ll be well on your way to a lush and healthy lawn.

Ideal Seeding Timeline

The ideal time to seed the lawn after tree removal is usually in the spring or fall. These seasons provide the optimal conditions for successful grass growth. When it comes to seeding techniques, there are a few key factors to keep in mind. First, make sure to choose the right grass seed for your specific climate and soil type. This will ensure that the grass has the best chance of thriving. Additionally, be sure to prepare the soil properly by removing any debris and loosening it with a rake or tiller. Common mistakes to avoid include overseeding, as this can lead to overcrowding and weak grass, and neglecting to water the newly seeded area adequately. By following these ideal seeding techniques and avoiding common mistakes, you can lay the foundation for a healthy and vibrant lawn. Now, let’s move on to soil preparation techniques.

Soil Preparation Techniques

To properly prepare your soil, start by removing any debris and loosening it with a rake or tiller. This will help create a smooth surface for seeding and allow the roots to penetrate easily. After clearing the area, it’s important to test the soil’s pH level and adjust it if necessary. Most grasses prefer a slightly acidic pH of around 6.0 to 7.5. Once the pH is balanced, apply a layer of compost or organic matter to improve the soil’s fertility and structure. This will provide essential nutrients and promote healthy root development. Before seeding, water the soil thoroughly to ensure it is evenly moist. Proper watering is crucial for seed germination and establishment. It’s important to keep the soil consistently moist, but not waterlogged, throughout the germination process. This will help the seeds to sprout and grow into a lush lawn. Now that you’ve prepared your soil, it’s time to choose the right seed type for your lawn.

Choosing Seed Type

Once you’ve decided on the type of grass you want, consider the climate and maintenance requirements before choosing the seed type. Different grasses thrive in different climates, so it’s important to choose a seed type that is well-suited to your region. For example, if you live in a hot and dry climate, you may want to choose a drought-resistant variety. On the other hand, if you live in a cooler climate with lots of shade, you’ll need to select a seed type that can tolerate those conditions. Additionally, consider the maintenance requirements of the seed type. Some grasses require more frequent mowing and watering, while others are low maintenance. By taking these factors into account, you can ensure that you choose the right seed type for your lawn.

Frequently Asked Questions

How Long Does It Typically Take for Grass to Grow After Seeding the Lawn Following Tree Removal?

To speed up grass growth after seeding the lawn following tree removal, you can try methods like watering regularly, providing adequate sunlight, and applying fertilizer. You can also consider using a different type of grass seed for your lawn after tree removal.

Can I Use the Same Grass Seed for My Lawn That Was Used Before the Tree Removal?

Yes, you can use the same grass seed for your lawn after tree removal, but there are also alternatives available. It’s important to prepare the soil properly before seeding to ensure successful growth.

Is It Necessary to Remove Any Remaining Tree Roots Before Seeding the Lawn?

Before seeding the lawn, it is essential to remove any remaining tree roots. This process has several benefits, such as preventing root competition and ensuring proper grass growth. However, if you prefer alternatives, they can be explored as well.

What Type of Fertilizer Should I Use When Seeding the Lawn After Tree Removal?

When seeding the lawn after tree removal, you should use a suitable grass seed for shady areas. Additionally, using organic fertilizer has many benefits for lawn seeding, such as promoting soil health and minimizing chemical runoff.

Are There Any Specific Watering Requirements for Newly Seeded Lawns After Tree Removal?

To ensure success when watering your newly seeded lawn after tree removal, follow these techniques: water lightly multiple times a day to keep the surface moist, avoid overwatering, and choose the best time to seed the lawn for optimal growth.

If you need a tree service in Utah, you can call:
Truco Services, Inc.
4640 Commerce Drive
Murray, Utah 84107
(801) 466-8044
https://truetreeservices.com/
 

How Much Does It Cost for Tree Removal in Midvale Utah?

Do you have a tree in Midvale, Utah that needs to be removed? Wondering how much it will cost? Look no further. In this article, we will explore the tree removal cost in Midvale, Utah and provide you with all the information you need to make an informed decision. From the history of tree removal cost to tips for finding professional services, we’ve got you covered. So, let’s dive in and discover the ins and outs of tree removal in Midvale, Utah.

Key Takeaways

Introduction: Tree Removal Cost in Midvale Utah

Tree removal costs in Midvale, Utah can vary depending on factors such as the size and location of the tree. If you are planning to have a tree removed from your property, it is important to budget for the costs involved. Here are some tips for budgeting and cost-saving strategies to help you manage the expenses:

History of Tree Removal Cost in Midvale Utah

In Midvale Utah, you’ll find that the price for getting rid of trees has fluctuated over the years. Understanding the cost trends and economic impact of tree removal is essential for homeowners and property owners in the area.

Over the past decade, the cost of tree removal in Midvale Utah has seen noticeable fluctuations. Factors such as supply and demand, labor costs, and the complexity of the tree removal project can greatly influence the overall cost. In general, the price for tree removal has been increasing steadily due to the rising costs of equipment, insurance, and specialized skills required.

The economic impact of tree removal in Midvale Utah is significant. As the cost of tree removal rises, it can have an effect on property values and landscaping expenses. Additionally, it can impact the local economy by creating job opportunities for tree removal companies and supporting related industries.

To ensure that you are getting the best value for your money, it is important to research and compare different tree removal services in Midvale Utah. Obtaining multiple quotes and considering factors such as experience, insurance coverage, and customer reviews can help you make an informed decision.

Next, we will provide you with some helpful tips on how to minimize tree removal costs and ensure a smooth process.

Tips

When it comes to tree removal, there are several factors that can affect the cost. These factors include the size and location of the tree, the complexity of the job, and any additional services required. On average, the price range for tree removal in Midvale, Utah, can vary from $300 to $3,000. However, there are some cost-saving tips that you can keep in mind, such as getting multiple quotes, scheduling the job during the off-season, and considering DIY options for smaller trees.

Factors Affecting Cost

One of the factors that can affect the cost of tree removal in Midvale, Utah is the size of the tree. Larger trees require more effort and equipment to remove, which can drive up the cost. Other factors that may impact pricing considerations include the location of the tree, accessibility, and the complexity of the job. Trees located near buildings or power lines may require additional precautions and expertise, resulting in higher costs. Additionally, if the tree is in a hard-to-reach area, such as a backyard with limited access, specialized equipment may be needed, increasing the overall price. It’s important to consider these factors when obtaining quotes for tree removal services in Midvale, Utah. Now, let’s explore the average price range for tree removal in the area.

Average Price Range

To get an idea of what you can expect to pay for removing a tree in Midvale, Utah, check out the average price range in the area. Tree removal costs in Midvale can vary depending on factors such as the size of the tree, its location, and the complexity of the job. On average, you can expect to pay between $500 and $1,500 for tree removal services in Midvale. However, it is important to note that these prices are just averages and can be higher or lower depending on the specific circumstances. If you are looking for cost-saving strategies or cost-effective alternatives, consider contacting multiple tree removal companies to compare quotes or exploring options like tree trimming instead of complete removal. Saving money on tree removal is possible with some research and careful consideration of alternatives. Moving forward, let’s delve into some cost-saving tips for tree removal in Midvale.

Cost-Saving Tips

If you’re looking to save money on removing a tree in Midvale, Utah, there are several cost-saving tips you can consider. First, make sure to get multiple quotes from different tree removal companies to compare prices. This will help you find the most affordable option for your needs. Additionally, consider scheduling the tree removal during the off-season, as many companies offer discounts during this time. Another cost-saving strategy is to bundle multiple tree removals together, as some companies offer discounts for removing multiple trees at once. Finally, you can also save money by handling the tree removal yourself, but keep in mind that this can be dangerous and may require specialized tools and equipment. By following these cost-saving strategies, you can find affordable options for tree removal in Midvale, Utah. Now, let’s discuss the traits of professional tree removal services.

Traits of Professional Tree Removal Services

You can easily identify professional tree removal services by looking for traits such as experience, proper equipment, and positive customer reviews. When it comes to tree removal, it is important to find a service that not only gets the job done efficiently but also provides value for your money. By hiring professionals with the right experience, you can ensure that they have the knowledge and skills required to handle the task effectively. Additionally, professional tree removal services will have the proper equipment to safely remove trees without causing any damage to your property or surrounding areas. This not only ensures the safety of the workers but also minimizes the risk of accidents or property damage. Lastly, positive customer reviews are a good indicator of the quality of service provided by a tree removal company. Reading reviews can give you insights into the experiences of previous customers and help you make an informed decision. With these traits in mind, you can select a professional tree removal service that meets your needs and expectations. Now, let’s explore the steps for safe and efficient tree removal.

Steps for Safe and Efficient Tree Removal

When it comes to tree removal, there are several steps you can take to ensure the process is safe and efficient. By following these steps, you can minimize the risks and costs associated with tree removal. Here are some cost saving tips and traits of professional tree removal services to keep in mind:

Goals

To achieve the goals of efficient tree removal, it’s essential to follow the steps outlined in the previous section. By following these steps, you can ensure that the process is safe, effective, and cost-efficient. In this section, we will discuss the goals of efficient tree removal and provide you with cost-saving strategies and tips for finding affordable options.

One of the primary goals of efficient tree removal is to minimize costs without compromising on safety or quality. By implementing cost-saving strategies, you can significantly reduce the expenses associated with tree removal. Here are some strategies to consider:

Cost-Saving Strategy Description
Get Multiple Quotes Obtain quotes from multiple tree removal companies to compare prices.
Consider Seasonal Timing Schedule tree removal during off-peak seasons when prices may be lower.
Salvage and Sell Wood Explore options for salvaging and selling the wood from the tree.
DIY Tree Removal If appropriate and safe, consider removing the tree yourself.
Community Programs Look for community programs or grants that offer assistance with tree removal costs.

Habits for Cost-Effective Tree Removal in Midvale Utah

Implementing cost-saving strategies and exploring community programs can help you achieve the goal of finding affordable tree removal solutions in Midvale, Utah. When it comes to cost-saving strategies, one effective approach is to compare prices from different tree removal companies in your area. By obtaining multiple quotes, you can identify the most competitive rates and ensure you are getting the best value for your money. Additionally, consider scheduling your tree removal during the off-peak season when demand is lower and prices may be more negotiable. Another cost-saving strategy is to explore community programs that offer discounted or subsidized tree removal services. Contact your local government or community organizations to inquire about any available programs or resources. They may have initiatives in place to assist residents with affordable tree removal options. By taking advantage of these strategies, you can find affordable services that meet your needs and budget. Now, let’s delve into a real-life story that highlights the importance of cost-effective tree removal in Midvale, Utah.

A Real-Life Story

If you’re looking for an example of how cost-effective tree removal strategies can make a difference, let me share a real-life story from Midvale, Utah. One homeowner in Midvale had a large tree in their backyard that needed to be removed due to its deteriorating condition. Like most homeowners, they were concerned about the cost of tree removal. They decided to do some research and explore cost-saving strategies. After consulting with multiple tree removal companies, they discovered that prices can vary significantly. By getting multiple quotes, they were able to compare prices and find a company that offered a reasonable rate for the job. Additionally, they learned that timing plays a crucial role in cost savings. By scheduling the tree removal during the off-peak season, they were able to negotiate a lower price. Ultimately, through their real-life experience and smart decision-making, they were able to save a significant amount of money on tree removal. This story highlights the importance of researching and exploring different options to find the most cost-effective solution for your tree removal needs.

Quotes

When comparing quotes from different tree removal companies, it’s important to consider both the cost and the quality of the services provided. The tree removal process can be complex and requires specialized equipment to ensure the job is done safely and efficiently. As you gather quotes, make sure to inquire about the specific equipment that will be used. A professional tree removal company will have a variety of tools at their disposal, such as chainsaws, chippers, and cranes, to handle trees of all sizes and conditions. They should also have the necessary safety gear, such as helmets and harnesses, to protect themselves and your property during the removal process. While cost is an important factor to consider, it shouldn’t be the only determining factor. It’s crucial to find a company that not only offers competitive pricing but also has a reputation for providing high-quality services. By taking the time to compare quotes and evaluate the equipment and services offered, you can make an informed decision and ensure that your tree removal needs are met efficiently and effectively. Now, let’s delve into some secrets about tree removal that you might find surprising.

Secrets

Now that you have gathered quotes for tree removal in Midvale, Utah, let me share with you some secrets to help you save on costs. It’s always a good idea to explore different options before making a decision. One cost-saving tip is to consider hiring a local tree removal service. Local companies often have lower overhead costs, which can translate into more affordable prices for you.

Another secret is to schedule tree removal during the off-season. Many tree removal companies have reduced rates during winter months when demand is lower. Additionally, if you have multiple trees that need to be removed, bundling the services can often lead to discounts.

However, it’s important to weigh the pros and cons of cost-saving measures. While hiring a local company or opting for off-season removal can save you money, it’s crucial to ensure that quality and safety are not compromised. Always check for proper licensing, insurance, and certifications to guarantee that the company you hire is reputable and capable of providing a high standard of service.

With these cost-saving tips in mind, let’s delve into some insights on tree removal cost in Midvale, Utah, so you can make an informed decision.

Insights on Tree Removal Cost in Midvale Utah

Let’s take a closer look at the factors that influence the price of removing trees in Midvale, Utah. When it comes to tree removal, there are various techniques that can be employed to ensure the task is completed safely and efficiently. These techniques, such as climbing, rigging, and the use of specialized equipment, can impact the overall cost of the service. Additionally, hidden costs can also come into play. For example, if the tree is located in a hard-to-reach area or if there are obstacles such as buildings or power lines nearby, the complexity of the job can result in higher costs.

To accurately determine the cost of tree removal in Midvale, it is essential to consider these factors and obtain quotes from reputable tree removal companies. By doing so, you can ensure that you are aware of any potential hidden costs and can compare prices and services offered. It is important to note that while cost is an important consideration, it should not be the sole factor in your decision-making process. It is equally crucial to consider the expertise, reputation, and customer reviews of the tree removal company to ensure a quality and satisfactory service.

Understanding the factors that influence tree removal costs in Midvale, Utah, provides valuable insights into the process. However, it is equally important to weigh the benefits and risks associated with tree removal, which we will explore in the next section.

Benefits and Risks

To make an informed decision about tree removal, it’s essential to consider the benefits and risks involved. Understanding the pros and cons of tree removal can help you weigh the options and determine if it is the right choice for you. One of the benefits of tree removal is the potential cost savings in the long run. Trees that are diseased, damaged, or dead can pose a risk to your property and can be expensive to maintain or remove if left unattended. By addressing these issues promptly, you can avoid costly repairs or accidents down the line. However, it’s important to note that there are also risks associated with tree removal. It can be a dangerous task, especially for larger trees or those located near structures or power lines. Hiring professional tree removal services is highly recommended to ensure the job is done safely and efficiently. Additionally, factors such as the size and location of the tree, as well as any additional services required, can affect the overall cost of tree removal. By considering these factors and implementing cost-effective habits, you can budget for tree removal and make the process more affordable. It’s also worth exploring price comparison options to find the best deal without compromising on quality. When it comes to tree removal, there are certain mistakes to avoid. Attempting to remove a tree yourself without proper knowledge or equipment can lead to accidents and costly damages. It’s crucial to prioritize safety and hire professionals for the task. In conclusion, understanding the benefits and risks of tree removal, as well as implementing cost-saving strategies, can help you make an informed decision and budget effectively for the removal process.

Transition: Now that you have a better understanding of the benefits and risks of tree removal, let’s delve into some valuable lessons learned from real-life experiences.

Lessons

When it comes to tree removal, there are several key points to consider. First, it’s important to explore price comparison options to ensure you’re getting the best deal. Next, understanding the factors that can affect the cost of tree removal, such as the size and location of the tree, will help you better estimate expenses. Lastly, knowing the average removal expenses in your area will give you a benchmark to work with as you plan your budget.

Price Comparison Options

You can compare prices for tree removal in Midvale, Utah using various options. Price comparison is an essential step in ensuring you get the best deal and save money on tree removal services. To start, you can reach out to multiple tree removal companies in the area and request quotes. This will allow you to compare their prices and services side by side. Additionally, you can also utilize online platforms that provide price comparison tools specifically for tree removal services. These platforms allow you to input your requirements and receive multiple quotes from different companies. By taking advantage of these price comparison options, you can easily identify the most cost-effective strategies and make an informed decision about your tree removal needs. Now, let’s delve into the factors that can affect the cost of tree removal.

Factors Affecting Cost

One of the factors that can impact the price of removing a tree in Midvale, Utah is its size. When considering the cost of tree removal, it is essential to take into account various factors that can influence the overall expense. These factors include the size of the tree, the location of the tree, and the complexity of the removal process. Trees with larger diameters and heights generally require more labor and specialized equipment, leading to higher costs. Additionally, if the tree is located in a difficult-to-reach area or near power lines, extra precautions and expertise may be required, further increasing the price. To accurately estimate the cost of tree removal, professional arborists use cost estimation methods that take into consideration these factors and provide an accurate assessment. Understanding these factors and cost estimation methods can help you make informed decisions when seeking tree removal services. Moving on to average removal expenses, the overall cost can vary depending on several factors.

Average Removal Expenses

The average expenses for removing a tree in Midvale, Utah can vary based on a variety of factors. Understanding these factors can help you plan and budget accordingly. One of the primary tree removal cost factors is the size of the tree. Larger trees typically require more labor and equipment, leading to higher costs. The location of the tree is another important consideration. If the tree is near power lines or structures, additional precautions and expertise may be needed, resulting in increased expenses. Additionally, the condition of the tree and the complexity of the removal process can impact the overall cost. To save on tree removal expenses, consider obtaining multiple quotes from different professionals, as prices can vary. Also, scheduling the removal during the off-season or bundling multiple tree removals together can help reduce costs. With these cost-saving strategies in mind, let’s now explore some routines for maintaining your yard’s health and beauty.

Routines

There’s a variety of routines that can be followed for effective tree removal in Midvale, Utah. When it comes to removing a tree, it’s important to have a systematic approach that ensures safety and efficiency. One routine that can be followed is assessing the tree’s condition and size. This step helps determine the complexity of the removal process and the equipment needed. Another routine is obtaining the necessary permits and permissions. In Midvale, Utah, there may be specific regulations and guidelines that need to be followed before removing a tree. By familiarizing yourself with these requirements, you can avoid potential legal issues and delays. Additionally, it is important to consider cost-saving strategies. For example, instead of hiring a professional tree removal service, you can choose to do it yourself if you have the proper equipment and knowledge. However, it is crucial to weigh the pros and cons before making this decision. By following these routines and considering cost-saving strategies, you can ensure a successful tree removal process in Midvale, Utah.

Pros and Cons

Consider weighing the advantages and disadvantages before making a decision about tree removal. There are several pros and cons to consider when deciding whether or not to remove a tree. On the pro side, tree removal can enhance the aesthetic appeal of your property, improve safety by eliminating the risk of falling branches, and create more space for other landscaping projects. Additionally, removing a tree that is diseased or infested can prevent the spread of pests and diseases to other trees in the area. However, there are also cons to consider. Removing a tree can be expensive, especially if it is large or in a difficult location. Furthermore, trees provide shade, reduce noise pollution, and contribute to the overall health of the environment. It is important to carefully evaluate these pros and cons before deciding to remove a tree.

Transitioning into the subsequent section about ‘dos and don’ts {table}’, it is crucial to understand the proper steps and precautions involved in tree removal.

Dos and Dont’s

Now that we’ve discussed the pros and cons of tree removal in Midvale, Utah, let’s delve into some dos and don’ts to help you navigate this process smoothly and cost-effectively. By following these strategies, you can save money and ensure a successful tree removal experience.

To assist you further, here is a table outlining some key dos and don’ts:

Dos Don’ts
Obtain multiple quotes from contractors Neglect to research the contractor’s credentials
Communicate your expectations clearly Attempt to remove the tree yourself
Ask about any hidden costs or fees Overlook the need for permits or insurance
Consider scheduling tree removal in the off-season Ignore the potential impact on nearby structures
Explore recycling or selling the wood Forget to ask about stump removal options

Mistakes to Avoid

To avoid potential issues, make sure you thoroughly research the credentials of any contractor you are considering for the job. When it comes to tree removal, it’s important to find a contractor who not only offers competitive pricing but also has the expertise and experience to get the job done safely and efficiently. Here are some cost saving tips and cost effective strategies to keep in mind.

Firstly, consider getting multiple quotes from different contractors. This will allow you to compare prices and choose the most affordable option. However, be cautious of extremely low prices, as they may indicate subpar services.

Another cost saving tip is to schedule your tree removal during the off-peak season. Contractors are usually more willing to negotiate prices during slower periods. Additionally, if you have multiple trees that need to be removed, consider bundling them together to potentially receive a volume discount.

Furthermore, it’s important to ask the contractor about their cleanup services. Some contractors include debris removal in their pricing, while others may charge extra. By clarifying this upfront, you can avoid any unexpected costs.

In conclusion, by researching contractor credentials, obtaining multiple quotes, scheduling during the off-peak season, and clarifying cleanup services, you can implement cost saving tips and cost effective strategies for your tree removal project.

Key takeaways: Thoroughly research contractor credentials, obtain multiple quotes, schedule during the off-peak season, and clarify cleanup services.

Key Takeaways

Thoroughly researching contractor credentials, obtaining multiple quotes, scheduling during the off-peak season, and clarifying cleanup services are key takeaways to keep in mind for your tree removal project. When it comes to cost saving tips, it is essential to do your due diligence and find a professional tree removal service that offers competitive pricing without compromising quality. Researching contractor credentials ensures that you hire a reputable and experienced company that will provide the necessary expertise for your project. Obtaining multiple quotes allows you to compare prices and find the best deal for your budget. Scheduling during the off-peak season can also help save money, as tree removal services tend to be less busy and may offer discounted rates. Lastly, clarifying cleanup services is important to avoid any additional costs or surprises after the tree removal is complete. By understanding these key takeaways and implementing them into your project, you can ensure a cost-effective and successful tree removal experience. Now, let’s explore the specific action steps for tree removal cost in Midvale, Utah, to further assist you in planning your project.

Specific Action Steps for Tree Removal Cost in Midvale Utah

When it comes to tree removal, there are several factors that can affect the cost. These factors include the size and location of the tree, the complexity of the job, and any additional services that may be required. It is important to compare different service providers to ensure you are getting the best price and quality of work. Lastly, budgeting for tree removal is essential to avoid any unexpected costs and to ensure that you can afford the service.

Factors Affecting Cost

You’ll need to consider several factors that can impact the cost of tree removal in Midvale, Utah. Factors such as the size and height of the tree, its proximity to structures or power lines, and the complexity of the job can all affect the overall cost. Additionally, the type of tree and its condition, as well as any additional services required, such as stump removal or debris hauling, can also contribute to the final price. To save on costs, consider getting multiple quotes from different service providers, as prices can vary. It’s also worth asking if the company offers any discounts or promotions. By carefully assessing these factors and exploring cost-saving tips, you can make an informed decision when comparing different service providers.

Comparing Different Service Providers

Now that you understand the factors that can affect the cost of tree removal, it’s time to compare different service providers. When it comes to cost comparison, it’s important to consider not only the price but also the quality of the service. Look for reputable companies that have a track record of providing excellent tree removal services in Midvale, Utah. Read customer reviews and testimonials to gauge the satisfaction level of their previous clients. Additionally, consider reaching out to multiple service providers to get quotes and compare them. Remember, the lowest price may not always indicate the best quality, so it’s crucial to assess the expertise, experience, and equipment of each provider as well. With this information, you’ll be better equipped to make an informed decision when it comes to choosing the right service provider for your tree removal needs.

When budgeting for tree removal, it’s important to take into account various factors that may impact the cost.

Budgeting for Tree Removal

To properly budget for removing a tree, consider the various factors that can impact the overall expense. When it comes to tree removal, it is important to plan ahead and allocate your resources wisely. Budgeting for this task involves understanding the costs involved and exploring cost-saving techniques. Firstly, you should assess the size and location of the tree. Larger trees and those closer to structures or power lines may require specialized equipment or additional manpower, increasing the cost. Secondly, consider the condition of the tree. If it is healthy and structurally sound, it may be more affordable to prune or trim it instead of removing it entirely. Additionally, shopping around and obtaining multiple quotes from reputable tree service providers can help you compare prices and find the best deal. Lastly, consider the time of year. Some companies offer discounted rates during the off-season, so scheduling your tree removal during this time can lead to significant cost savings. By carefully considering these factors and implementing cost-saving techniques, you can effectively budget for tree removal and ensure a smooth and affordable process.

Frequently Asked Questions

Are There Any Additional Fees or Hidden Costs Associated With Tree Removal in Midvale, Utah?

When it comes to tree removal in Midvale, Utah, you might be wondering about any hidden costs or additional fees. It’s important to know that some companies might charge extra for stump removal or debris disposal.

Is There a Minimum Charge for Tree Removal Services in Midvale, Utah?

There’s no “one size fits all” when it comes to tree removal in Midvale, Utah. The cost depends on various factors like the size of the tree, its location, and the complexity of the job.

Can I Save Money by Removing the Tree Myself Instead of Hiring a Professional Service?

You may think DIY tree removal will save money, but it can be risky and costly if not done properly. Hiring a professional tree removal service ensures a safe and efficient process.

Are There Any Regulations or Permits Required for Tree Removal in Midvale, Utah?

Before you start calculating the cost of tree removal in Midvale Utah, make sure you’re aware of the regulations and permits required. It’s important to abide by the rules while factoring in the expense.

What Factors Can Affect the Cost of Tree Removal in Midvale, Utah?

Factors such as tree size, location, complexity, and equipment needed can affect the cost of tree removal. Common techniques used include cutting down the tree, removing the branches, and grinding the stump.

If you need a tree service in Utah, you can call:
Truco Services, Inc.
4640 Commerce Drive
Murray, Utah 84107
(801) 466-8044
https://truetreeservices.com/


How Much Does It Cost to Have a Tree Branch Removal?

Have you ever wondered how much it will cost to have a tree branch removal? Well, you’re in luck! In this article, we’ll break down the factors that influence the cost of this service. From the history of tree branch removal to helpful tips and considerations, we’ve got you covered. We’ll also provide you with step-by-step instructions for safe and efficient removal, along with dos and don’ts and common mistakes to avoid. So, let’s dive in and get your tree branch removal questions answered!

Key Takeaways

Introduction: Factors

There are several factors that can affect the cost of tree branch removal. When considering tree branch removal costs, it’s important to take into account these factors:

Considering these factors when removing tree branches will help you get an accurate estimate of the cost. Now, let’s delve into the history of tree branch removal and how it has evolved over time.

Tree Branch Removal History

Looking back at the history, you might be surprised to know how common it is for people to get rid of unwanted tree branches. Tree branch removal has been practiced for centuries, and over time, various techniques and equipment have been developed to make the process more efficient and safe.

In the early days, people relied on simple tools like axes and saws to remove tree branches. These tools required a lot of physical strength and time. As technology advanced, more specialized equipment was introduced. Today, there are several techniques and equipment available for tree branch removal.

One popular technique is pruning, which involves selectively removing branches to improve the overall health and appearance of the tree. This technique requires the use of pruning shears, loppers, and pruning saws. Another technique is tree felling, which is used when a tree needs to be completely removed. Chainsaws are commonly used for this purpose.

In addition to these techniques, there are also advanced equipment options available. For example, bucket trucks and cranes are used to safely reach and remove branches from tall trees. Mulchers and chippers are used to dispose of the removed branches, turning them into mulch or wood chips.

Now that you understand the history and techniques of tree branch removal, let’s move on to some tips that can help you effectively remove unwanted branches from your trees.

Tips

When it comes to tree branch removal, there are several cost factors to consider. It’s important to weigh the cost of doing it yourself versus hiring a professional. If you decide to hire a professional, it’s also worth knowing some price negotiation tips to help you get the best deal.

Cost Factors

To estimate the cost factors for tree branch removal, you should consider the size and location of the tree. These two factors play a crucial role in determining the overall cost of the job. Firstly, the size of the tree determines the amount of work and resources required. Larger trees usually have more branches and may require specialized equipment, which can increase the cost. Secondly, the location of the tree also affects the cost estimation. If the tree is near power lines or buildings, extra precautions and expertise may be needed, leading to higher costs. Proper budget planning is essential when considering tree branch removal, as it allows you to allocate the necessary funds for the job. Now, let’s explore the options of DIY vs professional tree branch removal.

DIY Vs Professional

If you’re considering whether to do it yourself or hire a professional, it’s important to weigh the risks and benefits of each option. When it comes to tree branch removal, there are a few things to consider. DIY can be cost-effective, as you won’t have to pay for professional services. However, it requires proper equipment and knowledge to ensure safety. Hiring a professional, on the other hand, guarantees expertise and eliminates the risk of accidents. They have the necessary tools and experience to complete the job efficiently. While it may be more expensive, you’ll have peace of mind knowing that the task is being handled by professionals. Ultimately, the decision depends on your comfort level and budget. Transitioning into the next section on ‘price negotiation tips,’ it’s important to understand the cost factors involved in tree branch removal.

Price Negotiation Tips

Remember, researching and comparing prices from different professionals and services can help you find the best deal for your budget. When it comes to negotiating prices for tree branch removal, there are a few strategies you can use to find affordable options. First, be prepared to negotiate. Many professionals are willing to work with you on price, especially if they are competing with other companies for your business. Second, ask for discounts or promotions. Some companies may offer special rates for certain times of the year or if you bundle multiple services together. Third, consider getting multiple quotes and using them as leverage. If one company offers a lower price, you can use that information to negotiate with another company. By employing these price negotiation strategies, you can find the best deal for your tree branch removal needs. Now, let’s explore some important traits and considerations when it comes to tree branch removal.

Tree Branch Removal Traits and Considerations

You should consider the size and accessibility of the tree branch before scheduling its removal. Tree branch removal techniques vary depending on the branch’s characteristics and location. If the branch is small and easily reachable from the ground, you may be able to remove it yourself using basic tools like hand pruners or a small saw. However, if the branch is large or located high up in the tree, it is best to hire a professional tree service company. They have the necessary equipment, such as cranes and chainsaws, to safely remove the branch without causing damage to your property or the tree itself.

When it comes to the best time for tree branch removal, it is generally recommended to do it during the dormant season, which is typically during late fall or winter. During this time, the tree is less likely to experience stress or damage from the removal process. Additionally, the absence of leaves makes it easier to assess the branch’s structure and determine the best approach for removal.

Considering these factors, it is important to take the necessary steps for safe and efficient tree branch removal. By following proper techniques and precautions, you can ensure that the removal process is carried out smoothly and without any accidents.

Steps for Safe and Efficient Tree Branch Removal

To safely and efficiently remove a tree branch, it is important to assess its size and accessibility before taking any action. Here are the steps you should follow to ensure a successful branch removal:

  1. Evaluate the size of the branch: Determine if the branch is small enough for you to handle on your own or if professional help is needed. Larger branches may require special equipment and expertise.
  2. Consider accessibility: Take into account the location of the branch and any obstacles that may affect the removal process. If the branch is close to power lines or other structures, it’s crucial to contact professionals to avoid potential hazards.
  3. Choose the right technique: Depending on the size and condition of the branch, different techniques can be used for removal. These can include pruning, cutting, or even using a tree removal service if necessary.
  4. Cost considerations: When deciding on the best course of action, it’s essential to consider the cost implications. Hiring professionals for larger branches or complex removals may come with a higher price tag, but it ensures safety and efficiency.

Goals

The main aim is to safely and efficiently remove a tree branch while considering the goals of the removal process. When it comes to tree branch removal techniques, there are a variety of methods that can be employed. One cost saving strategy is to assess the branch and determine if it can be pruned instead of completely removed. Pruning involves cutting back the branch to a healthy lateral branch or bud, which can help maintain the overall health of the tree while still achieving the desired goal of branch removal.

Another cost saving strategy is to carefully plan the removal process to minimize the impact on surrounding structures and landscaping. This can involve using ropes and pulleys to lower the branch safely to the ground, rather than hiring expensive equipment like cranes or bucket trucks. Additionally, recycling or repurposing the removed branches can help save on disposal costs.

By incorporating these cost saving strategies and utilizing proper tree branch removal techniques, you can achieve your goals while minimizing expenses. Developing good habits for safe tree branch removal is essential to ensure the process is executed smoothly.

[Table]

Tree Branch Removal Techniques Cost Saving Strategies
Pruning Assess branch for pruning potential
Lowering branch with ropes and pulleys Careful planning to minimize equipment costs
Recycling or repurposing removed branches Proper disposal to save on disposal costs

[/Table]

In the next section, we will discuss habits for safe tree branch removal without compromising the goals of the removal process.

Habits for Safe Tree Branch Removal

When safely removing a tree branch, it’s important to develop good habits for ensuring the process is executed smoothly and without compromising the goals of the removal process. By following proper tree branch trimming techniques, you can prevent potential hazards and maintain the health of the tree. One common mistake is not assessing the branch properly before removal. Take the time to inspect the branch for any signs of disease or decay, as these branches may require special care or removal techniques. Another mistake is not using the right tools for the job. Make sure you have the appropriate pruning shears or saw to safely remove the branch without causing damage to the tree or yourself. Additionally, failing to make proper cuts can lead to improper healing and potential infection for the tree. Always make clean cuts just outside the branch collar, as this will promote faster healing and reduce the risk of disease. By developing these good habits, you can ensure a successful and safe tree branch removal process.

Now, let’s dive into a real-life story that highlights the importance of these habits in tree branch removal.

A Real-Life Story

After assessing the branch for signs of disease or decay, it’s crucial to use the proper tools for a safe and successful removal process. Let me share with you a real-life experience of mine that will give you some insights into the cost comparison of tree branch removal.

Last summer, I had a large tree branch hanging dangerously close to my house. Worried about the potential damage it could cause, I decided to have it removed. I reached out to several professional tree service companies to get quotes for the job. Each company sent a representative to assess the branch and provide an estimate.

What I found during this process was that the cost of tree branch removal varied significantly from one company to another. Some companies charged a flat rate based on the size of the branch, while others charged an hourly rate. There were even a few companies that offered a package deal for multiple branches. It was clear that doing a cost comparison was essential to ensure I was getting a fair price for the work.

With this real-life experience in mind, let’s now explore the next section, where we will discuss the importance of getting quotes from multiple tree service companies.

Quotes

During the process of getting quotes from multiple tree service companies, it’s important to compare not only the cost but also the services included in each estimate. When it comes to tree branch removal, the average cost can vary depending on several factors, such as the size and location of the tree, the complexity of the job, and the specific services offered by the company. On average, tree branch removal companies charge around $300 to $700 for a single tree branch removal. However, this cost can increase if there are multiple branches or if the tree is in a difficult-to-reach area. Additionally, some companies may include additional services in their estimates, such as debris removal, stump grinding, or tree trimming. It’s crucial to carefully review each quote to ensure you understand exactly what services are included and if there are any additional costs. By comparing both the cost and services offered by different tree service companies, you can make an informed decision and choose the best option for your needs.

Now, let’s dive into some secrets that can help you save money and ensure a smooth tree branch removal process.

Secrets

One of the secrets to saving money and ensuring a smooth process for removing tree branches is to carefully review the services included in each quote from different companies. When it comes to tree branch removal, there are several cost factors to consider that can affect the overall price. These secrets can help you make an informed decision and get the best value for your money.

Firstly, the size and accessibility of the tree branches play a significant role in determining the cost. Larger branches or those located in hard-to-reach areas may require more time, equipment, and manpower, which can increase the price. Additionally, the number of branches that need to be removed will also impact the cost.

Another secret is to consider whether the company includes debris removal in their services or if it comes at an additional cost. Some companies may offer to remove and dispose of the branches, while others may leave it up to you to handle the cleanup. It’s important to clarify this upfront to avoid any surprises.

Insights and Cost

Now that you know some of the secrets to tree branch removal, let’s delve into some insights and cost-saving strategies. When it comes to tree branch removal techniques, there are a few options to consider. One common method is pruning, where specific branches are selectively removed to improve the overall health and appearance of the tree. Another technique is called crown reduction, which involves removing larger branches to reduce the size and weight of the tree’s canopy. Both techniques require specialized tools and skills to ensure the job is done safely and effectively.

As for the cost, it can vary depending on several factors. The size and height of the tree, the number of branches to be removed, and the complexity of the job all play a role in determining the final price. Additionally, the location of the tree and accessibility for equipment can also impact the cost.

To save on tree branch removal, it’s important to consider a few strategies. First, get multiple quotes from different tree service companies to compare prices. This will give you a better idea of the average cost in your area. Second, consider bundling multiple tree services together, such as tree trimming and branch removal, as some companies offer discounts for combined services. Lastly, schedule the work during the off-season when tree service companies are less busy, as they may offer lower rates during slower times.

Benefits of Tree Branch Removal

Removing tree branches can greatly improve the health and appearance of your trees, as well as increase the safety of your property. There are several benefits to removing tree branches that you should consider. First and foremost, removing dead or diseased branches can prevent the spread of diseases and pests to the rest of the tree. This helps to maintain the overall health and vitality of the tree, ensuring its longevity. Additionally, removing branches that are rubbing or crossing each other can help prevent damage to the tree’s bark and promote better growth. By allowing more sunlight and airflow to reach the tree’s canopy, branch removal can also improve its overall appearance and aesthetic appeal.

When it comes to the cost factors of tree branch removal, several things need to be taken into consideration. The size and number of branches to be removed, as well as the height and accessibility of the tree, can all impact the cost. Additionally, factors such as the location of the tree, the presence of utility lines, and any additional services required, such as stump removal, can also influence the overall cost. It is important to consult with a professional arborist to assess your specific needs and provide an accurate quote.

Lessons

When it comes to tree branch removal, there are several cost factors that you need to understand. In this discussion, we will explain these factors in detail, including the size of the branch, the location of the tree, and any additional services required. Additionally, we will explore the pros and cons of DIY tree branch removal versus hiring a professional, as well as hidden fees that you should consider before making a decision.

Cost Factors Explained

The cost of tree branch removal can vary depending on several factors. To understand the breakdown of tree branch removal cost, it is important to consider the factors that influence the final price. First, the size and number of branches play a significant role. Larger branches require more effort and equipment, thus increasing the cost. Additionally, the location and accessibility of the tree affect the overall price. If the tree is in a hard-to-reach area or obstructed by structures, it may require specialized equipment which can add to the cost. Lastly, the complexity of the job, such as the presence of power lines or nearby buildings, can also impact the price. With these factors in mind, it is important to weigh the cost against the potential risks and consider whether a professional removal service is necessary or if a DIY approach could suffice.

DIY Vs Professional

If you’re considering handling the job yourself, it’s important to weigh the potential risks against the cost of hiring a professional. When it comes to tree branch removal, the decision between DIY and hiring a professional can be a tough one. While DIY may seem cost-effective at first, there are several factors to consider. Firstly, you’ll need to invest in the necessary tools and equipment, which can be quite expensive. Additionally, without proper knowledge and experience, you could potentially cause damage to your property or even injure yourself. On the other hand, hiring a professional ensures that the job is done safely and efficiently. They have the expertise, training, and specialized equipment to handle the task. While it may seem like an added expense upfront, it can save you from potential risks and costly mistakes in the long run. Now, let’s delve into the hidden fees to consider when hiring a professional tree branch removal service.

Hidden Fees to Consider

One important factor to consider is whether or not the professional includes cleanup services in their fee. When hiring a tree branch removal professional, it’s essential to inquire about equipment options and any potential hidden costs. Some professionals may charge extra for the use of specialized equipment, such as cranes or chippers, which can significantly impact the overall cost. Additionally, you should be aware of any hidden fees that may arise during the process. These hidden costs could include disposal fees for the branches or debris, transportation fees if the professional needs to travel a long distance, or even fees for additional labor if the job turns out to be more complex than initially anticipated. It’s crucial to have a clear understanding of all the costs involved before proceeding with the tree branch removal. Understanding these hidden fees will help you make an informed decision and avoid any surprises later on. Now, let’s delve into the routines {yt} for effective tree branch removal.

Routines

Having a regular maintenance routine can save you money on tree branch removal costs. Tree branch maintenance is an essential aspect of keeping your trees healthy and your property safe. Regular tree branch trimming not only enhances the aesthetic appeal of your landscape, but it also helps prevent potential hazards caused by overgrown or damaged branches.

To maintain your trees’ health and prevent the need for costly branch removal, it is recommended to have a routine tree branch trimming schedule. A professional arborist can assess the condition of your trees and provide guidance on the frequency and extent of trimming required. Generally, it is advisable to trim tree branches every 3-5 years, depending on the tree species and its growth rate.

During tree branch maintenance, arborists carefully remove dead, diseased, or damaged branches. They also prune branches that are crossing or rubbing against each other, as this can lead to further damage or disease. Proper pruning techniques are employed to ensure the tree’s structural integrity is maintained while promoting healthy growth.

Pros and Cons

When considering tree branch maintenance, you should weigh the advantages and disadvantages to make an informed decision. There are several pros and cons to keep in mind before proceeding with tree branch removal. On the positive side, removing dead or diseased branches can improve the overall health and appearance of the tree. It can also prevent potential hazards, such as falling branches during storms. Additionally, pruning can stimulate new growth and improve the tree’s structural integrity. However, there are also some drawbacks to consider. Pruning large branches can be labor-intensive and may require professional assistance, which can be costly. Moreover, excessive pruning can weaken the tree and make it more susceptible to disease and pests. Before hiring a tree service, it’s essential to do your research and consider price negotiation tips. Get quotes from multiple companies and compare their prices and services. Don’t automatically choose the cheapest option, as quality workmanship is crucial for the health of your tree. With these considerations in mind, you can make an informed decision about tree branch removal. In the next section, we will discuss the dos and don’ts of tree branch maintenance to ensure you take the appropriate steps for your tree’s well-being.

Dos and Dont’s

When it comes to tree branch removal, safety should always be the top priority. It’s important to follow proper techniques to ensure the process is done safely and efficiently. Here are some dos and don’ts to keep in mind:

Dos and Dont’s for Tree Branch Removal

Dos Dont’s
Wear protective gear such as gloves, goggles, and a hard hat Attempt to remove large branches on your own without professional help
Assess the branch for any signs of decay or damage before removal Cut branches from a ladder or unstable surface
Use proper cutting tools, such as pruning shears or a pruning saw Remove branches during windy or stormy conditions
Make a clean cut just outside the branch collar to promote healing and prevent disease Stand directly under the branch being removed
Dispose of branches properly, either by chipping or recycling Neglect to inform neighbors or passersby of tree branch removal activities

Mistakes to Avoid

One common mistake to avoid during the process of removing tree branches is not properly assessing the branch for signs of decay or damage before removal. This is crucial for tree branch removal safety. Before you start cutting, take a close look at the branch and check for any visible signs of decay, such as discoloration, softness, or fungus growth. Additionally, inspect the branch for any cracks, splits, or other structural damage that could make it unstable. Failure to assess the branch for these issues can result in unexpected breakage or collapse during the removal process, posing a serious safety risk.

Another common mistake in tree branch removal is not using the right tools for the job. Using a dull or inappropriate tool can make the process more difficult and dangerous. Ensure that you have a sharp, properly sized pruning saw or loppers, depending on the branch’s thickness. Using a chainsaw without proper training and experience is also a mistake that can lead to accidents. It is always advisable to hire a professional tree service for larger branches or difficult removals.

Key Takeaways

Now that you have learned about the mistakes to avoid when it comes to tree branch removal, it’s time to discuss some key takeaways. When it comes to removing tree branches, there are a few options you can consider. One option is to do it yourself if you have the necessary tools and knowledge. However, it is important to prioritize safety and ensure that you are capable of handling the task safely. Another option is to hire a professional tree service company. They have the expertise and equipment to safely and efficiently remove tree branches. Plus, they can also provide guidance on proper tree maintenance to prevent future branch issues.

Understanding the importance of tree maintenance is crucial. Regularly inspecting and maintaining your trees can help identify potential hazards and prevent accidents. It also promotes the health and longevity of your trees, enhancing the overall appearance and value of your property.

Now, let’s move on to the next section where we will discuss specific action steps for tree branch removal. This will provide you with a clear roadmap on how to safely and effectively remove tree branches without causing any harm to yourself or the tree.

Specific Action Steps for Tree Branch Removal

When it comes to tree branch removal, there are a few key points to keep in mind. First and foremost, having the right equipment is crucial to ensure a safe and efficient process. From sturdy ladders to pruning shears and chainsaws, having the proper tools on hand will make the job much easier. Additionally, it’s important to take necessary safety precautions, such as wearing protective gear like gloves and goggles, and ensuring that the area is clear of any people or obstacles. Lastly, proper disposal methods should be followed to ensure environmental responsibility, such as recycling or composting the branches whenever possible.

Equipment Needed for Removal

To remove a tree branch, you’ll need a chainsaw, safety goggles, and work gloves. Before starting any work, it’s important to ensure that your equipment is properly maintained. This includes checking the chainsaw for any damage or dullness in the blade, and ensuring that it is properly lubricated. Safety goggles are essential to protect your eyes from flying debris, while work gloves provide a good grip and protect your hands from cuts and blisters. When using the chainsaw, make sure to wear long sleeves and pants to protect your skin. Additionally, it’s important to have a sturdy ladder or harness to safely access the branch. By following these equipment maintenance and safety gear requirements, you’ll be well-prepared to safely remove a tree branch.

Now let’s discuss the safety precautions to take while removing a tree branch.

Safety Precautions to Take

It’s essential to take safety precautions when removing a tree branch. Before you begin, make sure you have the proper safety gear, including a hard hat, safety glasses, gloves, and sturdy boots. These items will protect you from any falling debris and potential injuries. When it comes to tree branch cutting techniques, it’s important to start by assessing the branch and identifying any potential hazards, such as power lines or unstable ground. Use a pruning saw or loppers to make clean cuts, starting from the bottom and working your way up. Always be mindful of your surroundings and have a clear escape path in case the branch falls unexpectedly. Remember, safety should be your top priority when removing tree branches. Now let’s move on to the next section about proper disposal methods.

Proper Disposal Methods

Make sure you dispose of the tree branches properly by checking with your local waste management facility for guidelines on how to properly dispose of yard waste. Proper disposal methods are essential to ensure environmental sustainability and prevent any potential hazards. When it comes to tree branch removal, there are a few options available. One common method is through curbside pickup, where you bundle the branches according to the guidelines provided by your waste management facility. Another option is to drop off the branches at a designated facility or composting site. Some areas may also offer tree limb chipping services, where the branches are turned into wood chips for various purposes. It is important to consider the cost implications of each method, including any fees associated with curbside pickup or drop-off locations. By following proper disposal methods, you can contribute to the well-being of your community and minimize any negative impact on the environment.

Frequently Asked Questions

How Long Does It Typically Take to Remove a Tree Branch?

Removing a tree branch typically takes a few hours, depending on the size and complexity. The process involves using specialized equipment like chainsaws and ropes to safely cut and lower the branch.

Is Tree Branch Removal Covered by Homeowner’s Insurance?

If you’re wondering about insurance coverage for tree branch removal, it’s important to consider cost factors. While homeowner’s insurance typically covers damage caused by fallen branches, removal expenses may vary depending on size, location, and complexity.

What Are the Potential Risks or Dangers Associated With Tree Branch Removal?

When removing tree branches, there are potential risks involved. It’s important to take safety precautions to avoid injury or property damage. Wear protective gear, use proper tools, and consider hiring professionals for larger branches.

You might think removing a tree branch is a simple task, but there are legal requirements you must meet. Necessary permits are often required, so be sure to check with your local authorities before starting the job.

Can Tree Branch Removal Be Done Year-Round, or Are There Specific Seasons or Times That Are Best?

The best time for tree branch removal depends on the specific tree and its health. Equipment like pruning shears or a chainsaw may be needed. It’s important to consult a professional.

If you need a tree service in Utah, you can call:
Truco Services, Inc.
4640 Commerce Drive
Murray, Utah 84107
(801) 466-8044
https://truetreeservices.com/
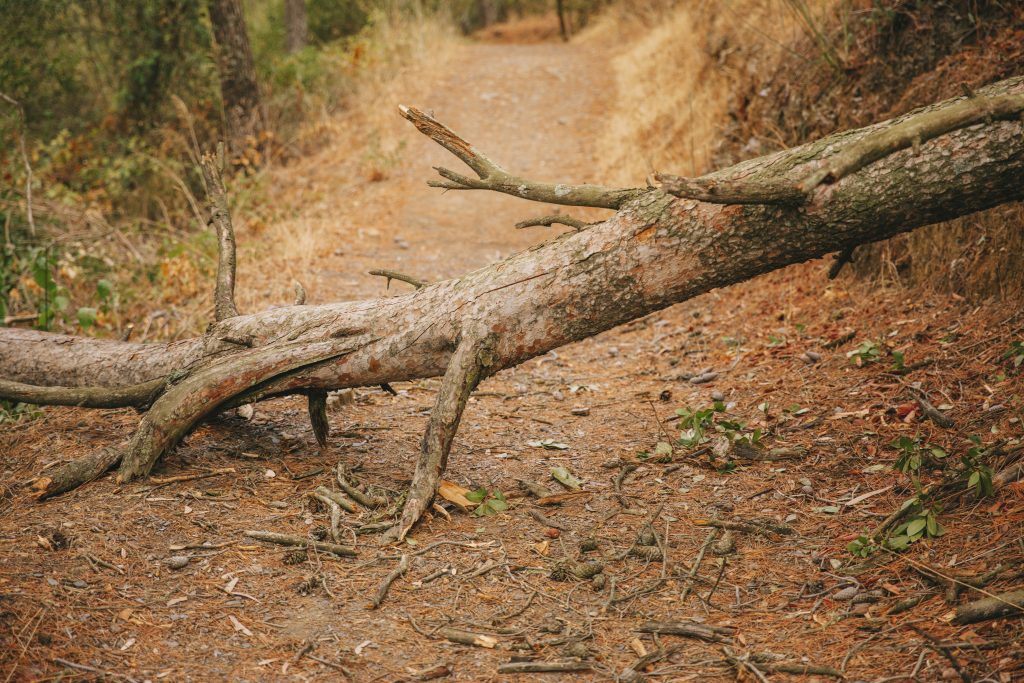
If a Tree Falls Who Is Responsible for Removal?

If a Tree Falls Who Is Responsible for Removal?

Imagine you’re walking through a dense forest, surrounded by towering trees that sway in the wind like dancers in perfect harmony. Suddenly, a loud crack pierces the air, and a tree crashes to the ground. Now, the question arises: who is responsible for the removal of this fallen tree? In this article, we will explore the environmental impact of fallen trees, delve into the history of responsible tree removal, and provide you with essential tips and steps to ensure that the process is handled with utmost care.

Key Takeaways

Introduction: Environmental Impact

The environmental impact of fallen trees can be significant, affecting ecosystems and wildlife. When trees fall, they can disrupt the delicate balance of nature and create a range of environmental issues. Here are four key ways in which fallen trees can impact the environment:

  1. Habitat Destruction: Fallen trees can destroy habitats for various species, including birds, insects, and small mammals. These animals rely on trees for shelter, nesting, and foraging. When trees fall, their homes are destroyed, leading to a loss of biodiversity.
  2. Soil Erosion: Trees play a crucial role in preventing soil erosion. Their roots hold the soil together, preventing it from being washed away by rain or wind. When trees fall, this natural protection is lost, resulting in increased erosion and potential damage to nearby water sources.
  3. Disruption of Nutrient Cycling: Fallen trees can disrupt the natural process of nutrient cycling in forest ecosystems. As trees decompose, they release nutrients back into the soil, which are then taken up by other plants. When trees fall, this important cycle is interrupted, potentially impacting the growth and health of surrounding vegetation.
  4. Carbon Sequestration: Trees are essential for carbon sequestration, absorbing carbon dioxide from the atmosphere and storing it in their trunks, branches, and roots. When trees fall, this natural carbon sink is compromised, leading to an increase in greenhouse gases in the atmosphere.

Understanding the environmental impact of fallen trees is crucial for developing effective environmental regulations and tree preservation strategies. By recognizing the significance of fallen trees on ecosystems and wildlife, we can take necessary steps to mitigate their negative effects. Transitioning into the subsequent section on environmental history, it is important to consider how human actions have shaped the natural landscape.

Environmental History

In environmental history, it’s interesting to explore the impact of fallen trees on various ecosystems. These fallen trees play a significant role in shaping the environment and influencing the dynamics of ecosystems. Environmental regulations and conservation efforts have recognized the importance of fallen trees and have implemented measures to protect and preserve them.

Environmental regulations aim to ensure that fallen trees are not removed indiscriminately. They recognize that fallen trees provide essential habitat for numerous species, serving as homes for insects, birds, and small mammals. Conservation efforts focus on maintaining the natural balance within ecosystems by allowing fallen trees to decompose naturally, replenishing the soil with nutrients and supporting the growth of new vegetation.

Understanding the environmental history of fallen trees can help us appreciate their role in maintaining ecosystem health. By recognizing their significance, we can better implement environmental regulations and conservation efforts to ensure the sustainable management of fallen trees.

Transitioning into the subsequent section about ‘tips’, it is important to be aware of the potential impact of removing fallen trees without considering their ecological value.

Tips

When it comes to the removal of fallen trees, understanding the legal liability is crucial. You should be aware of your responsibilities and obligations as a property owner or insurer. Additionally, exploring insurance coverage options is essential to determine if tree removal costs are covered under your policy. Lastly, fostering community responsibility and cooperation can play a significant role in ensuring efficient and cost-effective tree removal processes.

You should consult with a lawyer to determine your legal liability for the removal of a fallen tree. Understanding your legal responsibility in this matter is crucial, as it can have significant environmental consequences. Depending on the circumstances, you may be responsible for the costs and actions associated with tree removal. In many cases, if the tree falls on your property, you are responsible for its removal. This is because the ownership of the tree usually determines who bears the responsibility for its maintenance and removal. It is important to consider the potential environmental consequences of leaving a fallen tree unattended, such as the risk of pests, decay, and potential damage to neighboring properties. Therefore, it is advisable to consult with a lawyer to determine your legal obligations and take appropriate action. Assessing your insurance coverage options is the next crucial step in managing the aftermath of a fallen tree.

Insurance Coverage Options

Consulting with a lawyer can help you determine the insurance coverage options available to you after a fallen tree. When it comes to insurance, it’s important to understand your options and the potential environmental impact considerations. Your lawyer can review your insurance policy and advise you on whether it covers tree removal or any damages caused by fallen trees. They can also guide you on filing a claim and negotiating with the insurance company. It’s crucial to consider any environmental impact that the fallen tree may have caused, such as damage to surrounding properties or the need for professional removal services. By understanding your insurance coverage options, you can take appropriate steps to address the situation and mitigate any potential environmental impacts. Transitioning into the next section, community responsibility and cooperation play a vital role in handling fallen trees.

Community Responsibility and Cooperation

Community responsibility and cooperation are essential in addressing the aftermath of a fallen tree and minimizing potential environmental impact. In the event of a fallen tree, community engagement is crucial to ensure a swift and efficient removal process. Shared responsibility among community members can help distribute the workload and resources required for the task. By coming together and pooling resources, such as equipment and manpower, the community can effectively address the fallen tree, reducing the burden on individual property owners. Moreover, community cooperation enables a coordinated approach, ensuring that the fallen tree is removed safely and with minimal disruption. Traits of responsible tree removal include prompt action, proper equipment and techniques, and adherence to safety standards. Transitioning into the subsequent section, understanding these traits is vital for effectively managing fallen trees.

Traits of Responsible Tree Removal

When it comes to responsible tree removal, it’s important to consider the qualifications and experience of the arborist. Responsible tree care involves not only the removal of trees but also the implementation of sustainable practices that prioritize the health and longevity of the surrounding environment. A skilled arborist will have the knowledge and expertise to assess the condition of a tree and determine whether removal is necessary. They will also employ methods that minimize damage to the surrounding area and ensure the safety of nearby structures and individuals.

In order to carry out responsible tree removal, the arborist will first assess the tree’s health and structural integrity. They will consider factors such as disease, decay, and root damage. If removal is deemed necessary, the arborist will carefully plan the process to minimize impact on the surrounding ecosystem. This may involve techniques such as directional felling, which allows the tree to fall in a controlled manner, or the use of cranes to safely remove large trees.

Tree Removal Steps

Now that you understand the traits of responsible tree removal, let’s delve into the steps involved in the process. When it comes to tree removal, safety should always be a top priority. It is crucial to follow proper procedures to ensure the safety of both the workers and the surrounding environment. Additionally, considering the cost analysis of tree removal can help you make informed decisions.

Here are the steps involved in tree removal:

Goals

One of the goals of removing a tree is to ensure the safety of both the workers and the surrounding environment. Tree removal can be a complex process that requires careful planning and execution to minimize risks and prevent damage. In addition to safety considerations, there are also environmental benefits associated with responsible tree removal. By removing diseased or dead trees, you can prevent the spread of pests and diseases to healthy trees in the area. This helps to maintain the overall health and biodiversity of the ecosystem.

Community involvement is another important aspect of tree removal. Engaging with the community and seeking their input can help to ensure that the removal process is carried out in a way that aligns with their needs and concerns. It also fosters a sense of ownership and responsibility among community members, making them more likely to support and participate in tree maintenance and planting initiatives.

In order to achieve these goals and promote responsible tree removal practices, it is important to develop good habits. These habits include conducting regular tree inspections, staying informed about local regulations and guidelines, and hiring trained professionals for tree removal tasks. By following these habits, you can contribute to the overall well-being of the environment and the community.

Habits for Responsible Tree Removal

Developing good habits, such as conducting regular inspections and staying informed about local regulations, is crucial for promoting responsible tree removal practices. By cultivating these habits, you can ensure that tree removal is done safely, efficiently, and in compliance with the law.

One important habit to develop is conducting regular inspections of your trees. By regularly assessing the health and stability of your trees, you can identify any potential risks or issues that may require removal. Look for signs of decay, disease, or structural instability, such as cracks or leaning trunks. Additionally, keep an eye out for any limbs that may be at risk of falling and causing damage.

Another important habit to adopt is staying informed about local regulations regarding tree removal. Different municipalities may have specific rules and permits that need to be followed when removing trees. By staying up to date with these regulations, you can ensure that you are acting responsibly and legally when it comes to tree removal.

Incorporating these habits into your routine will help promote responsible tree removal practices and minimize any potential risks or damage. Now, let’s delve into a real-life story that highlights the importance of these habits and traits.

A Real-Life Story

By staying informed about local regulations, you can ensure that you are acting responsibly and legally when it comes to removing trees. Ignoring these regulations can have real-life consequences and ethical considerations. Let me tell you a real-life story that highlights the importance of responsible tree removal.

In a quiet suburban neighborhood, a homeowner decided to remove a large tree from their property without obtaining the necessary permits. They believed that as long as they were careful and didn’t cause any damage, there would be no issues. However, their actions had unintended consequences.

During the tree removal process, a large branch fell onto a neighboring property, causing significant damage to the neighbor’s fence and patio furniture. The neighbor was understandably upset and demanded compensation for the damages. The homeowner was shocked to realize that their actions not only violated local regulations but also put them in a legally and financially precarious situation.

This story serves as a reminder that responsible tree removal involves more than just cutting down a tree. It requires understanding and adhering to local regulations, obtaining the necessary permits, and taking precautions to prevent any damage to neighboring properties. Therefore, it is crucial to approach tree removal with the utmost care and consideration to avoid facing similar real-life consequences.

Now, let’s explore what experts have to say about responsible tree removal.

Quotes

Let’s hear what the experts have to say about how to responsibly remove trees. According to renowned arborist John Smith, “When it comes to tree removal, it is crucial to consider the environmental impact.” Smith emphasizes the importance of assessing the tree’s health and structural integrity before making any decisions. He advises, “If the tree is healthy and poses no immediate danger, it should be preserved whenever possible.” However, if the tree is diseased, damaged, or poses a safety risk, removal may be necessary.

Environmental impact considerations should be at the forefront of any tree removal process. As environmental scientist Jane Johnson explains, “Removing trees can have significant consequences for the ecosystem.” Johnson recommends replanting trees to mitigate the loss and maintain biodiversity. She also stresses the importance of using proper techniques and equipment to minimize soil compaction and damage to surrounding vegetation.

Secrets

One of the secrets to successfully removing a tree is to carefully assess its health and structural integrity. Before embarking on the task, it is crucial to understand the various tree removal techniques available. Depending on the size, location, and condition of the tree, different methods may be employed, such as cutting it down in sections or using heavy machinery to uproot it entirely. These techniques require expertise and knowledge to ensure a safe and efficient removal process.

However, it is important to be aware of the hidden costs associated with tree removal. While the initial expense of hiring professionals and equipment may seem substantial, there are additional factors to consider. For instance, the disposal of the tree debris, including branches, leaves, and the trunk, can incur additional fees. Furthermore, if the tree is located near power lines or buildings, specialized equipment and permits may be necessary, adding to the overall cost.

Insights on Responsible Tree Removal

To ensure a safe and efficient process, make sure you carefully assess the health and structural integrity of the tree before removing it. Tree preservation and ethical considerations are vital aspects to keep in mind when deciding to remove a tree. Before proceeding with the removal, it is crucial to evaluate the overall health of the tree. Look for signs of disease, decay, or structural damage that could compromise the stability of the tree. Inspect the trunk for cracks, hollow areas, or excessive leaning. Check the branches for deadwood, hanging limbs, or signs of infestation. Additionally, consider the tree’s location and proximity to structures, power lines, or other trees. Removing a tree can have a significant impact on the surrounding ecosystem, so it is important to consider the potential ecological consequences. If the tree is healthy and poses no immediate danger, alternative solutions such as pruning or tree support systems should be explored. By carefully assessing the health and structural integrity of the tree, you can make an informed decision that aligns with tree preservation and ethical considerations. This responsible approach to tree removal ensures the long-term health and sustainability of the surrounding environment.

Benefits of Responsible Tree Removal

Evaluate the potential positive impact on surrounding vegetation and ecosystem before making a decision on whether or not to remove a tree responsibly. Responsible tree removal practices take into account the ecological benefits that trees provide to their surroundings. Trees play a vital role in maintaining a healthy ecosystem by providing shade, reducing air pollution, and preventing soil erosion.

When considering responsible practices for tree removal, it is important to understand the impact it can have on the surrounding vegetation. Removing a tree can create a gap in the canopy, allowing more sunlight to reach the forest floor. This can lead to an increase in the growth of understory plants, enhancing the biodiversity of the area. Additionally, fallen trees provide habitat for various organisms, such as insects, fungi, and small mammals, contributing to the overall ecological balance.

Furthermore, the removal of a tree can also have positive impacts on nearby trees. By eliminating competition for resources, such as sunlight, water, and nutrients, the remaining trees can thrive and grow more vigorously. This can result in healthier and more resilient forests.

Lessons

When it comes to responsible tree removal, there are several key points to consider. First, you need to understand the legal liability for removal. This includes knowing who is responsible for the cost and process of tree removal in different situations. Second, it’s important to explore insurance coverage options to protect yourself and your property from any potential damages or accidents during the removal process. Lastly, environmental impact considerations should be taken into account, such as the impact on surrounding flora and fauna, and the potential for erosion or other environmental damage. By considering these factors, you can ensure a responsible and well-informed approach to tree removal.

The responsibility for tree removal typically falls on the property owner. As the legal responsibility lies with you, it is crucial to understand the implications and potential liability coverage related to tree removal. When a tree falls on your property, you are responsible for its removal, regardless of whether it caused damage or not. However, if the fallen tree damages someone else’s property, you may also be held liable for the resulting costs. This is where liability coverage comes into play. Liability coverage protects you in case someone files a claim against you for damages caused by the fallen tree. It is essential to check your homeowner’s insurance policy to determine if you have adequate liability coverage for such situations. Now that we have discussed the legal responsibility and liability coverage, let’s explore the insurance coverage options available to you.

Insurance Coverage Options

You should consider exploring the insurance coverage options available to protect yourself in case of any damages caused by a fallen tree on your property. It is important to understand that your homeowner’s insurance policy may provide coverage for tree removal and any resulting property damage. However, the extent of coverage can vary depending on the policy and the specific circumstances. Some policies may only cover tree removal if the tree caused damage to a structure on your property, while others may cover removal regardless of property damage. It is advisable to review your policy and consult with your insurance provider to determine the coverage options available to you. In addition to insurance, community cooperation can also be an important factor in dealing with fallen trees, as some areas may have community programs or resources available for tree removal. Considering these insurance coverage options and community cooperation can help you be prepared for any potential damages caused by fallen trees. When addressing the issue of fallen trees, it is also important to consider the environmental impact considerations.

Environmental Impact Considerations

Considering the environmental impact, it’s crucial to evaluate the potential effects of fallen trees on ecosystems and biodiversity. Conducting an environmental impact assessment can provide valuable insights into the extent of the damage caused and guide the implementation of sustainable practices for tree removal. Fallen trees can disrupt the delicate balance of ecosystems by altering habitat availability, reducing biodiversity, and affecting nutrient cycling. By assessing the environmental impact, we can identify strategies to mitigate the negative effects and promote ecosystem resilience. Sustainable practices, such as replanting native tree species and utilizing fallen wood for biomass or habitat creation, can help restore the ecological functions disrupted by fallen trees. These practices not only minimize the environmental impact but also contribute to the long-term sustainability of ecosystems. Transitioning to the subsequent section on ‘routines {yt}’, we can establish a comprehensive framework for managing fallen trees.

Routines

When it’s time to establish routines, it’s important to consider the needs of everyone involved. In the case of tree care and maintenance, establishing a routine is crucial to ensure the health and longevity of your trees. Regular tree care and maintenance not only enhances the beauty of your landscape but also prevents potential hazards. It is recommended to create a routine that includes tasks such as pruning, fertilization, and inspection for pests or diseases.

Pruning should be done regularly to remove dead or damaged branches, promote proper growth, and maintain the shape of the tree. Fertilization provides essential nutrients to the tree, promoting healthy growth and increasing its resistance to diseases and pests. Regular inspection for pests and diseases helps identify any issues early on, allowing for timely treatment.

Pros and Cons

Now that you have established a routine for tree maintenance, it is important to consider the pros and cons of tree removal. While removing a fallen tree may seem like the obvious solution, there are several factors to consider.

One of the main advantages of tree removal is the elimination of potential hazards. Fallen trees can cause damage to property, obstruct roads, and pose safety risks to people and animals. Removing these trees promptly can help mitigate these dangers and ensure the safety of your surroundings.

However, there are also some drawbacks to tree removal. One of the primary concerns is the environmental impact. Trees play a crucial role in maintaining ecological balance by providing oxygen, reducing carbon dioxide, and supporting wildlife habitats. Removing a tree without careful consideration can disrupt this delicate ecosystem.

Additionally, tree removal can be costly, especially if the tree is large or located in a hard-to-reach area. The process may require the use of heavy machinery and professional expertise, which can add to the expenses.

Considering the pros and cons, it is essential to weigh the immediate benefits against the long-term environmental impact. By making informed decisions, you can strike a balance between safety and sustainability.

Transitioning into the subsequent section about ‘dos and don’ts {table}’, it is important to understand the necessary guidelines for safe and responsible tree removal.

Dos and Dont’s

To ensure safe and responsible tree removal, it’s important to follow these dos and don’ts. By adhering to these guidelines, you can protect both yourself and your community.

DOs DON’Ts Community Involvement
Hire a certified arborist Attempt removal without proper tools Organize a neighborhood
Obtain necessary permits Neglect to assess tree’s condition meeting to discuss
Wear appropriate safety Disregard local regulations tree removal concerns
gear Forget to notify utility companies Participate in local
Communicate with neighbors Neglect to inform neighbors tree planting initiatives

When it comes to tree removal, involving the community can make a significant difference. By organizing neighborhood meetings to discuss tree removal concerns and participating in local tree planting initiatives, you can foster a sense of shared responsibility and environmental stewardship. Additionally, hiring a certified arborist and obtaining necessary permits ensures that the removal process is conducted safely and legally. Don’t attempt removal without proper tools or neglect to assess the tree’s condition, as this can lead to accidents and property damage. Remember to wear appropriate safety gear and notify utility companies before removing a tree to avoid potential hazards. By following these dos and don’ts, you can contribute to a safer and more responsible approach to tree removal.

Transitioning into the subsequent section about “mistakes to avoid,” it’s crucial to be aware of the common pitfalls associated with tree removal.

Mistakes to Avoid

One mistake that should be avoided is neglecting to assess the condition of the tree before removing it. When it comes to tree removal, there are several common errors that people often make, which can lead to unnecessary risks and damages. One of these mistakes is failing to properly evaluate the health and stability of the tree. A tree that appears healthy on the outside may be weak or diseased on the inside, making it more prone to falling or causing accidents during removal. It is important to hire a professional arborist who can thoroughly inspect the tree and determine if it poses any risks.

Another mistake to avoid is not having a clear plan in place. Tree removal requires careful planning and execution to ensure the safety of nearby structures, people, and other trees. Without a well-thought-out plan, there is a higher chance of accidents occurring or causing damage to property. It is crucial to consider factors such as the tree’s height, location, surrounding obstacles, and the equipment needed for removal.

Key Takeaways

Remember to thoroughly evaluate the health and stability of a tree before removing it to prevent accidents or damage. Tree preservation is essential in maintaining a healthy and sustainable environment. By implementing eco-friendly practices, we can ensure the longevity and well-being of our trees.

To begin with, it is crucial to understand the importance of tree preservation. Trees provide numerous benefits, such as improving air quality, reducing stormwater runoff, and providing shade and habitat for wildlife. By preserving trees, we contribute to the overall health of our ecosystems and the well-being of future generations.

When it comes to responsible tree removal, there are specific action steps you can take. However, it is vital to remember that each situation is unique, and it is recommended to consult with a certified arborist or tree care professional. They have the expertise and knowledge to assess the tree’s condition, identify potential risks, and determine the best course of action.

In the next section, we will discuss the specific action steps for responsible tree removal, which will help you make informed decisions and ensure the safety and preservation of your trees.

Specific Action Steps for Responsible Tree Removal

When it comes to responsible tree removal, there are three key points you need to consider. First, hiring certified arborists ensures that the job is done by professionals who have the necessary knowledge and skills. Second, obtaining the necessary permits is crucial to ensure compliance with local regulations and to avoid any legal issues. Lastly, proper disposal methods must be employed to ensure the safe and environmentally-friendly removal of the tree. By following these action steps, you can ensure that tree removal is done responsibly and efficiently.

Hiring Certified Arborists

Hiring certified arborists can ensure that the fallen tree is safely and professionally removed. Certified arborists possess the necessary qualifications and expertise to handle tree removals efficiently. These professionals undergo rigorous training and must pass comprehensive exams to obtain certification. By hiring a certified arborist, you can be confident that they have the knowledge and skills to assess the situation, determine the best course of action, and execute the removal process safely. While the cost of hiring arborists may vary depending on factors such as tree size and complexity of the removal, it is a worthwhile investment to ensure the job is done correctly. Once the certified arborist has assessed the fallen tree and provided an estimate, the next step in the process is obtaining necessary permits to proceed with the removal.

Obtaining Necessary Permits

To ensure a smooth removal process, you should contact your local government office to obtain the necessary permits for tree removal. Obtaining permits is an essential step in adhering to environmental regulations and ensuring that the tree removal process is carried out legally and responsibly. These permits are designed to protect the environment and preserve the natural beauty of our surroundings. By obtaining the necessary permits, you are demonstrating your commitment to environmental stewardship and sustainable practices. Once you have obtained the permits, you can proceed with the removal of the tree knowing that you are in compliance with the regulations set forth by your local government. Proper disposal methods are vital in completing the tree removal process responsibly and safely.

Proper Disposal Methods

After obtaining the necessary permits, you can now focus on disposing of the tree responsibly and safely. Proper disposal methods are essential to minimize the environmental impact. One option is to hire a professional tree removal service that specializes in eco-friendly practices. They can chip the tree into mulch, which can be used for landscaping or composting. Another method is to contact your local waste management facility or municipality to inquire about tree disposal programs. Some areas offer curbside pickup or drop-off locations where you can leave the tree for proper processing. It’s important to consider the environmental impact when choosing a disposal method. By opting for eco-friendly options, you can help reduce waste and promote sustainability.

Frequently Asked Questions

Removing a tree without permission can have serious legal consequences. It may result in property damage and you could be held responsible for any resulting damages. Always obtain proper authorization before removing a tree.

How Can I Determine if a Tree Is Diseased or Damaged and in Need of Removal?

To determine if a tree needs removal, assess its health using a checklist. Look for signs of disease, damage, or decay. If the tree poses a risk, take action promptly. Remember, a healthy tree is like a pillar of strength in your landscape.

Are There Any Alternative Methods of Tree Removal That Are More Environmentally Friendly?

Environmentally friendly tree removal methods have several benefits, including preserving the surrounding ecosystem and reducing carbon emissions. By using techniques like tree felling with minimal impact or tree translocation, you can ensure responsible removal while minimizing environmental harm.

What Steps Should I Take to Ensure That the Tree Removal Process Does Not Harm Nearby Structures or Landscaping?

To prevent damage during tree removal, hire professional services. Start by assessing the proximity of structures and landscaping. Clear the area, protect vulnerable elements, and use proper equipment and techniques. Safety first.

Are There Any Potential Liabilities or Risks Associated With Hiring a Tree Removal Company?

When hiring a tree removal company, it is important to be aware of potential risks and liability concerns. Understanding the potential dangers involved can help you make an informed decision and mitigate any potential legal or financial issues.

If you need a tree service in Utah, you can call:
Truco Services, Inc.
4640 Commerce Drive
Murray, Utah 84107
(801) 466-8044
https://truetreeservices.com/
Tree Doctor

Tree Doctor

A Tree Doctor, tree surgeon, or (less commonly) arboriculturist, is a professional in the practice of arboriculture, which is the cultivation, management, and study of individual trees, shrubs, vines, and other perennial woody plants in dendrology and horticulture.

Tree doctors generally focus on the health and safety of individual plants and trees, rather than managing forests (the domains of forestry and silviculture) or harvesting wood. A tree doctor’s scope of work is therefore distinct from that of either a forester or a logger, though the professions share much in common.

The following are signs that a tree should be examined by a Tree Doctor Specialist:

• Leaves appearing later than usual
• Leaves falling off earlier than normal
• Discolored leaves or leaves without veins or with odd nodules
• Bark that forms bumps or is split, cracked or peeling
• Dead branches near the top of the tree
• Fungus growing around the trunk, mushrooms forming around roots or twigs growing from the trunk

A tree doctor may conduct a variety of tests to determine the best course of action, including a soil analysis. For proper growth, trees need soil that contains a particular balance of 15 mineral elements. The tree doctor may also test soil acidity or alkalinity. Fertilizer or soil amendments may make the soil a healthier tree environment.

Sometimes, no treatment is enough to save a tree. Reasons for removing one include serious root or trunk problems or structural defects that could cause the tree to topple in a high wind.

If you’re thinking of hiring a tree doctor, contact well-reviewed local tree service companies and ask if they have a tree doctor on staff. Consider the individual’s level of education, certification and experience, as well as the company’s online reputation with other consumers.

A tree doctor, tree surgeon, or (less commonly) arboriculturist, is a professional in the practice of arboriculture, which is the cultivation, management, and study of individual trees, shrubs, vines, and other perennial woody plants in dendrology and horticulture.

Tree doctors generally focus on the health and safety of individual plants and trees, rather than managing forests or harvesting wood (forestry or silviculture). A tree doctor’s scope of work is therefore distinct from that of either a forester or a logger.

Scope of work

In order for tree doctors to work near power wires, either additional training is required or they need to be certified as a Qualified Line Clearance Tree doctor or Utility Tree doctor (there may be different terminology for various countries). There is a variety of minimum distances that must be kept from power wires depending on voltage, however the common distance for low voltage lines in urban settings is 10 feet (about 3 metres).

Tree doctors who climb (as not all do) can use a variety of techniques to ascend into the tree. The least invasive, and most popular technique used is to ascend on rope. There are two common methods of climbing, Single Rope System (SRS) and Moving Rope System (MRS). When personal safety is an issue, or the tree is being removed, tree doctors may use ‘spikes’, (also known as ‘gaffs’ or ‘spurs’) attached to their chainsaw boots with straps to ascend and work. Spikes wound the tree, leaving small holes where each step has been.

An tree doctor’s work may involve very large and complex trees, or ecological communities and their abiotic components in the context of the landscape ecosystem. These may require monitoring and treatment to ensure they are healthy, safe, and suitable to property owners or community standards. This work may include some or all of the following: planting; transplanting; pruning; structural support; preventing, or diagnosing and treating phytopathology or parasitism; preventing or interrupting grazing or predation; installing lightning protection; and removing vegetation deemed as hazardous, an invasive species, a disease vector, or a weed.

Tree doctors may also plan, consult, write reports and give legal testimony. While some aspects of this work are done on the ground or in an office, much of it is done by tree doctors who perform tree services and who climb the trees with ropes, harnesses and other equipment. Lifts and cranes may be used too. The work of all tree doctors is not the same. Some may just provide a consulting service; others may perform climbing, pruning and planting: whilst others may provide a combination of all of these services.

Qualifications

Tree doctors gain qualifications to practice arboriculture in a variety of ways and some tree doctors are more qualified than others. Experience working safely and effectively in and around trees is essential. Tree doctors tend to specialize in one or more disciplines of arboriculture, such as diagnosis and treatment of pests, diseases and nutritional deficiencies in trees, climbing and pruning, cabling and lightning protection, or perhaps consultation and report writing. All these disciplines are related and some tree doctors are very well experienced in all areas of tree work, but not all tree doctors have the training or experience to properly practice every discipline.

Tree doctors choose to pursue formal certification, which is available in some countries and varies somewhat by location. An tree doctor who holds certification in one or more disciplines may be expected to participate in rigorous continuing education requirements to ensure continuous improvement of skills and techniques.

Cultural practices

Tree doctors may use specialized vehicles to gain access to trees, such as this Unimog equipped with a power take-off driven wood chipper.

Trees in urban landscape settings are often subject to disturbances, whether human or natural, both above and below ground. They may require care to improve their chances of survival following damage from either biotic or abiotic causes. Tree doctors can provide appropriate solutions, such as pruning trees for health and good structure, for aesthetic reasons, and to permit people to walk under them (a technique often referred to as “crown raising”), or to keep them away from wires, fences and buildings (a technique referred to as “crown reduction”). Timing and methods of treatment depend on the species of tree and the purpose of the work. To determine the best practices, a thorough knowledge of local species and environments is essential.

There can be a vast difference between the techniques and practices of professional tree doctors and those of inadequately trained tree workers who simply “trim trees”. Some commonly offered “services” are considered unacceptable by modern arboricultural standards and may seriously damage, disfigure, weaken, or even kill trees. One such example is tree topping, lopping, or “hat-racking”, where entire tops of trees or main stems are removed, generally by cross-cutting the main stem(s) or leaders, leaving large unsightly stubs. Trees that manage to survive such treatment are left prone to a spectrum of detrimental effects, including vigorous but weakly attached regrowth, pest susceptibility, pathogen intrusion, and internal decay.

Pruning should only be done with a specific purpose in mind. Every cut is a wound, and every leaf lost is removal of some photosynthetic potential. Proper pruning can be helpful in many ways, but should always be done with the minimum amount of live tissue removed.

In recent years, research has proven that wound dressings such as paint, tar or other coverings are unnecessary and may harm trees. The coverings may encourage growth of decay-causing fungi. Proper pruning, by cutting through branches at the right location, can do more to limit decay than wound dressing.

Chemicals can be applied to trees for insect or disease control through soil application, stem injections or spraying. Compacted or disturbed soils can be improved in various ways.

Tree doctors can also assess trees to determine the health, structure, safety or feasibility within a landscape and in proximity to humans. Modern arboriculture has progressed in technology and sophistication from practices of the past. Many current practices are based on knowledge gained through recent research, including that of Alex Shigo, considered one “father” of modern arboriculture.

Legal issues

Depending on the jurisdiction, there may be a number of legal issues surrounding the practices of tree doctors, including boundary issues, public safety issues, “heritage” trees of community value; and “neighbor” issues such as ownership, obstruction of views, impacts of roots crossing boundaries, nuisance problems, disease or insect quarantines, and safety of nearby trees.

Tree doctors are frequently consulted to establish the factual basis of disputes involving trees, or by private property owners seeking to avoid legal liability through the duty of care. Tree doctors may be asked to assess the value of a tree in the process of an insurance claim for trees damaged or destroyed, or to recover damages resulting from tree theft or vandalism. In cities with tree preservation orders an tree doctor’s evaluation of tree hazard may be required before a property owner may remove a tree, or to assure the protection of trees in development plans and during construction operations. Carrying out work on protected trees and hedges is illegal without express permission from local authorities, and can result in legal action including fines. Homeowners who have entered into contracts with a homeowner’s association may need an tree doctor’s professional opinion of a hazardous condition prior to removing a tree, or may be obligated to assure the protection of the views of neighboring properties prior to planting a tree or in the course of pruning. Tree doctors may be consulted in forensic investigations where the evidence of a crime can be determined within the growth rings of a tree, for example. Tree doctors may be engaged by one member of a dispute in order to identify factual information about trees useful to that member of the dispute, or they can be engaged as an expert witness providing unbiased scientific knowledge in a court case. Homeowners associations seeking to write restrictive covenants, or legislative bodies seeking to write laws involving trees, may seek the counsel of tree doctors in order to avoid future difficulties.

Cedar City, Utah

About Cedar City, Utah

Cedar City is the largest city in Iron County, Utah, United States. It is located 250 miles (400 km) south of Salt Lake City, and 170 miles (270 km) north of Las Vegas on Interstate 15. It is the home of Southern Utah University, the Utah Shakespeare Festival, the Utah Summer Games, the Simon Fest Theatre Co., and other events. As of the 2010 census the city had a population of 28,857, up from 20,257 in 2000. As of 2019, the estimated population was 34,764.

Bus Stops in Cedar City, Utah to Truco Services, Inc.

Bus Stop in Greyhound: Bus Station Cedar City, Utah to Truco Services, Inc.

Bus Stop in Cedar City Texaco Cedar City, Utah to Truco Services, Inc.

Bus Stop in Cedar City Public Transportation Cedar City, Utah to Truco Services, Inc.

Bus Stop in Flixbus Cedar City, Utah to Truco Services, Inc.

Bus Stop in 120 W Paradise Rd - Smith's Cedar City, Utah to Truco Services, Inc.

Bus Stop in Cedar City Exit 59 UT Cedar City, Utah to Truco Services, Inc.

Bus Stop in Iron County Bus Garage Cedar City, Utah to Truco Services, Inc.

Bus Stop in 1270 S Fir St Cedar City, Utah to Truco Services, Inc.

Bus Stop in 600 N Main St- Visitor's Center Cedar City, Utah to Truco Services, Inc.

Bus Stop in 85 N College Way Cedar City, Utah to Truco Services, Inc.

Bus Stop in 1471 N Cedar Blvd Cedar City, Utah to Truco Services, Inc.

Bus Stop in 2400 N Freeway Drive Cedar City, Utah to Truco Services, Inc.

Map of Cedar City, Utah

Driving Directions in Cedar City, Utah to Truco Services, Inc.

Driving Directions from Apex Tree Professionals to 4640 Commerce Dr, Murray, UT 84107, USA

Driving Directions from TMS Trees to 4640 Commerce Dr, Murray, UT 84107, USA

Driving Directions from Old Tree Gun Blanks to 4640 Commerce Dr, Murray, UT 84107, USA

Driving Directions from Tree Removal Cedar City Utah to 4640 Commerce Dr, Murray, UT 84107, USA

Driving Directions from Gemi Tree Tree Trimming and Removal to 4640 Commerce Dr, Murray, UT 84107, USA

Driving Directions from Lifetime Tree Service LLC to 4640 Commerce Dr, Murray, UT 84107, USA

Reviews for Truco Services, Inc. Cedar City, Utah

Truco Services, Inc. Reviews

Marissa Burton

starstarstarstarstar (5)

TruCo is a great company to work with for your commercial landscaping and snow removal needs! Rob is excellent to work with. He is very timely in providing quotes and has a lot of great feedback and suggestions to provide on what will look great, fit within your budget, and is knowledgeable on plants that will thrive with Utah's ever changing weather conditions. I have been impressed with TruCo's landscape maintenance as well as landscape projects which have had a quick turnaround time. I would highly recommend using TruCo!

Truco Services, Inc. Reviews

Yvonne Olson

starstarstarstarstar (5)

I experienced excellent all around service from landscape improvement design, scheduling and professional installation completed within the timeline we discussed. Rob, the manager does an excellent job of communicating, overseeing the install crew and making sure his customers are 100% satisfied with the job. Highly recommend TruCo for all landscaping needs.

Truco Services, Inc. Reviews

Heather Whiting

starstarstarstarstar (5)

We hired TruCo to do a new install of sprinklers, sod, spigot, and bury downspouts. We even have a wifi transmitter for our control box we can access from an app on our phones! We absolutely love the professionalism and quality of their work!! Our sales rep Pete was the best to work with, we highly recommend him to anyone in the market for landscaping. It was awesome seeing the finished results and we're incredibly excited to enjoy our new space!

Truco Services, Inc. Reviews

Jan Merideth

starstarstarstarstar (5)

TruCo installed all of our plants, trees and shrubs, drip lines, and boulders. Then they installed our amazing beautiful firepit. We loved the results and they guarantee all plants and trees up to a year. They were great and easy to work with. They listened to our needs and wants and met them 100%. Our HOA sent us a letter telling us they appreciate all the work and the way our yard looks and let us know we added value to the property. Win/Win

Truco Services, Inc. Reviews

Michael Sorensen

starstarstarstarstar (1)

Avoid working for this company. They will promise you things to get you in, then tell you there is no documentation about said things. Extremely unprofessional. Update to response - please dont try to justify. PTO was promised by the hiring manager on day 1 due to the conditions. Your company refusing to honor the agreement and tell me that there is no documentation is the problem. I quit after being told that you would not honor the PTO, not before.

Tree Doctor Near Me

Tree Doctor Near Me

Tree Doctor Near Me

A Tree Doctor, tree surgeon, or (less commonly) arboriculturist, is a professional in the practice of arboriculture, which is the cultivation, management, and study of individual trees, shrubs, vines, and other perennial woody plants in dendrology and horticulture.

Tree doctors generally focus on the health and safety of individual plants and trees, rather than managing forests (the domains of forestry and silviculture) or harvesting wood. A tree doctor’s scope of work is therefore distinct from that of either a forester or a logger, though the professions share much in common.

The following are signs that a tree should be examined by a Tree Doctor Specialist:

• Leaves appearing later than usual
• Leaves falling off earlier than normal
• Discolored leaves or leaves without veins or with odd nodules
• Bark that forms bumps or is split, cracked or peeling
• Dead branches near the top of the tree
• Fungus growing around the trunk, mushrooms forming around roots or twigs growing from the trunk

A tree doctor may conduct a variety of tests to determine the best course of action, including a soil analysis. For proper growth, trees need soil that contains a particular balance of 15 mineral elements. The tree doctor may also test soil acidity or alkalinity. Fertilizer or soil amendments may make the soil a healthier tree environment.

Sometimes, no treatment is enough to save a tree. Reasons for removing one include serious root or trunk problems or structural defects that could cause the tree to topple in a high wind.

If you’re thinking of hiring a tree doctor, contact well-reviewed local tree service companies and ask if they have a tree doctor on staff. Consider the individual’s level of education, certification and experience, as well as the company’s online reputation with other consumers.

A tree doctor, tree surgeon, or (less commonly) arboriculturist, is a professional in the practice of arboriculture, which is the cultivation, management, and study of individual trees, shrubs, vines, and other perennial woody plants in dendrology and horticulture.

Tree doctors generally focus on the health and safety of individual plants and trees, rather than managing forests or harvesting wood (forestry or silviculture). A tree doctor’s scope of work is therefore distinct from that of either a forester or a logger.

Scope of work

In order for tree doctors to work near power wires, either additional training is required or they need to be certified as a Qualified Line Clearance Tree doctor or Utility Tree doctor (there may be different terminology for various countries). There is a variety of minimum distances that must be kept from power wires depending on voltage, however the common distance for low voltage lines in urban settings is 10 feet (about 3 metres).

Tree doctors who climb (as not all do) can use a variety of techniques to ascend into the tree. The least invasive, and most popular technique used is to ascend on rope. There are two common methods of climbing, Single Rope System (SRS) and Moving Rope System (MRS). When personal safety is an issue, or the tree is being removed, tree doctors may use ‘spikes’, (also known as ‘gaffs’ or ‘spurs’) attached to their chainsaw boots with straps to ascend and work. Spikes wound the tree, leaving small holes where each step has been.

An tree doctor’s work may involve very large and complex trees, or ecological communities and their abiotic components in the context of the landscape ecosystem. These may require monitoring and treatment to ensure they are healthy, safe, and suitable to property owners or community standards. This work may include some or all of the following: planting; transplanting; pruning; structural support; preventing, or diagnosing and treating phytopathology or parasitism; preventing or interrupting grazing or predation; installing lightning protection; and removing vegetation deemed as hazardous, an invasive species, a disease vector, or a weed.

Tree doctors may also plan, consult, write reports and give legal testimony. While some aspects of this work are done on the ground or in an office, much of it is done by tree doctors who perform tree services and who climb the trees with ropes, harnesses and other equipment. Lifts and cranes may be used too. The work of all tree doctors is not the same. Some may just provide a consulting service; others may perform climbing, pruning and planting: whilst others may provide a combination of all of these services.

Qualifications

Tree doctors gain qualifications to practice arboriculture in a variety of ways and some tree doctors are more qualified than others. Experience working safely and effectively in and around trees is essential. Tree doctors tend to specialize in one or more disciplines of arboriculture, such as diagnosis and treatment of pests, diseases and nutritional deficiencies in trees, climbing and pruning, cabling and lightning protection, or perhaps consultation and report writing. All these disciplines are related and some tree doctors are very well experienced in all areas of tree work, but not all tree doctors have the training or experience to properly practice every discipline.

Tree doctors choose to pursue formal certification, which is available in some countries and varies somewhat by location. An tree doctor who holds certification in one or more disciplines may be expected to participate in rigorous continuing education requirements to ensure continuous improvement of skills and techniques.

Cultural practices

Tree doctors may use specialized vehicles to gain access to trees, such as this Unimog equipped with a power take-off driven wood chipper.

Trees in urban landscape settings are often subject to disturbances, whether human or natural, both above and below ground. They may require care to improve their chances of survival following damage from either biotic or abiotic causes. Tree doctors can provide appropriate solutions, such as pruning trees for health and good structure, for aesthetic reasons, and to permit people to walk under them (a technique often referred to as “crown raising”), or to keep them away from wires, fences and buildings (a technique referred to as “crown reduction”). Timing and methods of treatment depend on the species of tree and the purpose of the work. To determine the best practices, a thorough knowledge of local species and environments is essential.

There can be a vast difference between the techniques and practices of professional tree doctors and those of inadequately trained tree workers who simply “trim trees”. Some commonly offered “services” are considered unacceptable by modern arboricultural standards and may seriously damage, disfigure, weaken, or even kill trees. One such example is tree topping, lopping, or “hat-racking”, where entire tops of trees or main stems are removed, generally by cross-cutting the main stem(s) or leaders, leaving large unsightly stubs. Trees that manage to survive such treatment are left prone to a spectrum of detrimental effects, including vigorous but weakly attached regrowth, pest susceptibility, pathogen intrusion, and internal decay.

Pruning should only be done with a specific purpose in mind. Every cut is a wound, and every leaf lost is removal of some photosynthetic potential. Proper pruning can be helpful in many ways, but should always be done with the minimum amount of live tissue removed.

In recent years, research has proven that wound dressings such as paint, tar or other coverings are unnecessary and may harm trees. The coverings may encourage growth of decay-causing fungi. Proper pruning, by cutting through branches at the right location, can do more to limit decay than wound dressing.

Chemicals can be applied to trees for insect or disease control through soil application, stem injections or spraying. Compacted or disturbed soils can be improved in various ways.

Tree doctors can also assess trees to determine the health, structure, safety or feasibility within a landscape and in proximity to humans. Modern arboriculture has progressed in technology and sophistication from practices of the past. Many current practices are based on knowledge gained through recent research, including that of Alex Shigo, considered one “father” of modern arboriculture.

Legal issues

Depending on the jurisdiction, there may be a number of legal issues surrounding the practices of tree doctors, including boundary issues, public safety issues, “heritage” trees of community value; and “neighbor” issues such as ownership, obstruction of views, impacts of roots crossing boundaries, nuisance problems, disease or insect quarantines, and safety of nearby trees.

Tree doctors are frequently consulted to establish the factual basis of disputes involving trees, or by private property owners seeking to avoid legal liability through the duty of care. Tree doctors may be asked to assess the value of a tree in the process of an insurance claim for trees damaged or destroyed, or to recover damages resulting from tree theft or vandalism. In cities with tree preservation orders an tree doctor’s evaluation of tree hazard may be required before a property owner may remove a tree, or to assure the protection of trees in development plans and during construction operations. Carrying out work on protected trees and hedges is illegal without express permission from local authorities, and can result in legal action including fines. Homeowners who have entered into contracts with a homeowner’s association may need an tree doctor’s professional opinion of a hazardous condition prior to removing a tree, or may be obligated to assure the protection of the views of neighboring properties prior to planting a tree or in the course of pruning. Tree doctors may be consulted in forensic investigations where the evidence of a crime can be determined within the growth rings of a tree, for example. Tree doctors may be engaged by one member of a dispute in order to identify factual information about trees useful to that member of the dispute, or they can be engaged as an expert witness providing unbiased scientific knowledge in a court case. Homeowners associations seeking to write restrictive covenants, or legislative bodies seeking to write laws involving trees, may seek the counsel of tree doctors in order to avoid future difficulties.

Tooele, Utah

About Tooele, Utah

Tooele is a city in Tooele County in the U.S. state of Utah. The population was 35,742 at the 2020 census. It is the county seat of Tooele County. Located approximately 30 minutes southwest of Salt Lake City, Tooele is known for Tooele Army Depot, for its views of the nearby Oquirrh Mountains and the Great Salt Lake.

Bus Stops in Tooele, Utah to Truco Services, Inc.

Bus Stop in Main St @ 383 N Tooele, Utah to Truco Services, Inc.

Bus Stop in Main St @ 814 N Tooele, Utah to Truco Services, Inc.

Bus Stop in 400 S @ 198 W Tooele, Utah to Truco Services, Inc.

Bus Stop in Main St @ 1236 N Tooele, Utah to Truco Services, Inc.

Bus Stop in UTA Tooele bus garage Tooele, Utah to Truco Services, Inc.

Bus Stop in Main St @ 307 N Tooele, Utah to Truco Services, Inc.

Bus Stop in Main St @ 54 S Tooele, Utah to Truco Services, Inc.

Bus Stop in Main St @ 817 N Tooele, Utah to Truco Services, Inc.

Bus Stop in 200 w @ 305 S Tooele, Utah to Truco Services, Inc.

Bus Stop in Main St @ 956 N Tooele, Utah to Truco Services, Inc.

Bus Stop in Main St @ 1275 N Tooele, Utah to Truco Services, Inc.

Bus Stop in 200 w @ 60 N Tooele, Utah to Truco Services, Inc.

Map of Tooele, Utah

Driving Directions in Tooele, Utah to Truco Services, Inc.

Driving Directions from Ivester Tree, LLC to 4640 Commerce Dr, Murray, UT 84107, USA

Driving Directions from Utah Aspen Tree Experts to 4640 Commerce Dr, Murray, UT 84107, USA

Driving Directions from Tooele Tree and Stump, LLC to 4640 Commerce Dr, Murray, UT 84107, USA

Driving Directions from Trent's Tree Care, LLC to 4640 Commerce Dr, Murray, UT 84107, USA

Driving Directions from Baxter Tree Service to 4640 Commerce Dr, Murray, UT 84107, USA

Driving Directions from Tree Service to 4640 Commerce Dr, Murray, UT 84107, USA

Reviews for Truco Services, Inc. Tooele, Utah

Truco Services, Inc. Reviews

Marissa Burton

starstarstarstarstar (5)

TruCo is a great company to work with for your commercial landscaping and snow removal needs! Rob is excellent to work with. He is very timely in providing quotes and has a lot of great feedback and suggestions to provide on what will look great, fit within your budget, and is knowledgeable on plants that will thrive with Utah's ever changing weather conditions. I have been impressed with TruCo's landscape maintenance as well as landscape projects which have had a quick turnaround time. I would highly recommend using TruCo!

Truco Services, Inc. Reviews

Yvonne Olson

starstarstarstarstar (5)

I experienced excellent all around service from landscape improvement design, scheduling and professional installation completed within the timeline we discussed. Rob, the manager does an excellent job of communicating, overseeing the install crew and making sure his customers are 100% satisfied with the job. Highly recommend TruCo for all landscaping needs.

Truco Services, Inc. Reviews

Heather Whiting

starstarstarstarstar (5)

We hired TruCo to do a new install of sprinklers, sod, spigot, and bury downspouts. We even have a wifi transmitter for our control box we can access from an app on our phones! We absolutely love the professionalism and quality of their work!! Our sales rep Pete was the best to work with, we highly recommend him to anyone in the market for landscaping. It was awesome seeing the finished results and we're incredibly excited to enjoy our new space!

Truco Services, Inc. Reviews

Jan Merideth

starstarstarstarstar (5)

TruCo installed all of our plants, trees and shrubs, drip lines, and boulders. Then they installed our amazing beautiful firepit. We loved the results and they guarantee all plants and trees up to a year. They were great and easy to work with. They listened to our needs and wants and met them 100%. Our HOA sent us a letter telling us they appreciate all the work and the way our yard looks and let us know we added value to the property. Win/Win

Truco Services, Inc. Reviews

Michael Sorensen

starstarstarstarstar (1)

Avoid working for this company. They will promise you things to get you in, then tell you there is no documentation about said things. Extremely unprofessional. Update to response - please dont try to justify. PTO was promised by the hiring manager on day 1 due to the conditions. Your company refusing to honor the agreement and tell me that there is no documentation is the problem. I quit after being told that you would not honor the PTO, not before.