How to Seed the Lawn After Tree Removal
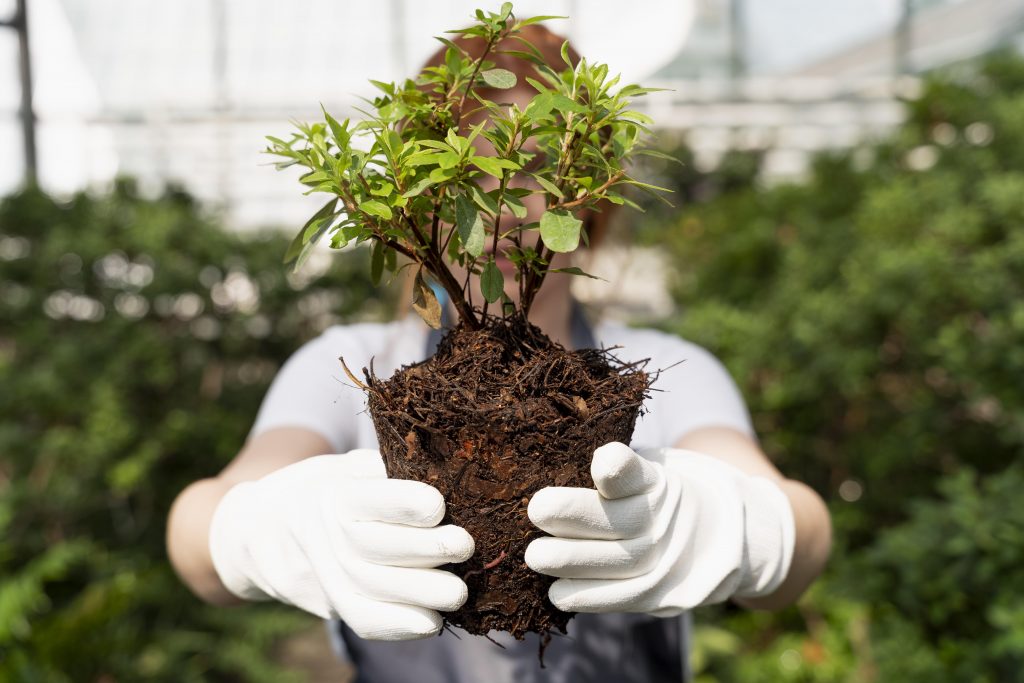
Are you ready to transform your yard after removing that old tree? Well, get ready to roll up your sleeves and get your hands dirty because we’ve got the ultimate guide on how to seed your lawn after tree removal. In this article, we’ll walk you through the step-by-step process of rejuvenating your grass and turning your yard into a lush green oasis. So grab your shovel, put on your gardening gloves, and let’s get started!

Key Takeaways

Introduction: Lawn Seeding Techniques After Tree Removal

Seeding the lawn after tree removal can be done using a variety of techniques. When it comes to lawn seeding techniques, there are a few options to consider. Here are four methods that can help you achieve a healthy and vibrant lawn:

  1. Overseeding: This technique involves spreading grass seed over an existing lawn to fill in bare patches and improve overall density. It is a great way to rejuvenate your lawn after tree removal.
  2. Hydroseeding: Hydroseeding is a process where a mixture of grass seed, fertilizer, mulch, and water is sprayed onto the soil. This method promotes faster germination and provides better coverage, resulting in a thicker and more uniform lawn.
  3. Slice seeding: In this technique, a machine is used to create small grooves in the soil and deposit grass seed directly into them. This method ensures good seed-to-soil contact, increasing the chances of successful germination.
  4. Hand seeding: If you have a small lawn or prefer a more hands-on approach, hand seeding is a viable option. Simply spread the grass seed evenly over the soil by hand and lightly rake it in.

Once you have chosen a seeding technique, it is crucial to take proper care of your lawn post-seeding. This includes regular watering, mowing at the appropriate height, and avoiding heavy foot traffic until the new grass is well-established.

Now that you know the various lawn seeding techniques and the importance of post-seeding care, let’s delve into the history of lawn seeding techniques after tree removal.

History of Lawn Seeding Techniques After Tree Removal

When it comes to establishing a healthy and lush lawn after removing a tree, you might be interested in learning about the various techniques that have been used over time. The history of lawn seeding techniques after tree removal is a fascinating one, filled with innovation and a quest for the best practices. In the past, people would simply remove the tree stump and plant grass seeds directly on the bare ground. However, this method often resulted in uneven growth and patchy areas. Over time, experts discovered that preparing the soil before seeding is crucial for success. Traits such as proper soil aeration, removing any remaining tree roots, and adding organic matter to improve soil fertility became common practices. Nowadays, the best practice for seeding a lawn after tree removal involves several steps, including soil testing, choosing the right grass seed, and proper watering and maintenance. By following these tips, you can ensure the success of your lawn seeding project and enjoy a beautiful, healthy lawn for years to come.

Tips

When it comes to creating a lush and healthy lawn, choosing the right seeds is crucial. You want to select seeds that are well-suited to your climate and soil type, as this will ensure optimal growth and resilience. Additionally, preparing the soil is just as important as choosing the right seeds, as it provides a solid foundation for the grass to grow. This involves removing any weeds or debris, aerating the soil, and adding necessary nutrients. Once your seeds are planted and the soil is prepared, proper watering and maintenance are key to ensure successful growth. Regular watering, as well as mowing and fertilizing as needed, will help your lawn thrive and maintain its lush appearance.

Choosing the Right Seeds

To choose the right seeds for your lawn, you’ll want to consider factors like the amount of sunlight and type of soil in your yard. There are different seed varieties available, each suited for specific conditions. For areas with full sunlight, opt for sun-loving grass seeds like Bermuda or Kentucky bluegrass. If your lawn is mostly shaded, choose shade-tolerant varieties such as fine fescue or creeping red fescue. It’s also important to consider the planting method that best suits your needs. You can choose to sow seeds directly onto the soil, or you may prefer to use a seed spreader for more even distribution. Now that you have an understanding of seed varieties and planting methods, let’s move on to preparing the soil for optimal growth.

Preparing the Soil

Once you’ve chosen the right seeds for your yard, it’s important to prepare the soil properly for optimal growth. Before seeding, it’s recommended to conduct a soil test to determine its pH level and nutrient content. This will help you understand what amendments, such as lime or fertilizer, are needed to create a favorable environment for your new grass. Additionally, weed control is essential to prevent unwanted plants from competing with your lawn. Remove any existing weeds by hand or use an appropriate herbicide, following the instructions carefully. Once the soil is tested and weed-free, it’s time to prepare it for seeding. Start by loosening the top few inches of soil, either by tilling or raking, to create a fine and level surface. This will ensure good seed-to-soil contact and allow the roots to penetrate easily. With the soil prepared, you can now move on to the next step of watering and maintenance to help your newly seeded lawn thrive.

Watering and Maintenance

Make sure you’re watering your newly seeded yard regularly to keep the soil moist and promote healthy growth. Proper watering techniques are crucial for successful lawn maintenance. After seeding, it’s important to water the area frequently, but not excessively. Watering too much can lead to shallow root growth and weak grass. Aim to water your lawn deeply, allowing the water to penetrate the soil at least 6 inches. This will encourage deep root development and make your lawn more drought-resistant. It’s best to water in the early morning or late afternoon when the temperatures are cooler, to minimize evaporation. Remember to adjust your watering schedule based on weather conditions, as rain can affect the amount of water your lawn needs. Now that you understand the importance of watering, let’s move on to the traits and best practices for maintaining a healthy lawn.

Traits and Best Practices

You should always consider the traits and best practices when seeding your lawn after tree removal. Seeding your lawn is an essential step in restoring its beauty and ensuring its health. To achieve the best results, there are certain practices you should follow and common mistakes to avoid.

Firstly, one of the best practices is to choose the right grass seed for your specific lawn conditions. Consider factors such as sunlight exposure, soil type, and climate when selecting the seed. This will ensure that the new grass grows well and blends seamlessly with the existing lawn.

Another important practice is to prepare the soil properly before seeding. Common mistakes include neglecting to remove tree stumps or roots, which can hinder the growth of new grass. It is also crucial to loosen the soil and remove any debris or rocks to create a favorable environment for the seed to germinate.

Once you have prepared the soil, it is time to spread the seed evenly. This can be done by hand or using a spreader. Be sure to follow the recommended seeding rate for the specific seed you have chosen. Over-seeding or under-seeding can lead to uneven growth and patchy areas in your lawn.

Key Steps

Now that you understand the traits and best practices for lawn seeding after tree removal, let’s dive into the key steps you need to take. By following these steps, you can ensure that your newly seeded lawn flourishes and thrives.

Here are the key steps to consider:

Goals

To achieve your desired outcome, it’s important to establish clear goals for your newly seeded grass. By setting specific goals, you can create a lawn seeding timeline and ensure proper post-seeding care. Here’s a breakdown of the goals you should aim for:

Goals Timeline
Germination 7-21 days
Root development 4-6 weeks
Establishment 8-12 weeks

During the germination phase, your focus should be on providing adequate moisture and protection to the newly seeded area. Watering lightly and frequently will help keep the soil consistently moist. Once the grass starts to grow, shift your attention to root development. This is the time to gradually reduce watering frequency and increase the depth to encourage deep root growth. Finally, the establishment phase is crucial for the grass to become resilient and healthy. Continue to provide regular irrigation and mow the grass when it reaches the recommended height.

Habits for Successful Lawn Seeding After Tree Removal

Establishing a consistent watering schedule and providing adequate nutrients are essential for the successful growth of newly seeded grass after a tree is removed. To ensure the best results, here are some tips for success and common challenges to be aware of.

Firstly, it is crucial to water the newly seeded area regularly. Watering deeply and frequently will promote root development and prevent the soil from drying out. It is recommended to water the area at least once a day, keeping the soil moist but not waterlogged.

In addition to regular watering, providing adequate nutrients is vital for the healthy growth of the new grass. Applying a high-quality fertilizer specifically formulated for newly seeded lawns will help promote strong root growth and lush green grass. Be sure to follow the instructions on the fertilizer package for the correct application rate.

One common challenge when seeding a lawn after tree removal is weed competition. Weeds can quickly invade the bare soil and compete with the new grass for nutrients and water. To prevent this, consider using a pre-emergent herbicide before seeding to suppress weed growth.

Now, let’s dive into a real-life story that demonstrates the importance of these habits for successful lawn seeding after tree removal.

A Real-Life Story

Providing consistent watering and proper nutrients are crucial for the successful growth of newly seeded grass after removing a tree, as demonstrated by this real-life story. A homeowner, let’s call him John, recently had a large tree removed from his front yard. He decided to seed the area with grass to restore the beauty of his lawn. John followed the recommended steps for lawn seeding after tree removal, including preparing the soil, spreading the grass seed evenly, and covering it with a thin layer of straw. However, what truly made a difference in the success of his lawn was his dedication to watering and providing the necessary nutrients.

John diligently watered the newly seeded area every day to keep the soil moist. He also applied a slow-release fertilizer to provide the grass with the nutrients it needed to grow strong and healthy. As a result of his efforts, the grass started germinating within a week, and after a few months, a lush green lawn replaced the bare patch where the tree once stood.

This real-life story is just one of many success stories when it comes to seeding grass after tree removal. It serves as a reminder of the importance of consistent watering and proper nutrients in achieving a vibrant and thriving lawn. Now, let’s delve into some quotes from experts in the field who can further guide us in this process.

Quotes

One expert in the field emphasizes the importance of consistent watering and proper nutrients for a successful grass growth. According to this expert, “Watering is crucial for newly seeded lawns. Keep the soil consistently moist, but avoid overwatering as it can lead to disease and shallow root growth.” Additionally, providing the right nutrients is essential. The expert suggests, “Using a balanced fertilizer with a high phosphorus content can promote root development and overall grass health.”

Another expert shares some secrets for successful lawn seeding. They say, “Before seeding, make sure to prepare the soil properly. Remove any debris, rocks, or old grass to create a smooth surface for the new seeds.” They also advise, “Aeration can greatly improve seed germination. It allows better water and nutrient penetration into the soil, resulting in healthier grass growth.”

It’s important to note that these quotes highlight the significance of consistent watering, proper nutrients, soil preparation, and aeration when seeding a lawn. These secrets, when followed correctly, can greatly increase the chances of a successful grass growth.

Secrets

Now that you’ve gathered inspiration from some insightful quotes, let’s dive into the secrets of successful lawn seeding techniques after tree removal. Seeding your lawn can be a daunting task, but with the right techniques and factors for success, you can achieve a lush and thriving lawn in no time.

One important factor to consider is the timing of your seeding. The best time to seed your lawn is in the early fall or spring when the soil temperature is ideal for seed germination. This will give your grass the best chance to establish strong roots before the harsh conditions of summer or winter.

Another key secret is proper soil preparation. Before seeding, make sure to remove any debris or tree roots left behind from the removal process. Loosen the soil to a depth of six inches and mix in compost to improve drainage and nutrient levels.

When it comes to seeding, make sure to choose the right type of grass seed for your region and soil conditions. Spread the seed evenly using a seed spreader and lightly rake it into the soil for good seed-to-soil contact.

With these secrets in mind, you’re now ready to gain some valuable insights on lawn seeding techniques after tree removal.

Insights on Lawn Seeding Techniques After Tree Removal

When it’s time to seed your yard after removing a tree, it’s important to consider the timing and soil preparation for successful lawn seeding techniques. First, make sure to remove any debris left behind from the tree removal process, such as roots or rocks, as they can interfere with the growth of new grass. Once the area is clear, prepare the soil by loosening it with a garden rake or tiller. This will help create a favorable environment for the seeds to germinate.

Before seeding, check the weather forecast to ensure a few days of mild temperatures and minimal rainfall. This will give the grass seeds the best chance of establishing themselves without being washed away or damaged. After spreading the seeds evenly across the prepared soil, lightly rake them in to ensure good seed-to-soil contact.

To promote proper germination, watering is crucial. Keep the seeded area consistently moist, but avoid overwatering, as this can lead to fungal diseases and weak root development. Water the lawn daily, applying enough water to penetrate the top inch of soil. As the grass begins to grow, gradually reduce the frequency of watering while increasing the amount of water applied each time.

Post-seeding maintenance is essential for the success of your new lawn. Regularly mow the grass once it reaches a height of three to four inches, taking care not to remove more than one-third of the grass blades in a single mowing. Additionally, fertilize the lawn about six weeks after seeding to provide essential nutrients for healthy growth.

Benefits of Lawn Seeding Techniques After Tree Removal

To maximize the benefits of your lawn seeding techniques after removing a tree, it’s important to properly time the seeding process and prepare the soil accordingly. Seeding your lawn after tree removal has numerous advantages. Firstly, it helps to fill in the bare spots left behind by the tree’s roots, ensuring a more uniform and attractive lawn. Additionally, lawn seeding can help to prevent soil erosion, as the new grass roots will hold the soil in place and prevent it from washing away during heavy rain. Moreover, by seeding your lawn, you can improve the overall health and vitality of your grass, as the new seedlings will compete with weeds for resources and create a denser, healthier turf. Lastly, lawn seeding after tree removal can enhance the aesthetic appeal of your outdoor space, giving it a fresh and rejuvenated look. By implementing proper seeding techniques, such as using high-quality grass seed and providing adequate watering and fertilization, you can enjoy these benefits and have a lush, green lawn in no time. Moving forward, there are also valuable lessons to learn from this process.

Lessons

When it comes to choosing the right seeds for your lawn, there are a few key factors to consider. First, you need to determine the type of grass that is best suited for your climate and soil conditions. Next, consider the specific needs of your lawn, such as high traffic areas or shaded spots. Lastly, look for seeds that are certified and labeled for quality assurance. Once you have selected the right seeds, it is important to understand the time to germination. This can vary depending on the type of grass you have chosen, but generally, it takes between 7-21 days for seeds to germinate. During this time, it is crucial to provide proper care and attention to ensure successful growth. This includes watering regularly, avoiding foot traffic, and keeping the soil moist. Finally, after seeding your lawn, there are a few post-seeding care tips to keep in mind. Avoid mowing the lawn until the new grass has reached a height of at least 3 inches. Additionally, continue to water the lawn regularly to promote healthy growth and establish strong roots. Following these tips will help you achieve a lush and vibrant lawn that you can enjoy for years to come.

Choosing the Right Seeds

You’ll want to make sure you choose the right seeds for your lawn after tree removal. When it comes to seed varieties, there are a few factors to consider. First, think about the type of grass that is best suited for your climate and soil conditions. Common seed varieties include Bermuda grass, Kentucky bluegrass, and fescue. Each has its own characteristics, such as drought tolerance or shade tolerance. Next, consider the planting techniques. Before seeding, make sure the soil is properly prepared by removing any debris or old tree roots. Then, spread the seeds evenly using a broadcast spreader or by hand. Finally, lightly rake the seeds into the soil and water thoroughly. By choosing the right seeds and using proper planting techniques, you’ll give your lawn the best chance for success.

As you wait for the seeds to germinate, it’s important to understand the time it takes for them to sprout. The time to germination can vary depending on the type of grass you have chosen. For example, Bermuda grass typically germinates within 7-10 days, while Kentucky bluegrass may take 14-21 days. It’s important to be patient during this stage and provide the seeds with consistent moisture. Water the area regularly, keeping the soil moist but not waterlogged. Additionally, avoid walking on the newly seeded area to prevent disturbing the seeds. With proper care and attention, you’ll soon see green sprouts emerging from your lawn, signaling the successful germination of your chosen seeds.

Time to Germination

The time it takes for the seeds to germinate can vary depending on the type of grass you’ve chosen. Typically, most grasses take about 7-14 days to germinate, but some varieties may take up to 21 days. It’s important to be patient during this time, as the seeds need the right conditions to sprout and establish roots. While waiting for germination, it’s crucial to keep the soil consistently moist but not waterlogged. This will help the seeds absorb water and nutrients, promoting healthy growth. Once the grass starts to sprout, it’s a sign that the lawn recovery process has begun. From here, you can transition into the next section to learn about post-seeding care tips for maintaining a lush and thriving lawn.

Post-Seeding Care Tips

For optimal results, it’s essential to water your newly seeded grass regularly to keep the soil moist. After seeding your lawn, post-seeding care is crucial to ensure healthy growth and establish a lush, green turf. Once you’ve finished seeding, it’s recommended to water the area thoroughly, making sure the soil is consistently moist. This will aid in seed germination and prevent the soil from drying out. Continue watering the seeded area daily, keeping the soil moist but not saturated. Avoid overwatering as it can lead to shallow root growth and fungal diseases. Additionally, it’s important to avoid walking or mowing on the newly seeded grass until it has reached a height of at least 3 inches. This will allow the young seedlings to establish a strong root system. By following these post-seeding care tips, you’ll give your lawn the best chance to thrive and flourish. Now let’s move on to routines {yt} that will help maintain your lawn’s health and beauty.

Routines

Make sure to establish a consistent routine for watering the newly seeded lawn after tree removal. Establishing good watering habits is one of the secrets to success when it comes to growing a healthy and vibrant lawn. Consistency is key, as it ensures that the seeds receive adequate moisture for germination and growth.

To start, water the newly seeded lawn lightly but frequently. Aim to keep the soil consistently moist, but not overly saturated. This can be achieved by watering the lawn two to three times a day for short durations. Avoid heavy watering, as it can lead to runoff and uneven moisture distribution.

As the grass begins to germinate and grow, adjust your watering routine accordingly. Gradually reduce the frequency of watering but increase the duration. This will encourage the roots to grow deeper into the soil, ensuring better drought tolerance in the future.

It is important to monitor the moisture levels of the soil regularly. Use a moisture meter or simply dig a small hole to check the soil’s moisture content. Adjust your watering routine based on the soil’s moisture needs.

Pros and Cons

Establishing a consistent watering routine has its pros and cons when it comes to growing a healthy and vibrant lawn. Let’s start with the pros. A regular watering schedule ensures that your lawn receives the necessary amount of moisture it needs to thrive. It helps to prevent under-watering, which can lead to dry and brown patches. Additionally, a consistent watering routine promotes deep root growth, making your lawn more resilient to drought conditions.

On the other hand, there are also some cons to consider. Over-watering is a common mistake that can have detrimental effects on your lawn. Too much water can lead to shallow root development, making your turf more susceptible to disease and pests. Moreover, excessive watering can also contribute to water wastage and higher utility bills.

To strike the right balance, it’s important to understand your lawn’s specific watering needs. Factors such as grass type, soil composition, and weather conditions should all be taken into account. By monitoring the moisture levels and adjusting your watering routine accordingly, you can avoid both under-watering and over-watering.

Now that you understand the pros and cons of establishing a watering routine, let’s move on to the dos and don’ts when it comes to watering your lawn.

Dos and Dont’s

It’s important to understand the dos and don’ts when it comes to watering your lawn. Proper watering is crucial for maintaining a healthy and lush lawn, while common mistakes can lead to wasted water, overwatering, or even damaging your grass. To help you navigate this important task, here are some key dos and don’ts to keep in mind:

Dos Don’ts
Water deeply Water shallowly
Water in the morning Water in the evening
Water infrequently Water too frequently
Water evenly Water unevenly

By following these dos, you can ensure that your lawn receives the right amount of water, promoting deep root growth and overall health. On the other hand, it’s important to avoid the common mistakes listed in the don’ts column. For example, watering shallowly can lead to shallow root systems, making your lawn more susceptible to drought and disease. Watering in the evening may cause the grass to stay wet overnight, increasing the risk of fungal diseases. Overwatering can drown the roots and cause the grass to become weak and vulnerable.

Understanding these dos and don’ts will set you on the right path to proper lawn watering. But what are the specific mistakes you should avoid? Let’s take a closer look in the next section.

Mistakes to Avoid

To ensure a healthy and vibrant lawn, it’s crucial to avoid these common watering mistakes. One of the most common mistakes people make is overwatering their lawn. While it may seem like more water is better, excessive watering can lead to shallow root growth and increase the risk of diseases. Another mistake to avoid is watering at the wrong time of day. Watering your lawn during the hottest part of the day can result in most of the water evaporating before it can be absorbed by the soil. Instead, water your lawn in the early morning or late afternoon to allow the water to penetrate deeper into the soil. Additionally, be mindful of the frequency of watering. Watering too frequently can cause the soil to become waterlogged, leading to root rot and other issues. Instead, water deeply but less frequently to encourage deep root growth. Finally, make sure to properly troubleshoot any issues with your irrigation system. Check for leaks, clogs, or misaligned sprinkler heads regularly to ensure efficient and effective watering. By avoiding these common watering mistakes and troubleshooting any issues, you can maintain a lush and healthy lawn.

Key Takeaways

One of the key takeaways is that avoiding common watering mistakes and regularly troubleshooting your irrigation system are essential for maintaining a healthy and vibrant lawn. By developing good watering habits and sticking to a routine, you can ensure that your lawn receives the right amount of water it needs to thrive. It’s important to avoid overwatering, as this can lead to shallow root growth and increase the risk of disease. On the other hand, underwatering can cause the grass to become weak and susceptible to drought stress. Regularly checking your irrigation system for leaks, clogs, or malfunctioning sprinkler heads is also crucial. This will help you identify and address any issues before they cause damage to your lawn. By making these habits and routines a part of your lawn care regimen, you can maintain a lush and healthy yard.

When it comes to seeding your lawn after tree removal, specific action steps can ensure successful growth.

Specific Action Steps for Lawn Seeding After Tree Removal

When it comes to seeding your lawn after tree removal, there are a few key points to consider. First, understanding the ideal seeding timeline is crucial for the success of your lawn. Next, you’ll need to learn about soil preparation techniques to create the optimal environment for seed germination. Lastly, choosing the right seed type is important to ensure that your new lawn thrives in your specific climate and conditions. By following these steps, you’ll be well on your way to a lush and healthy lawn.

Ideal Seeding Timeline

The ideal time to seed the lawn after tree removal is usually in the spring or fall. These seasons provide the optimal conditions for successful grass growth. When it comes to seeding techniques, there are a few key factors to keep in mind. First, make sure to choose the right grass seed for your specific climate and soil type. This will ensure that the grass has the best chance of thriving. Additionally, be sure to prepare the soil properly by removing any debris and loosening it with a rake or tiller. Common mistakes to avoid include overseeding, as this can lead to overcrowding and weak grass, and neglecting to water the newly seeded area adequately. By following these ideal seeding techniques and avoiding common mistakes, you can lay the foundation for a healthy and vibrant lawn. Now, let’s move on to soil preparation techniques.

Soil Preparation Techniques

To properly prepare your soil, start by removing any debris and loosening it with a rake or tiller. This will help create a smooth surface for seeding and allow the roots to penetrate easily. After clearing the area, it’s important to test the soil’s pH level and adjust it if necessary. Most grasses prefer a slightly acidic pH of around 6.0 to 7.5. Once the pH is balanced, apply a layer of compost or organic matter to improve the soil’s fertility and structure. This will provide essential nutrients and promote healthy root development. Before seeding, water the soil thoroughly to ensure it is evenly moist. Proper watering is crucial for seed germination and establishment. It’s important to keep the soil consistently moist, but not waterlogged, throughout the germination process. This will help the seeds to sprout and grow into a lush lawn. Now that you’ve prepared your soil, it’s time to choose the right seed type for your lawn.

Choosing Seed Type

Once you’ve decided on the type of grass you want, consider the climate and maintenance requirements before choosing the seed type. Different grasses thrive in different climates, so it’s important to choose a seed type that is well-suited to your region. For example, if you live in a hot and dry climate, you may want to choose a drought-resistant variety. On the other hand, if you live in a cooler climate with lots of shade, you’ll need to select a seed type that can tolerate those conditions. Additionally, consider the maintenance requirements of the seed type. Some grasses require more frequent mowing and watering, while others are low maintenance. By taking these factors into account, you can ensure that you choose the right seed type for your lawn.

Frequently Asked Questions

How Long Does It Typically Take for Grass to Grow After Seeding the Lawn Following Tree Removal?

To speed up grass growth after seeding the lawn following tree removal, you can try methods like watering regularly, providing adequate sunlight, and applying fertilizer. You can also consider using a different type of grass seed for your lawn after tree removal.

Can I Use the Same Grass Seed for My Lawn That Was Used Before the Tree Removal?

Yes, you can use the same grass seed for your lawn after tree removal, but there are also alternatives available. It’s important to prepare the soil properly before seeding to ensure successful growth.

Is It Necessary to Remove Any Remaining Tree Roots Before Seeding the Lawn?

Before seeding the lawn, it is essential to remove any remaining tree roots. This process has several benefits, such as preventing root competition and ensuring proper grass growth. However, if you prefer alternatives, they can be explored as well.

What Type of Fertilizer Should I Use When Seeding the Lawn After Tree Removal?

When seeding the lawn after tree removal, you should use a suitable grass seed for shady areas. Additionally, using organic fertilizer has many benefits for lawn seeding, such as promoting soil health and minimizing chemical runoff.

Are There Any Specific Watering Requirements for Newly Seeded Lawns After Tree Removal?

To ensure success when watering your newly seeded lawn after tree removal, follow these techniques: water lightly multiple times a day to keep the surface moist, avoid overwatering, and choose the best time to seed the lawn for optimal growth.

If you need a tree service in Utah, you can call:
Truco Services, Inc.
4640 Commerce Drive
Murray, Utah 84107
(801) 466-8044
https://truetreeservices.com/
 

How Much for One Tree Removal Sandy Utah?

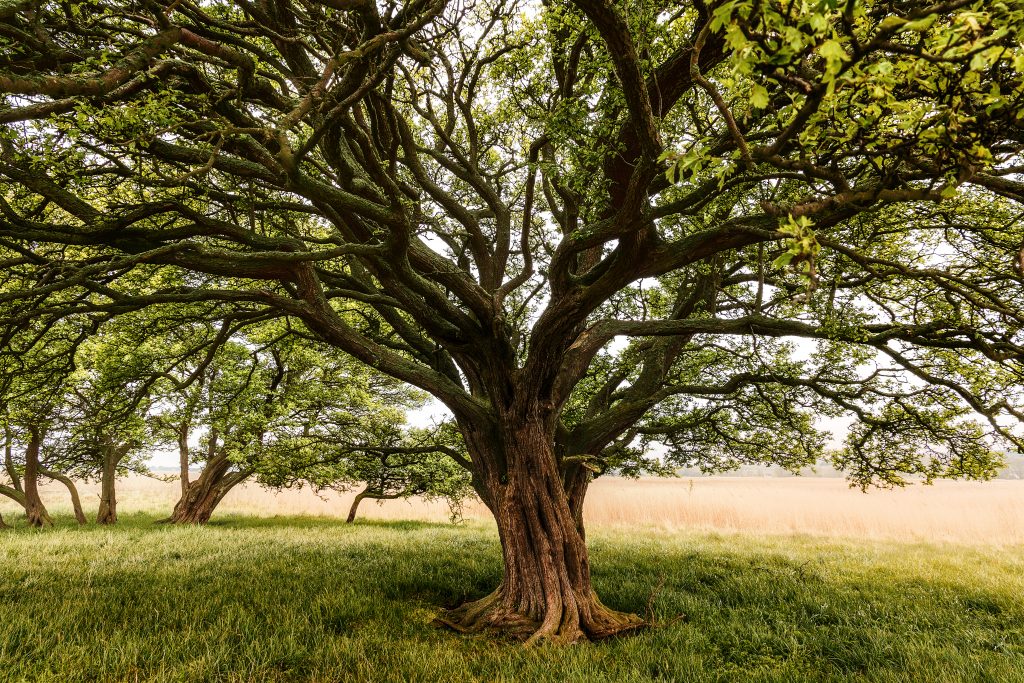
Are you tired of that pesky tree blocking your view in Sandy, Utah? Well, fret no more! In this article, we will delve into the world of tree removal services and uncover the answer to your burning question: how much will it cost to get rid of that tree once and for all? With our knowledgeable and precise style, we will provide you with tips, dos and don’ts, and the key steps for safe and efficient tree removal. So, let’s get started on reclaiming your beautiful view!

Key Takeaways

Introduction to Tree Removal Services

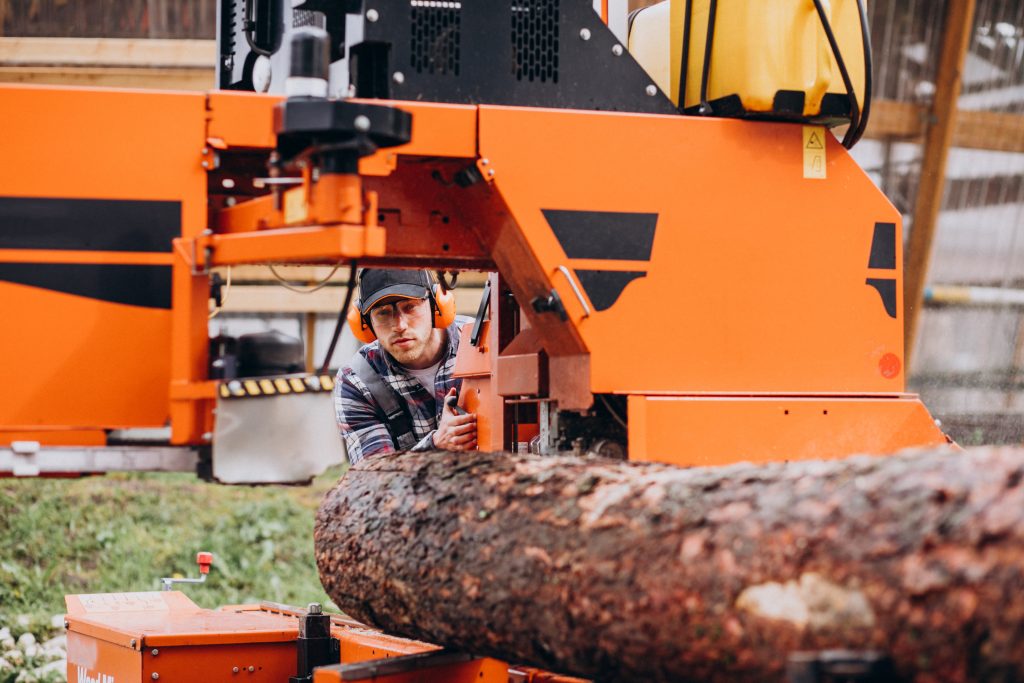
Tree removal services are a great option for homeowners who want to safely and efficiently remove trees from their property. Whether you have a diseased tree that poses a risk to your home or you simply want to clear space for a new construction project, tree removal services can help you get the job done. Here are three reasons why you should consider hiring professionals for tree removal:

  1. Expertise in tree removal techniques: Tree removal is a complex process that requires specialized knowledge and skills. Professional tree removal services have the expertise to assess the condition of the tree, determine the best approach for removal, and safely execute the process. They use techniques like tree climbing, rigging, and cutting to ensure efficient and safe removal.
  2. Minimal environmental impact: Tree removal can have a significant impact on the environment if not done properly. Professional tree removal services prioritize minimizing the environmental impact of their work. They follow industry best practices to ensure that the surrounding vegetation, wildlife, and soil are protected during the removal process.
  3. Proper disposal of tree debris: After the tree is removed, there is often a large amount of debris to be dealt with. Tree removal services take care of the entire process, including the disposal of tree debris. They have the necessary equipment to safely and efficiently remove the debris from your property, leaving it clean and ready for use.

With their expertise, focus on minimizing environmental impact, and comprehensive service, tree removal services are the ideal choice for homeowners looking to remove trees from their property. Now let’s delve into the fascinating history of tree removal services and how they have evolved over time.

History of Tree Removal Services

In Sandy, Utah, you’ll find a rich history of tree removal services that have been providing efficient and reliable solutions for years. The history of tree removal techniques in this area can be traced back to the early days of settlement, where trees were often cleared to make way for agriculture and development. Initially, manual labor was used, with axes and saws being the primary tools. As technology advanced, so did the methods of tree removal. Chainsaws became more commonly used, allowing for faster and more precise cutting. In recent years, specialized equipment such as cranes and bucket trucks have been utilized to remove trees safely and efficiently.

It’s important to consider the environmental impact of tree removal. While trees provide numerous benefits, such as shade and improved air quality, there are situations where removal is necessary. When a tree is diseased, dead, or poses a safety hazard, removal may be the best course of action. However, it’s crucial to minimize the impact on the surrounding environment and ecosystem. Replanting trees in the same area or elsewhere can help offset the loss and maintain the balance of nature.

Now that you understand the history and environmental considerations of tree removal, let’s move on to some tips for finding the right tree removal service in Sandy, Utah.

Tips

When it comes to tree removal, you have several cost comparison options to consider. You can choose to do it yourself, which can save you money but requires proper tools and expertise. Alternatively, you can hire professional arborists who have the experience and equipment necessary to safely remove trees.

Cost Comparison Options

You can save money by comparing the costs of different options for tree removal in Sandy, Utah. When it comes to tree removal, the price can vary depending on several factors. It is essential to consider cost comparison and pricing options to ensure you are getting the best deal. Start by contacting multiple tree removal companies in Sandy, Utah, and request a quote. Compare the prices they offer and consider what services are included in the cost. Some companies may provide additional services like stump removal or debris cleanup, while others may charge extra for these. By carefully comparing the options and pricing, you can find a reputable tree removal service that fits your budget. Transitioning into the next section about ‘diy tree removal,’ it’s crucial to be aware of the risks involved.

DIY Tree Removal

To safely remove a tree on your own, it’s important to assess the potential dangers and have the necessary equipment. DIY tree removal can be a cost-effective option, but it requires careful planning and adherence to safety precautions. Before starting the process, make sure you have the proper tools, such as a chainsaw, pruning shears, and a sturdy ladder. Additionally, wearing protective gear, like gloves, goggles, and a helmet, is crucial to prevent injuries. Always evaluate the surrounding area for any power lines, structures, or obstacles that may pose a risk during the removal process. Remember to carefully study the tree’s condition and size to determine the appropriate cutting techniques. However, if you are uncertain or the tree is large and hazardous, it’s best to hire professional arborists who have the expertise and specialized equipment to safely remove the tree.

Hiring Professional Arborists

If you’re unsure about the condition of the tree or if it poses a hazard, it’s best to hire professional arborists who have the expertise and specialized equipment. Arborists are trained professionals who specialize in the care and maintenance of trees. They possess extensive knowledge about tree biology, diseases, and proper pruning techniques. When you hire professional arborists, you can benefit from their expertise in assessing the health of your tree and determining the best course of action. They can also provide valuable advice on tree maintenance and preservation. Additionally, professional arborists have the necessary equipment to safely and efficiently remove trees if needed. Hiring professionals ensures that the job is done properly and reduces the risk of accidents or damage. Now, let’s explore the traits of professional tree removal services.

Traits of Professional Tree Removal Services

When hiring professional tree removal services, it’s essential to look for traits such as experience, certifications, and positive customer reviews. These traits are indicative of professional expertise and a commitment to customer satisfaction. Experienced tree removal professionals have the knowledge and skills necessary to handle even the most challenging tree removal jobs. They understand the intricacies of tree biology and can assess the health and stability of a tree before removal. Additionally, certifications such as those from the International Society of Arboriculture (ISA) demonstrate a commitment to industry standards and best practices.

Positive customer reviews are another crucial factor to consider when hiring tree removal services. These reviews provide insight into the experiences of previous customers and can give you confidence in the professionalism and quality of the service provider. Look for reviews that highlight the promptness, efficiency, and cleanliness of the tree removal process.

Steps for Safe and Efficient Tree Removal

Start by assessing the size and location of the tree to determine the best approach for safe and efficient removal. When it comes to tree removal, there are several cost-effective options available to you. Here are three key factors to consider:

Goals

The main goal of tree removal is to safely and efficiently eliminate a tree that poses a risk or is no longer desired in a specific location. When considering tree removal, it is important to conduct a cost analysis to determine the financial implications. Factors such as the size of the tree, its location, and accessibility can influence the cost. Additionally, it is crucial to consider the environmental impact of tree removal. Trees play a vital role in the ecosystem, providing oxygen, shade, and habitat for wildlife. Removing a tree can disrupt this delicate balance and impact the surrounding environment. However, there are instances where tree removal is necessary, such as when a tree is diseased, dead, or poses a safety hazard. In these cases, it is important to hire professionals who have the expertise and equipment to safely carry out the removal. By understanding the cost analysis and environmental impact, you can make informed decisions about tree removal. Transitioning into the subsequent section about habits for efficient tree removal, it is essential to adopt practices that ensure the process is carried out smoothly and effectively.

Habits for Efficient Tree Removal

To efficiently remove a tree, it’s important to hire experienced professionals who can safely carry out the process. They have the knowledge and skills to use efficient methods and cost-saving techniques. One such method is using a crane to lift and remove large trees. By using a crane, the professionals can safely and quickly remove the tree without causing damage to surrounding structures or landscapes. Another efficient method is the use of specialized equipment such as stump grinders, which can quickly grind down tree stumps, eliminating the need for manual labor and saving time and effort. Additionally, experienced professionals can assess the tree and determine if it can be salvaged or if it needs to be completely removed. This assessment can save costs by avoiding unnecessary removals. By hiring professionals who are knowledgeable in these efficient methods and cost-saving techniques, you can ensure that your tree removal is done safely and efficiently.

Now let’s delve into a real-life story that demonstrates the importance of hiring professionals for tree removal.

A Real-Life Story

When you hire experienced professionals for tree removal, you’ll have peace of mind knowing that the job will be done safely and efficiently. Let me share a real-life story to illustrate the importance of hiring professionals. A couple of years ago, my neighbor decided to remove a tree from their backyard on their own. Armed with just a chainsaw and little knowledge, they faced numerous challenges. First, they underestimated the size and weight of the tree, making it difficult to control during the removal process. Second, they struggled with proper cutting techniques, as improper cuts led to branches falling in unpredictable directions. Lastly, they encountered difficulties in disposing of the tree debris, as they had to find a way to transport and dispose of it responsibly. In the end, they spent more time, effort, and money than they initially anticipated. By hiring professionals, you can avoid such challenges and ensure a safe and efficient tree removal process. Now, let’s move on to discussing the next section, where we’ll explore the importance of getting quotes before hiring a tree removal service.

Quotes

Getting quotes from multiple tree removal services is a smart way to compare prices and ensure you’re getting the best deal. When it comes to tree removal, the cost estimation can vary based on several factors, such as the size and location of the tree, the complexity of the job, and the equipment required. It is important to gather quotes from different tree removal services to get an idea of the price range in your area.

When requesting quotes, be sure to provide accurate information about the tree, including its height, diameter, and any potential obstacles nearby. This will help the tree removal services give you a more accurate cost estimation. It is also a good idea to ask for any additional charges that may apply, such as stump removal or debris disposal.

By obtaining multiple quotes, you can compare the prices and services offered by different tree removal companies. This will allow you to make an informed decision and choose the best option for your needs and budget. Keep in mind that the lowest price may not always be the best choice, as quality and reliability are also important factors to consider.

Now that you have gathered your quotes and have a better understanding of the cost estimation, it’s time to uncover some secrets to ensure a smooth and successful tree removal process.

Secrets

Now that you’ve gathered your quotes, it’s important to consider the quality and reliability of the tree removal companies before making a decision. When it comes to tree removal techniques, you want to ensure that the company you choose is equipped with the right tools and expertise to handle the job safely and efficiently. Look for companies that have trained professionals who are knowledgeable about the different techniques involved in tree removal.

In addition to considering the techniques used, it’s also crucial to be aware of any hidden costs that may arise during the process. Some tree removal companies may try to add extra charges for services that should be included in the initial quote. Take the time to carefully review the quote and ask the company about any potential hidden costs before making a final decision.

By considering both the quality of the techniques used and the potential for hidden costs, you can make a more informed decision about which tree removal company to choose. This will ensure that you are getting the best value for your money and that the job is done safely and efficiently.

Transitioning to the next section about ‘insights on tree removal services,’ it’s important to have a clear understanding of what to expect from the companies you are considering.

Insights on Tree Removal Services

As you explore different tree removal services, it’s essential to gain insights into their qualifications and experience. When it comes to pricing, it’s crucial to understand that the cost of tree removal can vary depending on various factors such as the size of the tree, its location, and the complexity of the job. To get accurate pricing information, it’s recommended to contact multiple tree removal companies in Sandy, Utah, and request a detailed quote. This will give you a better idea of the average cost and help you make an informed decision.

In addition to pricing, customer testimonials can provide valuable insights into the quality of service provided by tree removal companies. Reading reviews and testimonials from previous customers can give you an idea of the company’s professionalism, reliability, and customer satisfaction. Look for companies with positive feedback and high ratings, as this indicates a track record of delivering excellent service.

Benefits of Tree Removal Services

Hiring a professional tree removal service can greatly enhance the safety and aesthetics of your property. There are several reasons why you should consider hiring a professional for this job. First and foremost, professionals have the knowledge and expertise to safely remove trees without causing any damage to your property or nearby structures. They are trained in the proper techniques and have the necessary equipment to handle any tree removal job, no matter how big or small.

Another advantage of hiring a professional tree removal service is that they can help improve the overall aesthetics of your property. Trees that are diseased, damaged, or overgrown can be an eyesore and negatively impact the curb appeal of your home. By removing these trees, you can create a more visually appealing landscape that will enhance the value and attractiveness of your property.

In addition to safety and aesthetics, there are other advantages to hiring a professional tree removal service. They can help you save time and effort by taking care of all the necessary permits and paperwork required for tree removal. They can also ensure that the entire process is completed efficiently and effectively, leaving you with a clean and clear space.

By hiring a professional tree removal service, you can enjoy the benefits of a safer and more beautiful property. So, if you have any trees that need to be removed, consider reaching out to a professional who can handle the job with expertise and precision.

Now, let’s move on to some valuable lessons about tree removal.

Lessons

When it comes to tree removal, there are several key points to consider: the cost, the methods used, and the importance of professional assistance. The cost of tree removal can vary depending on factors such as the size of the tree, its location, and any additional services required. There are different methods for tree removal, including cutting the tree down and removing it in sections or using a crane to lift it out. However, it is crucial to seek professional assistance for tree removal to ensure safety, proper technique, and compliance with local regulations.

Cost of Tree Removal

The cost of tree removal in Sandy, Utah can vary depending on the size and complexity of the job. Before diving into the cost analysis, it is important to understand the different tree removal techniques that professionals use. One common method is cutting the tree down from the base and removing it in sections. This is often done when the tree is in a confined space or close to buildings. Another technique involves using a crane to safely remove the tree branches and trunk. This method is suitable for large trees or those located in hard-to-reach areas. Other factors that can impact the cost include the type of tree, its condition, and the equipment required for the job. Now that you have a better understanding of the cost and techniques involved in tree removal, let’s explore the different methods for tree removal.

Methods for Tree Removal

Now that you know the cost of tree removal, let’s dive into the methods and techniques used for this task. There are several ways to remove a tree, depending on its size, location, and condition. One common method is felling, where the entire tree is cut down and removed from the site. This is often done when there is enough space for the tree to fall without causing any damage. Another technique is sectional dismantling, which involves cutting the tree into smaller sections and removing them one by one. This is useful when there are obstacles nearby or when the tree is too large to be felled in one piece. Other methods include using cranes or specialized equipment for difficult-to-reach trees. Each method has its own advantages and considerations, so it’s important to consult with professionals to determine the best approach for your specific situation.

Importance of Professional Assistance

Hiring a professional for tree removal can save you time and ensure the task is done safely and effectively. When it comes to removing a tree, professional expertise is crucial. These experts have the knowledge and experience to handle any tree removal project, no matter how big or small. They understand the complexities involved, such as assessing the tree’s condition, identifying potential risks, and using the right techniques and equipment. Not only does their professional expertise ensure the job is done correctly, but it also saves you from potential accidents or damage to your property. Additionally, hiring professionals can be cost-effective in the long run. They have the necessary tools and skills to efficiently remove the tree, minimizing any potential damage and saving you from costly repairs. With their expertise, you can trust that your tree removal needs will be handled with utmost care and efficiency. Transitioning into the subsequent section about ‘routines {yt}’, it’s important to understand the step-by-step process of tree removal to further appreciate the importance of professional assistance.

Routines

You can save time and effort by establishing daily routines for tree removal in Sandy, Utah. Having a set routine and developing good habits can greatly contribute to the efficiency of your tree removal process. Here are some key steps to consider when establishing your routines:

First, start by assessing the area and identifying any potential hazards or obstacles that may affect the tree removal process. This will help you plan accordingly and ensure a safe working environment.

Next, gather all the necessary tools and equipment needed for the job. This includes chainsaws, ropes, safety gear, and any other specialized tools required for specific tasks.

Once you have everything ready, it’s important to prioritize tasks based on their urgency and complexity. This will help you stay organized and work systematically through the removal process.

Additionally, consider establishing a daily schedule that outlines specific tasks to be accomplished each day. This will help you stay on track and ensure that the work is completed efficiently and within the desired timeframe.

Pros and Cons

Consider the advantages and disadvantages of tree removal before making a decision. There are several pros and cons to take into account when it comes to removing a tree from your property. On the positive side, tree removal can help improve the aesthetics of your landscape, create more space, and eliminate potential safety hazards. However, there are also drawbacks. Removing a tree can be costly, especially if you have multiple trees that need to be taken down. Additionally, the process of tree removal requires professional expertise and equipment, which adds to the overall cost.

Before deciding on tree removal, it is important to explore your cost comparison options. Get quotes from different tree removal services to determine the best price for the job. Keep in mind that the cost can vary depending on factors such as the size and condition of the tree, the location, and any additional services required (such as stump removal). By comparing prices, you can ensure that you are getting a fair deal and not overspending on the tree removal process.

Considering the pros and cons and exploring cost comparison options will help you make an informed decision about tree removal. Now, let’s move on to the dos and don’ts of tree removal to ensure a smooth and successful process.

Dos and Dont’s

Now, let’s take a look at the dos and don’ts of tree removal to ensure a smooth and successful process. It’s important to know the right steps to follow and the common mistakes to avoid. To make things easier, here are some dos and don’ts for tree removal:

Do’s Don’ts
Do hire a professional arborist or tree removal service for large or dangerous trees. Don’t attempt to remove a tree on your own if you lack the necessary knowledge and equipment.
Do obtain any necessary permits or permissions from your local municipality before removing a tree. Don’t forget to check for any underground utilities or structures near the tree before starting the removal process.
Do properly dispose of the tree debris and clean up the area after the tree is removed. Don’t neglect to assess the condition of the surrounding trees and foliage to ensure their safety during the removal process.

Mistakes to Avoid

It’s important to be aware of common mistakes that are often made during the tree removal process. By avoiding these mistakes, you can save yourself from unnecessary expenses and ensure a smooth removal process. One common mistake is not hiring a professional tree removal service. While it may seem like a cost-saving measure to tackle the job yourself, it can actually end up costing you more in the long run if the tree is not removed safely and efficiently. Another mistake is not obtaining the necessary permits and permissions. Before removing a tree, it’s crucial to check with your local authorities and obtain any required permits. Failure to do so can result in hefty fines and legal issues. Additionally, not considering the surrounding landscape is another mistake to avoid. It’s important to assess the area and plan the removal process accordingly to prevent damage to nearby structures or vegetation. By being aware of these common mistakes and taking the necessary precautions, you can ensure a successful tree removal process without any costly setbacks.

Now that you know the common mistakes to avoid during the tree removal process, let’s move on to the key takeaways.

Key Takeaways

To summarize, when it comes to tree removal, there are a few key takeaways to keep in mind. First and foremost, it is crucial to hire a professional service. While you may be tempted to tackle the task yourself to save money, it’s important to understand that tree removal can be dangerous and requires specialized knowledge and equipment. By hiring a professional, you can ensure that the job is done safely and efficiently.

Another important factor to consider is obtaining necessary permits. Depending on your location and the size of the tree, you may need to obtain permits from your local government before removing it. Failure to do so can result in fines and legal issues, so it’s always best to check with your local authorities before proceeding.

Lastly, it’s essential to consider the surrounding landscape when removing a tree. Factors such as the proximity to structures, power lines, and other trees can greatly impact the cost of removal. Additionally, the species of the tree can also affect the cost, as certain species may require more specialized equipment or techniques to remove.

Specific Action Steps for Tree Removal

When it comes to tree removal, there are a few key points to consider. First, choosing the right tree removal company is crucial to ensure the job is done safely and efficiently. Additionally, obtaining the necessary permits before removing a tree is important to avoid any legal issues. Lastly, it’s important to take safety precautions during the removal process to protect yourself and those around you.

Choosing Tree Removal Company

You should consider hiring a reputable tree removal company in Sandy, Utah. When it comes to removing trees, there are several cost considerations to keep in mind. The size and condition of the tree, as well as its location, can all affect the price. It’s important to get estimates from multiple companies to compare prices and services. Additionally, be sure to read customer reviews to gauge the reputation and quality of the company. Look for companies with positive feedback and a track record of satisfied customers. Once you’ve chosen a tree removal company, the next step is obtaining necessary permits. These permits ensure that the removal process is done legally and in accordance with local regulations.

Obtaining Necessary Permits

Once you’ve chosen a reputable tree removal company in Sandy, Utah, it’s essential to obtain the necessary permits for the job. Obtaining permits is a legal requirement that ensures the safety of both the workers and the surrounding environment. In Sandy, Utah, there are specific regulations in place that govern tree removal activities. These regulations aim to protect the community and preserve the natural landscape. To obtain permits, you need to contact the city or county’s permit office and provide them with the necessary information about the tree removal project. They will guide you through the process and inform you about any additional requirements or fees. Remember, obtaining permits is crucial to avoid any legal issues or fines. Now, let’s move on to discussing the safety precautions during tree removal.

Safety Precautions During Removal

To ensure the safety of workers and the surrounding environment, it’s important to follow specific safety precautions during the tree removal process. When it comes to pruning techniques, always start by identifying any dead or diseased branches that may pose a risk. Use proper pruning tools, such as sharp hand pruners or loppers, to make clean cuts at the branch collar. Avoid removing more than 25% of the live foliage to maintain the tree’s health. Additionally, equipment safety is crucial. Before operating any machinery, make sure to read and understand the manufacturer’s instructions. Wear appropriate protective gear, such as helmets, gloves, and safety glasses. Keep a safe distance from power lines and be cautious of falling debris. By following these safety precautions, you can ensure a successful and accident-free tree removal process.

Frequently Asked Questions

What Are the Different Types of Equipment Used for Tree Removal in Sandy, Utah?

To choose the right tree removal service in Sandy, Utah, you should consider the different types of equipment used. Some common options include chainsaws, cranes, and chippers. Each has its benefits, so it’s important to find a service with the right tools for the job.

Is There a Specific Time of the Year That Is Ideal for Tree Removal in Sandy, Utah?

The ideal time for tree removal in Sandy, Utah depends on various factors such as the type of tree, weather conditions, and local regulations. It is best to consult with a professional arborist for specific guidance.

Are There Any Restrictions or Permits Required for Tree Removal in Sandy, Utah?

To remove a tree in Sandy, Utah, there are restrictions and permits required. Make sure to check with the local authorities to know the specific regulations and obtain the necessary permits.

Can Tree Removal Services in Sandy, Utah Also Assist With Stump Removal?

Tree removal companies in Sandy, Utah can assist with stump removal as well. They have the expertise and equipment to safely remove both the tree and the stump. The tree removal cost will depend on various factors.

How Long Does the Tree Removal Process Typically Take in Sandy, Utah?

When it comes to tree removal in Sandy, Utah, it’s important to know how long the process typically takes. Factors like tree size and complexity can affect the timeline, so consult a professional for an accurate estimate.

If you need a tree service in Utah, you can call:
Truco Services, Inc.
4640 Commerce Drive
Murray, Utah 84107
(801) 466-8044
https://truetreeservices.com/
What to Do With Lawn After Tree Removal

What to Do With Lawn After Tree Removal

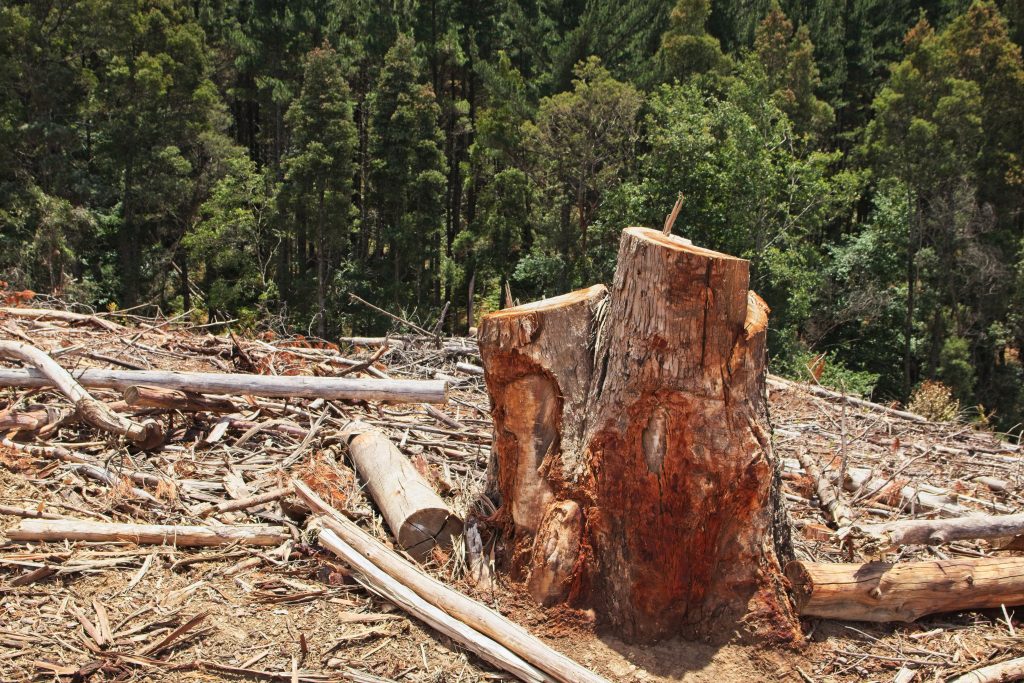
Are you wondering what to do with your lawn after removing a tree? Don’t worry, we’ve got you covered. In this article, we’ll guide you through the process of restoring your lawn to its former glory. From tips on maintaining healthy lawns to specific action steps for restoration, we’ll provide you with all the information you need to ensure your lawn looks its best. So, let’s dive in and get your lawn looking lush and green again!

Key Takeaways

Introduction to Tree Removal Process

Now that you’ve decided to remove a tree from your lawn, it’s important to understand the process involved. Tree removal is not a simple task and requires careful planning and execution. Here is what you need to know:

Understanding the process involved in tree removal is essential for a successful and safe operation. Now that you have a grasp on the basics, let’s delve into the fascinating history of arboriculture and the evolution of tree removal techniques.

History of Tree Removal

In the past, people often had trees taken out of their yards. The history of tree removal dates back centuries, with various techniques and reasons behind the process. In ancient civilizations, trees were removed for practical purposes such as clearing land for agriculture or construction. However, the act of tree removal also held cultural significance. In some cultures, trees were seen as sacred or believed to house spirits, so their removal required specific rituals or ceremonies.

As time progressed, tree removal became more common for urban development and landscaping purposes. In the 19th and early 20th centuries, trees were often removed to make way for expanding cities and roads. This led to a significant loss of green spaces and natural habitats. However, as environmental awareness grew, people started recognizing the importance of trees for their ecological benefits, such as providing shade, improving air quality, and preventing soil erosion.

Today, tree removal is approached with caution and consideration for the environment. Modern techniques and equipment have made the process safer and more efficient. Arborists and tree care professionals are trained to assess the health and structural integrity of trees before removal, ensuring that only necessary trees are taken down.

Transitioning to the subsequent section about ‘tips’, it is important to note that tree removal should be a last resort. However, if you find yourself in a situation where tree removal is necessary, there are several things you can do to ensure the process is smooth and the land is properly managed afterward.

Tips

When it comes to replanting options after tree removal, there are several factors to consider. You’ll need to assess the soil conditions, determine the right type of plant or tree to replace the removed one, and ensure proper care and maintenance. Soil restoration techniques such as adding organic matter and aerating can help improve the health of the soil and promote successful replanting. Lastly, ongoing lawn care maintenance, including regular watering, fertilizing, and mowing, is crucial to keep your newly replanted area thriving.

Replanting Options

You can consider various replanting options for your lawn after removing the tree. Replanting strategies are essential for lawn renovation, as they help restore the beauty and functionality of your outdoor space. One option is to simply replant grass seeds in the bare areas. Make sure to choose a grass variety that is suitable for your climate and soil type. Another option is to install sod, which provides instant coverage and eliminates the need to wait for seeds to grow. If you want to add some diversity to your lawn, consider planting a mixture of grass, flowers, and shrubs. This can create a more visually appealing and environmentally friendly landscape. Transitioning into the subsequent section about soil restoration techniques, it is important to note that before replanting, you should focus on restoring the health of your soil.

Soil Restoration Techniques

One option for restoring soil health is to add organic matter, such as compost or manure, which can improve soil structure and fertility. Before adding any organic matter, it is important to conduct a soil test to determine the nutrient levels and pH balance. This will help you determine the right amount and type of organic fertilizer to use. Soil testing can be done by taking samples from different areas of your lawn and sending them to a lab for analysis. Once you have the results, you can choose the appropriate organic fertilizer based on the nutrient deficiencies in your soil. Organic fertilizers are derived from natural sources and provide slow-release nutrients, improving soil health over time. Transitioning into the subsequent section on lawn care maintenance, it is crucial to establish a proper fertilization schedule to maintain the health and vitality of your lawn.

Lawn Care Maintenance

Now that you’ve restored the soil after removing a tree from your lawn, it’s time to focus on the ongoing maintenance of your lawn. One important aspect of lawn care is soil testing. By testing the soil regularly, you can determine its pH level and nutrient content. This information will help you apply the right fertilizers and amendments to keep your lawn healthy and vibrant. Additionally, weed control is crucial for maintaining a lush lawn. Regularly inspect your lawn for weeds and use appropriate herbicides to eliminate them. Remember to follow the instructions on the herbicide label to ensure safe and effective weed control. By regularly testing the soil and controlling weeds, you’ll be taking important steps to keep your lawn in top condition. In the next section, we’ll discuss the traits of healthy lawns.

Traits of Healthy Lawns

Maintaining a healthy lawn requires regular watering and mowing. In addition to these essential tasks, there are several other traits that contribute to the overall health and beauty of your lawn. Firstly, proper fertilization is crucial. By providing your lawn with the right nutrients, you can promote robust growth and prevent weed invasion. Secondly, adequate aeration is essential for healthy lawns. This process involves creating small holes in the soil to improve water and oxygen penetration, which helps the roots grow deeper and stronger. Thirdly, regular dethatching is necessary to remove the buildup of dead grass and debris, allowing for better nutrient absorption. Lastly, proper weed control is essential to maintain a healthy lawn. Weeds compete with grass for nutrients and water, so it’s important to regularly remove them or use appropriate herbicides. By incorporating these traits into your lawn care routine, you can ensure that your lawn remains healthy and vibrant.

To restore your lawn after tree removal, there are several steps you can take.

Steps for Lawn Restoration

To restore your yard’s health after removing a tree, you’ll need to follow a few steps. Here’s what you should do:

  1. Get your soil tested: Soil testing is crucial to determine the nutrient levels and pH balance of your soil. This will help you understand what nutrients your lawn needs and how to adjust the pH if necessary. A healthy lawn starts with healthy soil.
  2. Remove weeds: Weeds can quickly take over your lawn and compete with new grass for nutrients and sunlight. Prioritize weed control by applying herbicides or manually removing them. This will create a clean and weed-free environment for your new grass to thrive.
  3. Prepare the soil: Loosen the soil with a rake or tiller to improve its structure and allow air, water, and nutrients to penetrate the root zone. Add organic matter, such as compost, to improve soil fertility and moisture retention.
  4. Reseed or sod: Depending on the extent of the damage, you may need to reseed or lay new sod. Choose high-quality grass seed or sod that suits your climate and soil conditions. Follow proper watering and maintenance practices to ensure successful establishment.

Goals

One goal you should aim for in your lawn restoration process is achieving a thick and healthy grass coverage. This is essential for a beautiful and vibrant lawn that enhances the overall aesthetic of your property. To achieve this goal, there are several key lawn care practices you should incorporate into your routine.

First and foremost, proper watering is crucial for promoting healthy grass growth. Ensure that your lawn receives adequate water, but be mindful not to overwater, as this can lead to shallow root systems and weak grass. Additionally, regular mowing at the correct height will help maintain a dense and healthy lawn. Be sure to follow the 1/3 rule, which states that you should only remove one-third of the grass blade during each mowing session.

Fertilizing is another important aspect of lawn care. By providing your grass with the essential nutrients it needs, you can promote healthy growth and help it withstand environmental stressors. Use a high-quality lawn fertilizer that is specifically formulated for your grass type and follow the recommended application rates.

Lastly, it is crucial to address any bare spots or thin areas in your lawn. One effective way to do this is by overseeding. Overseeding involves spreading grass seed over existing grass to fill in these areas and promote thicker grass coverage. Be sure to choose a grass seed that is compatible with your existing lawn and follow the recommended seeding rates.

By incorporating these lawn care practices into your routine, you can achieve the goal of a thick and healthy grass coverage in your lawn. These practices will help your grass thrive and create a lush and inviting landscape.

When it comes to tree replacement, it is important to consider the impact of the new tree on your lawn. Choose a tree species that is compatible with your lawn’s growing conditions and provides a suitable amount of shade. Additionally, consider the tree’s root system and how it may affect the surrounding lawn. Proper tree care, including regular pruning and watering, is essential for maintaining a healthy tree and preserving the integrity of your lawn. Now, let’s explore some habits for lawn restoration that will further enhance the health and beauty of your lawn.

Habits for Lawn Restoration

Now that you understand the goals of lawn restoration after tree removal, let’s dive into some important habits that will help you achieve a healthy and beautiful lawn. One crucial step is to conduct soil testing. By analyzing your soil, you can determine its pH level, nutrient content, and overall health. This information will guide you in choosing the right fertilizers and amendments to improve the soil quality and support healthy grass growth.

Another essential habit is weed control. With the removal of a tree, you may notice an increase in weed growth, as the tree’s shade is no longer suppressing them. Regularly inspect your lawn for weeds and take appropriate action to prevent their spread. This can include manual removal, using herbicides, or employing natural weed control methods like mulching or mowing at the correct height.

A Real-Life Story

By analyzing your soil, you’ll be able to determine its pH level, nutrient content, and overall health, which can guide you in choosing the right fertilizers and amendments to improve the soil quality and support healthy grass growth. When faced with lawn restoration challenges, it’s important to learn from real-life stories to gain valuable insights. One homeowner, let’s call him John, had recently removed a large tree from his backyard and was left with a patchy and unhealthy lawn. He decided to take matters into his own hands and embarked on a journey of lawn restoration. John started by testing his soil and discovered that it was lacking in certain nutrients. Armed with this knowledge, he chose a fertilizer specifically formulated to address those deficiencies. He also learned the importance of proper watering techniques and adjusting the mowing height to promote healthy grass growth. Through trial and error, John was able to restore his lawn to its former lush and green state. His experience taught him valuable lessons about the importance of soil analysis, choosing the right products, and implementing proper lawn care practices. Now, let’s delve into some quotes from experts in the field to further enhance your understanding of lawn restoration.

Quotes

If you’re looking for expert advice on lawn restoration, you’ll find valuable insights in these quotes from industry professionals. When it comes to restoring your lawn after tree removal, it’s important to take the right steps to ensure success. According to Bob Smith, a renowned landscaper, “One key secret is to remove any remaining tree roots and debris from the area before starting the restoration process. This will help create a clean slate for your new lawn to thrive.” Another expert tip comes from Jane Johnson, a horticulturist, who advises, “After removing the tree, it’s crucial to aerate the soil to improve its overall health and drainage. This will provide a solid foundation for your new grass to grow.” Additionally, Mike Davis, a turf specialist, suggests, “Choosing the right type of grass for your specific climate and soil conditions is vital. Consult with a local nursery or lawn care professional to determine the best grass variety for your area.” By following these expert insights and secrets, you’ll be well on your way to a beautiful and thriving lawn. Now, let’s delve deeper into these secrets for successful lawn restoration.

Secrets

Following the advice of industry professionals, it’s crucial to remove any remaining roots and debris before starting the process of restoring your lawn after a tree has been removed. This step is often overlooked, but it is essential for ensuring the success of your lawn restoration project. By removing any leftover roots and debris, you create a clean slate for new grass to grow.

Now, let’s reveal some secrets and hidden techniques for achieving a beautiful and healthy lawn after tree removal. Firstly, consider aerating the soil. This process involves creating small holes in the ground to allow air, water, and nutrients to penetrate deep into the soil, promoting healthy root growth. Secondly, apply a layer of topsoil to improve the quality of the soil and provide a fertile environment for grass seeds to germinate. Additionally, don’t forget to choose the right type of grass seed for your specific climate and soil conditions. This will ensure that your lawn thrives and remains resilient throughout the seasons.

Insights on Lawn Restoration

Now, let me share with you some valuable insights on how to restore your lawn to its former glory. After the recovery process of tree removal, your lawn may be left damaged and in need of some care. To ensure the best results, there are a few best practices you should follow.

Firstly, it is crucial to assess the extent of the damage caused by the tree removal. Look for any bare spots, compacted soil, or debris that needs to be cleared. Once you have a clear understanding of the damage, you can begin the restoration process.

One of the best practices for lawn restoration is to aerate the soil. This helps to loosen compacted soil, allowing for better water and nutrient absorption. You can use a manual or mechanical aerator to achieve this. After aerating, it is a good idea to overseed the damaged areas with grass seed. This will help fill in any bare spots and promote new growth.

In addition to aerating and overseeding, it is important to provide your lawn with proper irrigation and fertilization. Water your lawn regularly, especially during dry periods, and use a balanced fertilizer to promote healthy growth.

Benefits of Lawn Restoration

To fully appreciate the benefits of restoring your lawn, you’ll be amazed at how it can improve the overall appearance of your outdoor space. Restoring your lawn is of utmost importance as it not only enhances the beauty of your yard but also brings several other advantages. One of the key benefits is the improved air quality. A healthy lawn acts as a natural air purifier by absorbing carbon dioxide and releasing oxygen. It also helps in reducing noise pollution by absorbing sound waves. Another advantage is the prevention of soil erosion. A well-maintained lawn with proper grass coverage acts as a natural barrier, preventing soil from eroding during heavy rain or wind. Additionally, a restored lawn provides a safe and comfortable space for outdoor activities such as playing, relaxing, and entertaining. It also enhances the value of your property, making it more appealing to potential buyers. So, restoring your lawn not only improves the aesthetic appeal but also provides numerous benefits that contribute to a healthier and more enjoyable outdoor space.

Transitioning to the subsequent section about ‘lessons,’ it is important to understand the key steps involved in the process.

Lessons

When it comes to restoring your lawn after tree removal, there are several key points to consider. Firstly, soil restoration methods are essential to replenish the nutrients and promote healthy growth of your grass. Secondly, grass regrowth techniques such as overseeding and aeration can help rejuvenate your lawn and fill in any bare patches. Lastly, exploring alternative landscaping options like xeriscaping or incorporating native plants can not only enhance the aesthetic appeal of your yard but also reduce water consumption and maintenance requirements. By focusing on these aspects, you can ensure a successful lawn restoration project.

Soil Restoration Methods

One effective way to restore the soil after tree removal is by implementing a process called soil amendment. Before starting this process, it is important to conduct a soil test to determine its nutrient levels. This will help you identify any deficiencies or imbalances that may hinder grass regrowth. Once the test results are obtained, nutrient supplementation can be done by adding organic matter such as compost or well-rotted manure to the soil. This will improve its fertility and provide essential nutrients for the grass to thrive. Additionally, adding lime or sulfur can help adjust the pH level of the soil, creating optimal conditions for grass growth. By properly amending the soil, you can create a healthy and nutrient-rich environment for successful grass regrowth techniques.

Grass Regrowth Techniques

Now that you have restored the soil, it’s time to focus on regrowing your grass. One effective technique for grass regrowth is overseeding. This involves spreading grass seeds over your existing lawn to fill in any bare patches and promote healthy, lush growth. Before overseeding, make sure to mow your lawn short and remove any debris. Then, spread the grass seeds evenly across the entire lawn, using a seed spreader for better distribution. Afterward, lightly rake the seeds into the soil or use a roller to ensure good seed-to-soil contact. Water the newly overseeded areas regularly to keep the soil moist, promoting germination. Additionally, consider lawn renovation techniques such as aerating, dethatching, and fertilizing to further improve the health and appearance of your lawn.

As you explore alternative landscaping options, you may find that there are various choices available to enhance the beauty and functionality of your outdoor space.

Alternative Landscaping Options

As you consider alternative landscaping options, you’ll discover a wide range of choices to enhance your outdoor space’s beauty and functionality. When it comes to alternative landscaping designs, there are numerous options to explore. One popular choice is to replace traditional grass lawns with sustainable alternatives. Sustainable lawn options include native grasses, groundcovers, and ornamental plants that require less water and maintenance. These alternatives not only reduce your water consumption but also provide habitat for local wildlife and add visual interest to your yard. Additionally, you can incorporate hardscaping elements such as gravel paths, stone patios, or wooden decks to create distinct areas for relaxing or entertaining. By embracing these alternative landscaping options, you can transform your outdoor space into a sustainable and visually appealing retreat. Now, let’s delve into some routines {yt} that will help you maintain your new landscape.

Routines

If you’re unsure about what to do with your lawn after tree removal, establishing new routines for maintenance can help keep it looking healthy and vibrant. Restoring your lawn after tree removal requires consistent effort and attention to detail. By developing good habits and routines, you can ensure the long-term health of your lawn.

First, it’s important to establish a regular watering schedule. Your lawn needs an adequate amount of water to thrive, especially after the removal of a tree that may have provided shade and moisture. Water deeply and infrequently to encourage deep root growth and avoid shallow rooting. Be sure to water early in the morning or late in the evening to minimize evaporation.

Next, mowing your lawn regularly is crucial. Set your mower to the appropriate height for your grass type and never remove more than one-third of the blade at a time. This will promote healthy growth and prevent scalping. Additionally, remember to keep your mower blades sharp to achieve clean cuts and avoid damaging the grass.

Lastly, maintaining proper nutrition is essential for lawn restoration. Consider fertilizing your lawn with a high-quality, slow-release fertilizer to provide the necessary nutrients for growth. Follow the instructions on the package for application rates and timing.

Pros and Cons

Establishing new routines for lawn maintenance has its pros and cons, so it’s important to carefully consider the options available. One of the first things you should consider is conducting a soil test. This will help you understand the nutrient levels and pH of your soil, allowing you to make informed decisions about fertilization and amendment. It’s also worth exploring alternative ground covers that may require less maintenance and water. For example, you could consider planting clover or creeping thyme, both of which are drought-tolerant and have the added benefit of attracting pollinators. Another option is to create a naturalistic meadow using a mix of native grasses and wildflowers. This can reduce the need for mowing and create a beautiful, low-maintenance landscape. However, it’s important to note that alternative ground covers may have their own drawbacks. They may not withstand heavy foot traffic as well as traditional lawns, and they may require more initial effort to establish.

Transitioning into the next section about dos and don’ts, it’s important to consider these factors when deciding on the best approach for your lawn.

Dos and Dont’s

When it comes to maintaining your lawn, it’s important to follow these dos and don’ts to ensure healthy and thriving grass. Below is a table highlighting some key actions to take and avoid when it comes to lawn care:

Do’s Don’ts
Regularly mow Overwater
Aerate Cut too short
Fertilize Neglect weeds
Water deeply Overuse chemicals
Remove thatch Ignore soil pH

By following these do’s and don’ts, you can avoid common mistakes that may hinder the health of your lawn. Regularly mowing your lawn helps to promote growth and keep it looking neat. Aeration allows oxygen, water, and nutrients to penetrate the soil, promoting root development. Fertilizing provides essential nutrients, while watering deeply encourages deep root growth. Removing thatch, the layer of dead grass and debris, helps to prevent disease and allows nutrients to reach the soil.

Now that you know the do’s and don’ts of lawn care, it’s important to understand the mistakes to avoid. By avoiding these mistakes, you can ensure proper lawn maintenance and achieve a lush, green yard.

Mistakes to Avoid

To avoid hindering the health of your lawn, it is important to be aware of some common mistakes and practice the best techniques. One common mistake is neglecting to regularly mow your lawn. Letting the grass grow too long can lead to a weakened root system and an unkempt appearance. Aim to mow your lawn at least once a week during the growing season, adjusting the frequency depending on the grass type and weather conditions. Another mistake to avoid is overwatering. While it may seem like a good idea to give your lawn plenty of water, excessive watering can actually harm the grass by promoting shallow root growth and inviting diseases. Instead, water deeply and infrequently, allowing the soil to dry out between waterings. Additionally, be cautious of using too much fertilizer. Over-fertilization can result in excessive growth and can harm the environment. Follow the recommended application rates and schedule to ensure the optimal health of your lawn. By avoiding these common mistakes and following these best practices, you can maintain a healthy and vibrant lawn.

Now that you are aware of the common mistakes to avoid, let’s move on to the key takeaways for caring for your lawn after tree removal.

Key Takeaways

Now that you’re aware of the key takeaways, it’s important to remember that regular maintenance and proper watering are essential for the overall health of your lawn. When it comes to lawn restoration techniques, there are a few important things to keep in mind. First, you should always start by removing any debris from the area, such as rocks, sticks, or dead plants. This will help create a clean and even surface for your new grass to grow. Next, you’ll want to aerate the soil to improve drainage and allow air and nutrients to reach the roots. This can be done using a fork or a specialized aerator tool. Once the soil is prepared, it’s time to reseed or lay new sod, depending on the extent of the damage. Make sure to choose a grass variety that is well-suited to your climate and soil conditions. Finally, don’t forget to water your lawn regularly, especially during the establishment phase. This will help the grass take root and grow strong. With these key takeaways in mind, let’s now dive into specific action steps for lawn restoration.

Specific Action Steps for Lawn Restoration

When it comes to restoring your lawn, there are three key steps you need to take: soil preparation techniques, choosing the right grass seed, and proper watering and maintenance. First, you’ll want to make sure your soil is properly prepared by removing any debris and weeds, tilling the soil, and adding necessary amendments like compost or fertilizer. Next, selecting the right grass seed is crucial for a healthy and vibrant lawn, taking into consideration factors like your climate, sun exposure, and foot traffic. Finally, watering and maintenance play a vital role in the growth and health of your lawn, so be sure to water consistently and evenly, mow regularly at the correct height, and keep an eye out for any signs of pests or diseases.

Soil Preparation Techniques

Properly preparing the soil is key for successful lawn regrowth after tree removal. Before you begin restoring your lawn, it is important to test the soil to determine its composition and nutrient levels. A soil test will provide valuable information about the pH level, organic matter content, and nutrient deficiencies. Based on the results, you can then proceed with nutrient enrichment. Adding organic matter, such as compost or well-rotted manure, will improve soil structure and fertility. You may also need to apply specific fertilizers to address any nutrient deficiencies. Once you have prepared the soil, you can move on to choosing the right grass seed for your lawn restoration. By understanding the condition of your soil, you can select the appropriate grass seed that will thrive in those specific conditions.

Choosing Grass Seed

It’s important to choose the right grass seed for your lawn restoration based on the condition of your soil. Grass seed selection is a crucial step in the lawn renovation process. Before you start, assess the soil type, pH level, and sunlight exposure in your yard. Different grass species thrive in different conditions, so it’s essential to choose a seed that matches your soil’s characteristics. For example, if you have sandy soil, opt for a grass seed that is drought-tolerant and can withstand poor drainage. On the other hand, if your soil is clay-based, look for a grass seed that has good water retention properties. By selecting the right grass seed, you can ensure a successful lawn restoration project. Now let’s move on to the next important aspect of lawn renovation – watering and maintenance.

Watering and Maintenance

Maintaining a healthy lawn requires regular watering and proper maintenance. When it comes to watering techniques, it’s important to water deeply and infrequently. This encourages deep root growth, making your lawn more resilient to drought. Watering in the early morning or late evening is ideal, as it allows the grass to absorb the moisture before the sun evaporates it. As for maintenance, create a schedule that includes mowing, fertilizing, and aerating. Mow the grass to a height of about 2-3 inches, as this helps shade the soil and prevent weed growth. Fertilize according to the needs of your specific grass type, and aerate the soil once a year to improve water and nutrient absorption. Following a regular maintenance schedule will keep your lawn healthy and lush throughout the year.

Frequently Asked Questions

How Much Does Tree Removal Typically Cost?

Tree removal costs can vary depending on several factors such as tree size, location, and complexity of the job. On average, prices range from $150 to $1,500, but it’s best to get a quote from a professional for an accurate estimate.

Can I Plant a New Tree in the Same Spot After Tree Removal?

You can plant a new tree in the same spot after tree removal. However, it’s important to consider planting alternative species to avoid potential issues and allow the lawn to recover.

What Are the Potential Dangers of Removing a Tree Yourself?

Potential hazards of removing a tree yourself include injury from falling branches or equipment accidents. To ensure safety, take precautions like wearing protective gear, using proper tools, and seeking professional guidance if necessary.

Are There Any Alternatives to Lawn Restoration After Tree Removal?

You can explore alternative landscaping options for a low maintenance yard after tree removal. Consider replacing the lawn with native plants, creating a rock garden, or installing a patio or deck for a more functional outdoor space.

How Long Does It Take for a Lawn to Fully Recover After Tree Removal?

After tree removal, your lawn can take anywhere from several months to a year to fully recover. The cost of lawn restoration depends on factors like size and condition. However, tree removal can benefit lawn health by allowing more sunlight and nutrients to reach the grass.

If you need a tree service in Utah, you can call:
Truco Services, Inc.
4640 Commerce Drive
Murray, Utah 84107
(801) 466-8044
https://truetreeservices.com/

How to Plant Grass After Tree Removal

How to Plant Grass After Tree Removal

Are you ready to transform your barren landscape into a lush green oasis? Say goodbye to the shadowy reign of that old tree and hello to the vibrant carpet of grass that awaits you. Planting grass after tree removal is an opportunity for renewal and rejuvenation, giving you a fresh canvas to work with. In this article, we’ll guide you through the steps and share our expert tips to ensure your grass planting endeavor is a resounding success. So roll up your sleeves and let’s get started!

Key Takeaways

Introduction and Benefits of Planting Grass After Tree Removal

Now that you’ve removed the tree, it’s time to explore the introduction and benefits of planting grass in your yard. Planting grass after tree removal not only enhances the aesthetic appeal of your outdoor space but also offers numerous advantages. Here is a list of benefits to get you excited about the transformation that awaits your yard:

  1. Improved soil quality: Planting grass helps replenish the soil with essential nutrients, promoting healthy growth and preventing erosion.
  2. Increased curb appeal: A lush, green lawn adds beauty and value to your property, creating a welcoming atmosphere for you and your guests.
  3. Enhanced air quality: Grass acts as a natural air purifier, absorbing carbon dioxide and releasing oxygen, contributing to a cleaner and healthier environment.
  4. Reduced temperature: A well-maintained lawn can significantly lower the temperature around your home, providing relief during hot summer months.

Understanding the history of grass planting techniques and the benefits of tree removal will further enhance your knowledge and allow you to make informed decisions about your yard. So, let’s delve into the fascinating world of tree removal and grass planting to uncover the secrets that will transform your outdoor space into a lush paradise.

History of Tree Removal and Grass Planting

To get started, you could first research the background of tree removal and the subsequent planting of grass. Understanding the history of tree removal can provide valuable insights into the importance of grass planting. Throughout time, trees have been removed for various reasons, such as land development, infrastructure construction, and even for aesthetic purposes. However, the removal of trees can have detrimental effects on the environment and ecosystem. This realization has led to the recognition of the benefits of planting grass after tree removal.

When trees are removed, the landscape can become barren and susceptible to erosion. Planting grass helps to stabilize the soil, preventing erosion and the loss of valuable topsoil. Grass also promotes water absorption, reducing the risk of flooding and the need for extensive drainage systems. Additionally, grass provides shade, reduces heat, and improves air quality by absorbing carbon dioxide and releasing oxygen.

Transitioning into the subsequent section about ‘tips,’ it is important to note that proper preparation and maintenance are essential for successful grass planting after tree removal.

Tips

When it comes to planting grass, timing is everything. The best time to plant grass is during the spring or fall when temperatures are mild and rainfall is more consistent. Proper watering and maintenance are crucial for the successful establishment of your grass. Make sure to water deeply and infrequently, allowing the roots to grow deep into the soil. Lastly, choosing the right grass for your specific climate and soil conditions is essential. Consider factors such as shade tolerance, drought resistance, and maintenance requirements when selecting the perfect grass variety for your lawn.

Best Time to Plant

You should consider the best time to plant grass after tree removal. Timing is crucial to ensure the success of your grass reestablishment. The best time to plant grass is during the early fall or spring seasons when the weather is mild and the soil temperature is ideal for seed germination. These seasons provide the perfect combination of warm soil and cool air, creating optimal planting conditions. It is important to avoid planting grass during extreme temperatures, such as the peak of summer or the depths of winter, as these conditions can hinder seed germination and growth. By choosing the right time to plant your grass, you set the stage for a healthy and thriving lawn. Now that you know when to plant, let’s dive into the next section: watering and maintenance.

Watering and Maintenance

Make sure to water your new lawn regularly and maintain it by mowing and fertilizing as needed. Proper watering techniques are crucial for the successful establishment of your new grass. After planting, it is important to keep the soil moist but not saturated. Water the lawn deeply, making sure to penetrate the entire root zone. This helps to encourage deep root growth and drought tolerance. Avoid shallow and frequent watering, as it promotes shallow root development and makes the grass more susceptible to stress. As your lawn begins to establish, gradually reduce the frequency of watering but increase the amount of water applied. This encourages the roots to grow deeper in search of water. Along with watering, post planting care includes regular mowing to promote thick and healthy growth, as well as fertilizing to provide essential nutrients. With proper maintenance, your new lawn will thrive and become a beautiful addition to your landscape. Now, let’s move on to choosing the right grass for your needs.

Choosing the Right Grass

To ensure a successful lawn, it’s important to select the appropriate type of grass for your specific needs and climate. Grass selection plays a crucial role in the overall health and appearance of your lawn. Consider factors such as sunlight exposure, soil type, and maintenance requirements when choosing the right grass. For areas with heavy foot traffic, opt for a durable grass variety like Bermuda or Zoysia. If you live in a region with hot and dry summers, consider warm-season grasses like St. Augustine or Buffalo grass, which are drought-tolerant. On the other hand, cool-season grasses like Kentucky Bluegrass or Fescue are well-suited for areas with cold winters. By carefully considering these factors, you can select the perfect grass variety that will thrive in your specific climate and meet your lawn care needs.

When planting grass after tree removal, it’s important to keep in mind certain traits that contribute to successful establishment and growth.

Traits of Successful Grass Planting After Tree Removal

Successful grass planting after tree removal requires careful consideration of soil conditions and proper watering techniques. When it comes to traits of successful grass planting after tree removal, there are a few key factors to keep in mind. First and foremost, choosing the right grass species is essential. Different grasses have different traits and adaptability to various soil types and environmental conditions. Therefore, it is important to select a grass species that is well-suited to your specific soil conditions and climate.

Timing is another crucial trait to consider. The best time to plant grass after tree removal is in the early spring or fall when temperatures are mild and rainfall is more abundant. This allows the grass to establish its root system before the extremes of summer or winter set in.

In addition to these traits, proper preparation of the soil is paramount. This includes removing any remaining tree roots or debris, loosening the soil to improve drainage and aeration, and amending the soil with organic matter to enhance its fertility.

Steps for Successful Grass Planting After Tree Removal

Now that you have chosen the right grass species and timing, the next step is to prepare the soil for optimal growth. Here are some best practices to ensure successful grass planting after tree removal:

Common mistakes to avoid during soil preparation include neglecting soil testing, leaving debris on the ground, failing to loosen compacted soil, skipping the addition of organic matter, and ignoring the need for a level surface.

With the soil properly prepared, you are now ready to move on to the next section about goals {table}.

Goals

Once the debris has been cleared and the soil has been properly prepared, your next step is to establish your goals for the grass planting process. Setting clear goals will help you stay focused and achieve the desired results. When determining your goals, consider the traits you want your grass to possess and the steps you need to take to achieve them.

To help you visualize your goals, here is a table outlining some common traits and the steps required to achieve them:

Trait Steps
Lush and Green Proper watering and fertilization
Weed-free Regular weed control and maintenance
Drought-resistant Choosing drought-tolerant grass varieties
Low-maintenance Selecting grass species that require minimal care

By identifying these traits and the necessary steps, you can tailor your grass planting process to meet your specific needs. Remember, each goal may require different techniques and maintenance practices.

Transitioning into the subsequent section on ‘habits for successful grass planting after tree removal,’ it is important to understand that achieving your goals requires consistent effort and proper care.

Habits for Successful Grass Planting After Tree Removal

To establish healthy habits for your newly cleared area, it’s important to prioritize consistent watering and regular maintenance. These two traits are crucial for successful grass planting after tree removal. By providing adequate water and taking care of your grass, you can ensure its growth and longevity. Insights gained from years of experience in landscaping have taught us the importance of watering your grass consistently. Water deeply but infrequently to encourage deep root growth. This will help your grass withstand drought conditions and develop a strong foundation. Additionally, regular maintenance is key to keeping your grass healthy and vibrant. This includes mowing at the right height, fertilizing appropriately, and controlling weeds. By following these habits, you can create a thriving lawn that will enhance the beauty of your newly cleared area.

Now, let’s delve into a real-life story that exemplifies the success achieved by implementing these habits.

A Real-Life Story

Establishing consistent watering and regular maintenance habits is crucial for successful grass planting after removing trees, and a real-life story exemplifies the positive outcomes achieved by implementing these practices. Let’s dive into a real-life experience that sheds light on the challenges faced during the process.

In this particular case, a homeowner decided to remove a large tree from their backyard, creating an opportunity to transform the area into a lush green lawn. Armed with enthusiasm and a determination to succeed, they began the journey of planting grass. However, they quickly realized that it was not as easy as it seemed.

One of the major challenges they faced was ensuring adequate watering. Initially, they underestimated the amount of water needed and the frequency of watering. As a result, the soil became dry, hindering the germination process. However, after adjusting their watering schedule and using a sprinkler system, they were able to provide sufficient moisture to the newly planted grass.

Regular maintenance also presented its own set of challenges. The homeowner had to battle with weeds that threatened to overtake the grass. Through diligent weeding and the application of herbicides, they were able to keep the unwanted invaders at bay and give the grass a fighting chance to thrive.

This real-life experience highlights the importance of consistent watering and regular maintenance in achieving successful grass planting after tree removal. By learning from the challenges faced and implementing the necessary adjustments, the homeowner was able to witness the transformation of their backyard into a beautiful and vibrant lawn.

Now, let’s explore some quotes from experts that further emphasize the significance of these practices.

Quotes

Take note of what the experts have to say about the importance of consistent watering and regular maintenance in achieving a thriving and vibrant lawn. When it comes to discussion ideas about lawn care, these topics are always at the forefront. Consistent watering is crucial because it ensures that your grass receives the necessary hydration it needs to grow and stay healthy. Without enough water, your lawn can become dry and brittle, making it more susceptible to diseases and pests. Regular maintenance, on the other hand, involves tasks like mowing, fertilizing, and aerating. These activities help promote healthy growth, prevent weed infestations, and maintain an even and attractive appearance.

The relevance of consistent watering and regular maintenance cannot be overstated. Many homeowners make the mistake of neglecting their lawns, thinking that grass will grow just fine on its own. However, this is far from the truth. In order for your lawn to thrive, it requires your attention and care. By consistently watering and maintaining your lawn, you are setting it up for success.

Now that you understand the importance of consistent watering and regular maintenance, let’s dive into the secrets of achieving a lush and beautiful lawn.

Secrets

Now that we know the relevance of consistent watering and regular maintenance, let’s uncover the secrets to achieving a lush and beautiful lawn. Planting grass after tree removal can be a challenging task, but with the right insights and techniques, you can create a thriving green space in your yard.

One of the secrets to successful grass planting is proper soil preparation. Before laying down the grass seeds, it is important to remove any debris or tree roots that may hinder the growth of the new grass. Loosen the soil with a rake and add some organic matter to improve its fertility and drainage.

Another secret is choosing the right grass seed for your specific climate and soil type. There are various types of grass seeds available, each with its own characteristics and requirements. Research and consult with local experts to determine the best seed for your lawn.

Furthermore, ensuring proper watering and fertilization is essential for the success of your new grass. Water the newly planted seeds regularly, keeping the soil moist but not waterlogged. Apply a suitable fertilizer to provide the necessary nutrients for healthy growth.

Insights for Successful Grass Planting After Tree Removal

One of the key factors for successful planting of new grass after removing a tree is proper soil preparation. To ensure that your grass thrives in the area where the tree once stood, it is essential to understand the insights and successful techniques involved in this process.

Firstly, you need to remove any remaining tree roots or debris from the soil. These can hinder the growth of your grass and create an uneven surface. Use a shovel or a rake to carefully remove them, ensuring that the soil is clear and ready for planting.

Next, it is important to test the pH level of the soil. Grass generally thrives in slightly acidic to neutral soil conditions. You can easily test the pH level using a soil testing kit, which can be purchased at any garden center. Based on the results, you may need to add lime to increase the pH or sulfur to decrease it.

After preparing the soil, it is time to choose the right grass seed for your specific climate and soil conditions. Consider factors such as sun exposure, foot traffic, and drought tolerance when selecting the seed. Spread the seed evenly over the prepared soil and lightly rake it to ensure good seed-to-soil contact.

With proper soil preparation and the right grass seed, you are well on your way to a successful grass planting after tree removal. The benefits of planting grass in this area are numerous and will be discussed in the next section.

Benefits of Planting Grass After Tree Removal

To fully appreciate the benefits of having new grass in the area where the tree once stood, you should consider the increased aesthetic appeal it brings to your landscape. Planting grass after tree removal not only fills the void left by the tree’s absence but also enhances the overall look and feel of your outdoor space. The lush green carpet of grass creates a visually pleasing contrast against other elements in your garden, such as flowers, shrubs, and hardscapes. It adds a sense of freshness and rejuvenation, transforming a barren spot into a vibrant and inviting area.

Apart from the visual appeal, planting grass after tree removal offers practical advantages as well. The newly established grass helps prevent soil erosion by holding the ground together with its roots. It also improves the overall health of the soil by increasing its organic content and promoting better water retention. By planting grass, you create a stable and functional surface that can be utilized for various activities like picnics, sports, or simply enjoying the outdoors.

To achieve a successful grass planting after tree removal, several techniques can be employed. Preparation of the soil is crucial, including removing any remaining tree roots and debris. Properly selecting the type of grass that suits your specific climate and soil conditions is also essential. Adequate watering, regular fertilization, and proper mowing practices will ensure the healthy growth and longevity of your new grass.

Lessons

When it comes to planting grass, timing is crucial. Knowing the right time to plant can greatly increase your chances of success. Additionally, proper soil preparation techniques are essential for creating a healthy growing environment for your grass. Lastly, selecting the right grass seed is important to ensure that you achieve the desired results in terms of appearance and durability.

Timing for Grass Planting

The best time to plant grass after tree removal is during the fall season. This is because the cooler temperatures and increased rainfall during the fall create the perfect conditions for grass seed germination and establishment. It is important to follow best practices when planting grass after tree removal to ensure successful growth. One of the most common mistakes is planting grass too soon after tree removal. It is crucial to wait until all tree roots have been fully removed to prevent competition for nutrients and water. Additionally, proper soil preparation techniques are essential for successful grass planting. By preparing the soil properly, you will create a healthy and fertile environment for the grass seed to take root and thrive.

Soil Preparation Techniques

Properly preparing the soil is essential for creating a fertile environment for successful grass planting. Before you begin, it’s important to conduct a soil test to determine the pH level and nutrient content. This will help you understand what amendments, such as lime or fertilizer, are needed to optimize the soil conditions for grass growth. Once you have the results, you can start by removing any existing weeds or grass. Weed control is crucial because these unwanted plants can compete with your new grass for nutrients and space. Use a suitable herbicide or manually remove them, ensuring the area is weed-free. Afterward, you can proceed with loosening the soil using a tiller or rake, creating a smooth and level surface. This will promote better seed-to-soil contact and germination. Now that the soil is prepared, let’s move on to the next step: grass seed selection.

Grass Seed Selection

Now that you have prepared the soil for planting grass after tree removal, it’s time to select the right grass seed for your lawn. There are several grass seed types available, each with its own unique characteristics. Consider factors such as your climate, soil type, and the amount of sunlight your lawn receives. For sunny areas, Bermuda grass or Kentucky bluegrass may be suitable options. If you have shady spots, consider using fine fescue or zoysia grass. Once you have chosen the appropriate grass seed, it’s important to follow proper planting techniques. Start by evenly distributing the seed over the prepared soil. Then, lightly rake or roll the seed to ensure good soil contact. Finally, water the area gently and consistently to keep the soil moist for germination. With the right grass seed selection and planting techniques, you are on your way to a beautiful and lush lawn.

As you establish your grass, it’s important to develop routines that will help maintain its health and appearance.

Routines

First, you’ll want to establish a regular watering routine to ensure your newly planted grass receives the necessary moisture for healthy growth. Watering is crucial during the early stages of grass growth, as it helps the seeds germinate and establish strong root systems. To develop good watering habits, start by watering the area immediately after planting the grass seeds. This will help the soil settle around the seeds and encourage them to make contact with the moisture below. After the initial watering, continue to water the area lightly every day for the next two weeks. Gradually increase the amount of water as the grass begins to grow. It is important to water consistently, ensuring the soil stays evenly moist but not waterlogged. As the grass matures, you can reduce the frequency of watering to every two or three days, but remember to water deeply, allowing the water to penetrate the soil to a depth of around six inches. This will encourage the roots to grow deeper into the ground, making the grass more resilient to drought and other environmental stresses.

Pros and Cons

To make an informed decision, you should carefully weigh the pros and cons of establishing a regular watering routine for your newly planted grass. Let’s start with the pros. Consistency is key when it comes to watering your grass. By establishing a regular routine, you ensure that your grass receives the necessary moisture it needs to thrive. This will promote healthy root growth and overall plant development. Additionally, a regular watering routine can help prevent issues such as drought stress or overwatering, which can lead to root rot and other diseases.

However, there are also some cons to consider. One common mistake is overwatering, which can drown the roots and suffocate the grass. Another mistake is under-watering, which can cause the grass to become weak and susceptible to pests and diseases. Finding the right balance can be tricky, especially in changing weather conditions.

Now that you’ve considered the pros and cons, let’s move on to the dos and don’ts of establishing a watering routine for your newly planted grass.

Dos and Dont’s

Establishing a regular watering routine for your newly planted grass has its dos and don’ts that you should be aware of. To ensure the success of your grass planting project, it is important to follow these guidelines and avoid common mistakes.

Dos:

  1. Water your new grass consistently: Provide enough moisture to keep the soil evenly moist, but not soaked.
  2. Water deeply: Aim for at least 6 inches of penetration to encourage deep root growth.
  3. Water in the morning: This allows the grass to dry before evening, reducing the risk of disease.
  4. Adjust watering based on weather conditions: Increase watering during hot and dry periods, and reduce during cooler and wetter periods.

Don’ts:

  1. Overwater: Excessive watering can lead to shallow root development and fungal diseases.
  2. Water too frequently: Frequent light watering promotes shallow roots and weak grass.
  3. Water in the evening: Moist grass overnight can promote fungal growth.
  4. Forget to monitor soil moisture: Regularly check the soil to ensure it is not too dry or too wet.

Mistakes to Avoid

One mistake to avoid when watering your newly planted grass is overwatering, as it can lead to shallow root development and fungal diseases. While it’s essential to provide adequate moisture for your grass to thrive, it’s equally important to strike the right balance. Overwatering can suffocate the roots, preventing them from growing deep into the soil, which weakens the grass and makes it more susceptible to diseases.

Another common mistake is not watering your newly planted grass enough. It’s crucial to keep the soil consistently moist during the establishment phase, which typically lasts for the first few weeks after planting. Without sufficient water, the grass may struggle to take root and establish itself properly.

Additionally, many people make the mistake of mowing their newly planted grass too soon. It’s important to allow the grass to grow to a sufficient height before mowing, as this ensures the roots have had enough time to develop and anchor the grass securely.

To avoid these common mistakes, it’s important to follow a few important considerations. First, make sure to water your newly planted grass deeply but infrequently, allowing the soil to dry out slightly between waterings. Second, monitor the soil moisture levels regularly to ensure you are providing enough water without overdoing it. Finally, wait until the grass has reached a height of about 3-4 inches before mowing for the first time.

Key Takeaways

In conclusion, it’s crucial to avoid common mistakes like overwatering, underwatering, and premature mowing when establishing newly planted grass. Proper watering techniques are essential for the health and successful establishment of your newly planted grass. Overwatering can lead to shallow root growth, fungal diseases, and wasted water. On the other hand, underwatering can cause the roots to dry out, leading to stunted growth and brown patches. It’s important to find the right balance by watering deeply and infrequently, allowing the soil to dry out slightly between waterings.

Another common mistake is premature mowing. It’s important to resist the urge to mow your newly planted grass too soon. Wait until the grass blades have reached a height of 3 to 4 inches before mowing. This will allow the roots to establish and the grass to mature properly.

To ensure the successful planting of grass after tree removal, it’s important to follow specific action steps. These steps include preparing the soil by removing any debris, loosening the soil, and adding organic matter. Additionally, selecting the right type of grass seed for your specific climate and soil conditions is crucial. By following these steps, you’ll be on your way to establishing a healthy and vibrant lawn after tree removal.

Specific Action Steps for Grass Planting After Tree Removal

When it comes to planting grass after tree removal, there are several key points to consider: soil preparation techniques, grass seed selection, and watering and maintenance. First, it’s important to properly prepare the soil by removing any debris and loosening it with a rake or tiller. Next, choose the right type of grass seed for your specific climate and lawn conditions. Lastly, ensure that the newly planted grass receives adequate watering and regular maintenance to promote healthy growth. By following these steps, you can successfully establish a lush and vibrant lawn after tree removal.

Soil Preparation Techniques

To prepare the soil for planting grass after tree removal, you’ll want to loosen it up by tilling and adding organic matter. Soil preparation techniques are crucial to ensure the success of your grass planting project. First, start by removing any large debris or tree roots from the area. Then, use a tiller to break up the compacted soil and improve its drainage. Make sure to till the soil to a depth of at least six inches to create a loose and aerated base for your grass seeds. After tilling, incorporate organic matter such as compost or peat moss into the soil to improve its fertility and moisture retention. This will provide the necessary nutrients for your grass to grow strong and healthy.

However, it’s important to avoid some common mistakes during soil preparation. One common mistake is over-tilling the soil, which can lead to excessive compaction and poor drainage. Be careful not to till too deep or too often, as this can disrupt the soil structure and harm beneficial organisms. Another mistake is neglecting to test the soil pH and nutrient levels. Conducting a soil test will help you determine if any amendments, such as lime or fertilizer, are needed to create the optimal conditions for grass growth.

With the soil properly prepared, you can now move on to the next step: grass seed selection.

Grass Seed Selection

Choose the right type of grass seed based on your specific needs and the conditions of your soil and climate. When it comes to grass seed types, there are several options to consider. If you have a sunny yard, Bermuda grass seed is a great choice as it thrives in full sun. For shady areas, opt for a shade-tolerant grass seed like fescue. If your soil is prone to drought, consider using a drought-resistant seed variety such as buffalo grass. When planting the grass seed, make sure to prepare the soil properly by removing any debris and loosening it with a rake. Spread the seed evenly over the area and lightly rake it into the soil. Now, let’s move on to watering and maintenance to ensure your grass seed grows into a lush, green lawn.

Watering and Maintenance

Proper watering and regular maintenance are crucial for the growth and health of your newly planted grass seed. When it comes to watering techniques, it’s important to remember that consistency is key. Water your lawn deeply and infrequently, allowing the water to penetrate the soil and reach the root system. Avoid shallow watering, as it encourages shallow root growth and makes your lawn more susceptible to drought. Additionally, be mindful of the time of day you water your lawn. Watering in the early morning or late afternoon is ideal, as it allows the grass to dry before evening, reducing the risk of disease. As for lawn maintenance, regular mowing is essential. Keep your grass at a height of around 2-3 inches, as this promotes healthy growth and helps the grass outcompete weeds. Don’t forget to also fertilize your lawn regularly, following the manufacturer’s instructions. By following these watering techniques and incorporating proper lawn maintenance, you can ensure the growth and longevity of your newly planted grass seed.

Frequently Asked Questions

How Long Does It Typically Take for Grass to Grow After Tree Removal?

Typically, it takes about 2-4 weeks for grass to start growing after tree removal. However, this time frame can vary depending on factors such as soil condition, weather, and grass seed type.

Can I Plant Any Type of Grass After Tree Removal, or Are There Specific Types That Work Best?

You can definitely plant any type of grass after tree removal, but there are specific types that work best. It’s important to choose the best grass types for your specific soil and climate to ensure successful growth and avoid common mistakes.

Are There Any Special Considerations for Planting Grass in Areas Where the Tree’s Roots Were Removed?

When planting grass after tree removal, there are important factors to consider. Special considerations for soil preparation, such as removing any remaining tree roots, are crucial. Additionally, following best practices for watering new grass will promote healthy growth.

What Steps Can I Take to Ensure Successful Grass Growth After Tree Removal?

To ensure successful grass growth after tree removal, prepare the soil by removing any remaining tree roots and aerating it. Choose the right grass seed for your region and follow proper maintenance practices like watering and fertilizing regularly.

Are There Any Potential Drawbacks or Challenges Associated With Planting Grass After Tree Removal?

Before planting grass after tree removal, be aware of potential challenges such as soil preparation. Properly assess the condition of the soil, remove any debris, and ensure adequate drainage to ensure successful grass growth.

If you need a tree service in Utah, you can call:
Truco Services, Inc.
4640 Commerce Drive
Murray, Utah 84107
(801) 466-8044
https://truetreeservices.com/
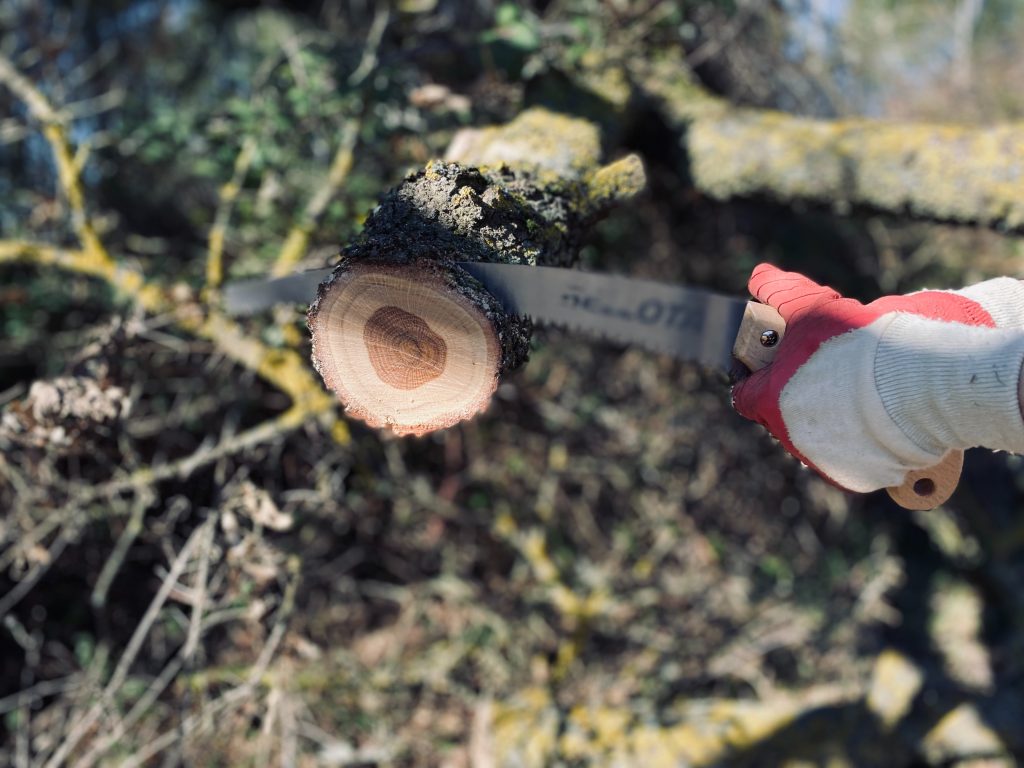
About Murray, Utah

Murray is a city situated on the Wasatch Front in the core of Salt Lake Valley in the U.S. state of Utah. Named for territorial governor Eli Murray, it is the state's fourteenth largest city. According to the 2020 census, Murray had a population of 50,637. Murray shares borders with Taylorsville, Holladay, South Salt Lake and West Jordan, Utah. Once teeming with heavy industry, Murray's industrial sector now has little trace and has been replaced by major mercantile sectors. Known for its central location in Salt Lake County, Murray has been called the Hub of Salt Lake County. Unlike most of its neighboring communities, Murray operates its own police, fire, power, water, library, and parks and recreation departments and has its own school district. While maintaining many of its own services, Murray has one of the lowest city tax rates in the state.

Bus Stops in Murray, Utah to Truco Services, Inc.

Bus Stop in Murray Central Station (Bay C) Murray, Utah to Truco Services, Inc.

Bus Stop in State St @ 4801 S Murray, Utah to Truco Services, Inc.

Bus Stop in Murray North Station Murray, Utah to Truco Services, Inc.

Bus Stop in State St @ 4949 S Murray, Utah to Truco Services, Inc.

Bus Stop in Murray Central Frontrunner/Trax Station Murray, Utah to Truco Services, Inc.

Bus Stop in Murray Blvd / Vine St (SB) Murray, Utah to Truco Services, Inc.

Bus Stop in State St @ 3925 S Murray, Utah to Truco Services, Inc.

Bus Stop in State St @ 4824 S Murray, Utah to Truco Services, Inc.

Bus Stop in State St @ 5223 S Murray, Utah to Truco Services, Inc.

Bus Stop in Murray Blvd / Allendale Dr (NB) Murray, Utah to Truco Services, Inc.

Bus Stop in Murray Blvd @ 5039 S Murray, Utah to Truco Services, Inc.

Bus Stop in State St @ 4721 S Murray, Utah to Truco Services, Inc.

Map of Murray, Utah

Driving Directions in Murray, Utah to Truco Services, Inc.

Driving Directions from Woodruff Tree Trimming and Removal to 4640 Commerce Dr, Murray, UT 84107, USA

Driving Directions from Reliable Tree Care to 4640 Commerce Dr, Murray, UT 84107, USA

Driving Directions from Tree Pro-Tech to 4640 Commerce Dr, Murray, UT 84107, USA

Driving Directions from Prestige Tree And Landscape to 4640 Commerce Dr, Murray, UT 84107, USA

Driving Directions from Excellence Tree & Landscape to 4640 Commerce Dr, Murray, UT 84107, USA

Driving Directions from Amen Trees to 4640 Commerce Dr, Murray, UT 84107, USA

Driving Directions from Tim's Tree Care to 4640 Commerce Dr, Murray, UT 84107, USA

Driving Directions from Jordan Tree Service - Murray to 4640 Commerce Dr, Murray, UT 84107, USA

Driving Directions from Arbor Works to 4640 Commerce Dr, Murray, UT 84107, USA

Driving Directions from Diamond Tree Experts to 4640 Commerce Dr, Murray, UT 84107, USA

Driving Directions from Green Tree Arborist to 4640 Commerce Dr, Murray, UT 84107, USA

Driving Directions from TruCo Services to 4640 Commerce Dr, Murray, UT 84107, USA

Reviews for Truco Services, Inc. Murray, Utah

Truco Services, Inc. Reviews

Emily Abercrombie

starstarstarstarstar (5)

We had a great experience with TruCo! They were well priced, responsive and prompt. Michael was a pleasure to work with and gave us advice on which plants to put in where we took out our ugly old shrubs. I would highly recommend this company!!!

Truco Services, Inc. Reviews

Michelle Turpin

starstarstarstarstar (5)

TruCo Services gets 5 stars from us for customer service. We experienced a few issues with their services this last year and Rob Eccles in senior management, stepped in and immediately handled our issues. He was very committed to making sure they understood our expectations and would execute to make us happy.

Truco Services, Inc. Reviews

Siobhan Billingsley

starstarstarstarstar (5)

I work for a property management company and have the pleasure of working with Rob at a community in Sandy. He has been incredible to work with and always responds in a timely manner. He knows all the homeowners by name and address and is aware of all the "problem" areas when it comes to sprinklers. I never have to worry about following up with him because he always reaches out to provide me with an update. If you're looking to work with someone who takes pride in their job, is professional, and can solve the worst landscaping problems thrown your way, Rob is your guy. Thank you, Rob for all you do!

Truco Services, Inc. Reviews

Jaime S.

starstarstarstarstar (5)

We have used Truco at 2 of the complexes we manage, they have been great to work with. Good quality service, outstanding customer service with good communication. That's hard to find these days. I highly recommend them. Travis has been awesome to work with.

Truco Services, Inc. Reviews

Jerusha Smart

starstarstarstarstar (5)

We use TruCo for a majority of our properties and our home. While other landscaping companies we use come and go for various reasons like cost, communication issues, work performance, etc., TruCo is always consistent in price and work. Also, Rob is the best.

After Tree Removal What Can I Plant if Bacterial Cankor Was in the Tree?

After Tree Removal What Can I Plant if Bacterial Cankor Was in the Tree?

Looking to replace a tree after it has been removed due to bacterial cankor? Wondering what options are available? Look no further! In this article, we’ll explore the history of bacterial cankor, its traits, and the steps you can take to replace your tree successfully. We’ll also highlight some dos and don’ts and provide key takeaways to ensure you make the right choices. So, let’s dive in and discover what you can plant after tree removal if bacterial cankor was present.

Key Takeaways

Introduction: Bacterial Cankor and Tree Replacement Options

If bacterial cankor was present in your tree and it had to be removed, you might be wondering what options you have for replacing it. Bacterial cankor is a destructive disease that can cause extensive damage to trees, leading to their decline and eventual death. To prevent the spread of this disease and ensure the health of your new tree, it is important to consider the following tree replacement strategies:

  1. Choose a resistant species: Certain tree species are more resistant to bacterial cankor than others. Research and select a tree species that has shown resistance to this disease in your area.
  2. Practice proper planting techniques: When replanting, ensure that you follow proper planting techniques to promote the healthy establishment of your new tree. This includes preparing the soil, planting at the correct depth, and providing adequate water and nutrients.
  3. Implement good sanitation practices: To prevent the introduction and spread of bacterial cankor, it is crucial to practice good sanitation. This involves removing and destroying any infected plant material and disinfecting tools used during tree removal and planting.
  4. Monitor and maintain tree health: Regularly monitor your new tree for any signs of bacterial cankor or other diseases. Implement appropriate preventive measures, such as pruning dead or infected branches, to maintain the health of your tree.

Bacterial Cankor History

Learn about the history of bacterial cankor and what types of plants are resistant to it. Bacterial cankor, also known as bacterial blight, is a destructive disease that affects a variety of plants, including trees. It is caused by the bacterium Pseudomonas syringae, which infects the vascular system of the plant, leading to cankers, or necrotic lesions, on the branches and trunk.

The history of bacterial cankor dates back to the early 20th century, when it was first identified as a disease affecting fruit trees. Since then, it has spread to a wide range of plants, including ornamental trees, shrubs, and even some vegetable crops.

Preventing bacterial cankor is essential to protect your plants. There are several strategies you can employ to minimize the risk of infection. These include maintaining proper plant hygiene, such as pruning infected branches and disposing of them properly. Regularly monitoring your plants for signs of infection and applying appropriate fungicides can also help prevent the spread of the disease.

When it comes to tree replacement strategies, it is important to choose plants that are resistant to bacterial cankor. Some trees, such as certain varieties of apple, pear, and cherry, have been bred to be more resistant to the disease. By selecting these resistant varieties, you can reduce the risk of bacterial cankor in your garden or orchard.

Now that you have learned about the history of bacterial cankor and the types of plants that are resistant to it, let’s move on to some tips for planting after tree removal.

Tips

When it comes to planting after removing a tree affected by bacterial canker, there are several important factors to consider. First, you should explore disease-resistant plant options that are less susceptible to bacterial canker. Additionally, proper soil preparation techniques will play a crucial role in creating a healthy environment for the new plants. Finally, seeking expert consultation and following their recommendations will ensure that you make informed decisions and increase the chances of successfully establishing disease-resistant plants in the area.

Disease-Resistant Plant Options

Consider planting disease-resistant varieties such as apple trees, which can help prevent the spread of bacterial canker. Disease-resistant plants have the benefit of being less susceptible to various illnesses, including bacterial canker, which can devastate your garden. By choosing disease-resistant varieties, you can minimize the risk of your new plants becoming infected and ensure a healthier garden overall. When selecting disease-resistant plants, it is important to also consider soil health. Healthy soil provides the necessary nutrients and support for plants to thrive. Ensure your soil is well-drained and properly amended with organic matter. This will create an optimal environment for disease-resistant plants to grow and flourish. Now that you have chosen disease-resistant varieties, let’s move on to soil preparation techniques to further enhance the success of your garden.

Soil Preparation Techniques

Now that you’ve chosen disease-resistant varieties, let’s explore how to prepare your soil for optimal growth. Proper soil preparation is crucial for the success of your disease-resistant plant options. Start by removing any existing vegetation or weeds from the planting area. This will eliminate competition for nutrients and help prevent the spread of diseases. Next, loosen the soil using a garden fork or tiller to improve aeration and drainage. If your soil is lacking in organic matter, consider adding compost or well-rotted manure to enhance nutrient content and soil structure. It’s also important to test the pH level of your soil and make any necessary adjustments to ensure it is within the optimal range for the selected plants. Finally, make sure to water the soil thoroughly before planting to provide a moist environment for the roots to establish. With these soil preparation techniques, you’re setting the stage for healthy and disease-resistant plants to thrive.

Expert Consultation Recommendations

For personalized guidance, it’s advisable to seek expert consultation from a local horticulturist or agricultural extension service. These professionals have the knowledge and expertise to provide you with the best advice on planting strategies after tree removal, especially if bacterial canker was present in the tree. They can assess the specific conditions of your soil, climate, and other factors to recommend the most suitable plants that are resistant to bacterial canker or other diseases. Expert advice is crucial in preventing the spread and recurrence of bacterial canker, as they can guide you on proper sanitation practices and the use of disease-resistant plant varieties. By consulting with these experts, you can ensure that you make informed decisions and take the necessary precautions to protect your new plantings from the traits of bacterial canker, such as canker formation and branch dieback.

Traits of Bacterial Cankor

If bacterial canker was present in the tree, you should avoid planting susceptible tree species in the same area. Bacterial canker is a destructive disease that affects a wide range of tree species, causing cankers, wilting, and dieback. To prevent the spread of this disease, it is crucial to select tree species that are resistant to bacterial canker. When choosing new trees, ensure that they have been bred or selected for their resistance to this disease. Look for varieties that have been specifically developed to withstand bacterial canker and have a proven track record of resistance. Consulting with local experts or arborists can provide valuable insights into the best disease-resistant tree species for your area.

By planting disease-resistant tree species, you can minimize the risk of bacterial canker and protect the health of your landscape. Some common choices for disease-resistant trees include certain varieties of oak, maple, and cedar. These trees are less vulnerable to bacterial canker and have a higher chance of thriving in an area where the disease was previously present. Additionally, implementing proper tree care practices, such as regular pruning to remove infected branches and maintaining optimal soil conditions, can further enhance the resistance of your trees against bacterial canker.

In order to replace trees after bacterial canker, there are several steps you can take to ensure a successful transition and minimize the risk of reinfection.

Steps to Replace Trees After Bacterial Cankor

To successfully replace trees following bacterial canker, it’s important to carefully select disease-resistant species and implement proper planting techniques. Here are four key steps to help you in the process:

  1. Choose disease-resistant tree options: Look for tree species that have been bred or naturally selected for resistance to bacterial canker. Some common disease-resistant options include the Liberty Apple, the Redhaven Peach, the American Elm ‘Valley Forge’, and the London Plane Tree.
  2. Prepare the planting site: Before planting new trees, it’s essential to ensure the soil is well-drained and free from any infected debris. Remove any remnants of the previous tree, as they may still contain the bacteria causing canker. Consider soil testing and amendment to create optimal growing conditions for the new trees.
  3. Plant correctly: Dig a hole that is wide and shallow to encourage proper root growth. Place the tree in the hole, making sure the root collar is level with the ground. Backfill with soil, gently firming it around the roots. Water thoroughly after planting to settle the soil and remove any air pockets.
  4. Provide long-term tree care: Regularly monitor the trees for signs of disease and take appropriate action if necessary. Proper pruning techniques, adequate irrigation, and balanced fertilization can promote healthy growth and minimize the risk of bacterial canker.

Goals

Now, let’s discuss what your goals should be when replacing trees affected by bacterial canker. When choosing disease resistant tree options, it is crucial to prioritize the health and longevity of your new trees. You want to select trees that are not only resistant to bacterial canker but also well-suited to your specific climate and soil conditions. Additionally, it is important to consider the aesthetic value and functionality of the trees for your landscape.

To help guide your decision-making process, here is a table outlining some disease resistant tree options and their characteristics:

Tree Species Disease Resistance Growth Rate Mature Height Soil Adaptability
Oak High Slow Tall Wide Range
Maple Moderate Medium Medium Well-drained
Dogwood High Slow Short Acidic
Cherry Low Fast Medium Loamy
Birch Moderate Fast Tall Moist

Habits and Tree Replacement Options

Now that you have established your goals for replacing the tree after bacterial canker, it’s important to develop good habits and consider tree replacement options that prioritize disease resistance. When it comes to tree planting, there are several factors to consider to ensure successful growth and long-term health.

First, choose a site that provides adequate sunlight, proper soil drainage, and sufficient space for the new tree to thrive. This will help reduce the risk of disease and promote healthy development. Additionally, consider selecting a tree species that is known for its disease resistance. Consult with local nurseries or arborists to identify trees that are less susceptible to bacterial canker or other common diseases in your area.

When planting the new tree, follow proper planting techniques, such as digging a hole that is wide and shallow, rather than deep. This encourages the growth of a strong root system. Be sure to water the tree regularly, especially during the establishment period, to promote healthy growth.

A Real-Life Story

If you’re looking for inspiration on successfully replacing a tree after disease, let me share with you a real-life story that highlights the importance of good habits and disease-resistant tree selection. One of my clients, let’s call him John, experienced the devastating effects of bacterial canker on his beloved cherry tree. John had always taken great care of his tree, but unfortunately, it succumbed to the disease. Determined to find a suitable replacement, he sought expert advice and learned from real-life experiences.

John discovered that choosing disease-resistant tree varieties is crucial for long-term success. With the guidance of an arborist, he selected a cultivar known for its resistance to bacterial canker. This decision proved to be a game-changer. The new tree thrived, showing no signs of disease even when nearby trees were affected.

John’s real-life experience emphasizes the importance of not only replacing a tree after disease but also making informed choices based on expert advice. By selecting disease-resistant varieties, you increase the likelihood of a healthy, thriving tree in the future.

Now, let’s dive into some insightful quotes from experts in the field, who provide valuable guidance on successfully replacing a tree after disease.

Quotes

Choosing disease-resistant tree varieties is crucial for long-term success, as highlighted by John’s real-life story. When it comes to disease-resistant tree options, there are several varieties to consider. Some popular choices include the American elm, which is resistant to Dutch elm disease, and the Liberty apple, which is resistant to apple scab. These varieties have been specifically bred to withstand common diseases and pests, making them a wise choice for your landscape.

In addition to selecting disease-resistant tree varieties, proper soil preparation techniques are essential. Before planting, it is important to test the soil pH and fertility levels. Adjustments can be made by adding organic matter or specific fertilizers to create an optimal growing environment for your trees. Adequate drainage is also crucial to prevent waterlogged soil, which can lead to root rot and other diseases.

By choosing disease-resistant tree varieties and implementing proper soil preparation techniques, you are setting yourself up for success in maintaining a healthy and vibrant landscape. These steps will help ensure that your trees are able to resist common diseases and thrive in their environment.

Now, let’s delve into some secrets to further enhance the health and longevity of your trees.

Secrets

To enhance the health and longevity of your trees, it’s essential to regularly prune them to promote proper growth and prevent the spread of diseases. Pruning is a vital technique that can help maintain the overall well-being of your trees. But how can you ensure that you’re doing it right? Well, here are some secrets and tips to help you become a master pruner.

First and foremost, always use sharp and clean tools. Dull blades can cause unnecessary damage to the tree, and dirty tools may introduce harmful pathogens. Secondly, make sure you prune at the right time of year. Different tree species have different optimal pruning periods, so do your research or consult an expert to determine the best time for your specific tree.

Another secret is to prune strategically. Focus on removing dead, damaged, or diseased branches, as well as those that are crossing or rubbing against each other. By eliminating these problematic branches, you’ll improve the tree’s structure and allow for better airflow and light penetration.

Lastly, don’t forget to remove any suckers or water sprouts that may emerge from the base or trunk of the tree. These vigorous shoots can divert energy away from the main branches and hinder proper growth.

By following these secrets and tips, you’ll be on your way to becoming a skilled pruner and ensuring the health and longevity of your trees.

Lessons and Insights

Now that you know the secrets and tips of proper pruning, let’s delve into some valuable lessons and insights about tree care. When it comes to maintaining healthy trees, there are a few key lessons that every homeowner should keep in mind.

Firstly, it is crucial to regularly inspect your trees for any signs of disease or damage. Catching issues early on can help prevent further spread and potential tree loss. Additionally, understanding the specific needs of different tree species is essential for providing proper care. Each tree requires specific amounts of water, sunlight, and nutrients, so it’s important to do your research and provide the ideal conditions.

Insightful tree care also involves learning about common pests and diseases that can affect your trees. By familiarizing yourself with these issues, you can take proactive measures to prevent infestations and infections. Regularly monitoring and addressing pest and disease problems can significantly extend the lifespan of your trees.

Benefits of Planting Disease-Resistant Trees After Bacterial Cankor

Understanding the benefits of planting disease-resistant trees helps ensure the long-term health and vitality of your landscape. When it comes to dealing with bacterial canker, selecting disease-resistant options is crucial in preventing the spread of this destructive disease. By choosing trees that have been bred or genetically modified to resist bacterial canker, you can significantly reduce the risk of future infections and protect the overall health of your landscape.

One of the key benefits of planting disease-resistant trees is the increased likelihood of long-term survival. Trees that are resistant to bacterial canker have a higher chance of withstanding and recovering from infections, ensuring that your landscape remains vibrant and healthy for years to come. Additionally, disease-resistant trees require less maintenance and fewer interventions, saving you time and effort in the long run.

Furthermore, disease-resistant trees contribute to the overall ecological balance of your landscape. By planting these trees, you are creating a more resilient and diverse ecosystem that can better withstand disease outbreaks and environmental stressors. This can have a positive impact on the surrounding vegetation, wildlife, and even the air quality in your area.

Lessons

When considering alternative tree options after removing a tree affected by bacterial canker, there are several key points to keep in mind. First, it is crucial to choose disease-resistant plant varieties to minimize the risk of future infections. Additionally, soil health considerations should be taken into account to ensure optimal conditions for the new trees to thrive. By carefully considering these factors, you can make informed decisions and create a healthier and more resilient landscape.

Alternative Tree Options

Consider planting disease-resistant tree species to replace the tree affected by bacterial canker. When choosing alternative tree options, it is crucial to select disease-resistant plant varieties to avoid the recurrence of bacterial canker. Look for tree species that have been bred or genetically modified to resist this particular disease. Some examples of disease-resistant tree species include the American elm, which is resistant to Dutch elm disease, and the Liberty apple, which is resistant to apple scab. These disease-resistant options provide a viable solution to replanting after tree removal. By selecting disease-resistant plant varieties, you can ensure the health and longevity of your new trees, minimizing the risk of future disease outbreaks. Transitioning into the subsequent section about disease-resistant plant varieties, it is important to understand the different options available to you.

Disease-Resistant Plant Varieties

There are several disease-resistant tree species available that can prevent the recurrence of bacterial canker. When choosing new trees to plant after tree removal, it is crucial to select disease-resistant plant varieties. These varieties have been specifically bred to withstand and combat diseases such as bacterial canker. Some examples of disease-resistant tree species include the Liberty apple, which is resistant to apple scab and fire blight, and the Emerald Green arborvitae, which is resistant to multiple diseases, including bacterial canker. To ensure the success of these disease-resistant trees, proper soil preparation techniques should be employed. This includes removing any remaining roots or debris from the previous tree, amending the soil with organic matter, and ensuring proper drainage. By selecting disease-resistant plant varieties and employing effective soil preparation techniques, you can establish a healthier and more resilient landscape. Now, let’s delve into the important considerations for soil health.

Soil Health Considerations

Now that you have considered disease-resistant plant varieties, it is important to focus on the health of your soil before planting. Soil testing is a crucial step in this process. By analyzing your soil’s nutrient levels and pH, you can determine its fertility and make informed decisions about which plants will thrive. Additionally, soil testing can help identify any deficiencies or imbalances that may have contributed to the bacterial canker in your previous tree. Once you have the results, you can take steps to improve your soil’s health. One effective approach is to use organic fertilizers, which provide nutrients while also enhancing the soil’s structure and promoting beneficial microbial activity. With a well-balanced and fertile soil, you can create an optimal environment for your new plants to grow and thrive. Now, let’s explore some routines for maintaining a healthy garden.

Routines

You should establish new planting routines to prevent the spread of bacterial canker after tree removal. Incorporating new habits and secrets into your routine will help ensure the health and well-being of your future plantings. When it comes to preventing the spread of bacterial canker, there are several key factors to consider.

Firstly, it is essential to remove all infected plant material and debris from the area. This includes not only the tree itself, but also any fallen leaves or branches that may harbor the bacteria. Proper disposal of this material is crucial to prevent further contamination.

Next, you should thoroughly clean and disinfect any tools or equipment used during the removal process. Bacterial canker can easily be spread from one plant to another through contaminated tools, so it is important to take the necessary precautions.

Another important routine to establish is regular monitoring and inspection of your new plantings. By keeping a close eye on the health of your plants, you can quickly identify any signs of bacterial canker and take appropriate action.

Pros and Cons

Consider the advantages and disadvantages of different planting options to ensure the long-term success of your garden. When deciding what to plant after tree removal, it is important to weigh the pros and cons of each option. One option is to replant another tree in the same spot. The advantage of this is that it can maintain the aesthetic appeal of your garden and provide shade and habitat for wildlife. However, the disadvantage is that if the previous tree had bacterial canker, there is a risk that the new tree could also be affected. Another option is to choose a different type of plant, such as shrubs or flowers. The advantage of this is that it can add variety and color to your garden. However, the disadvantage is that it may not provide the same level of shade or habitat as a tree. Ultimately, the decision on what to plant will depend on your specific needs and preferences. Now, let’s explore some dos and don’ts to ensure the success of your garden.

Dos and Dont’s

It’s important to be aware of the dos and don’ts when deciding what to plant in your garden. To help you make informed choices and prevent any mistakes, here are some key tips to keep in mind:

Dos Don’ts
Consider your climate Overlook soil conditions
Choose disease-resistant varieties Plant susceptible plants
Plan for proper spacing Overcrowd your garden
Rotate crops to prevent disease Plant the same crop in the same spot year after year
Use organic fertilizers and pest control methods Rely solely on chemical pesticides

By following these dos and avoiding the don’ts, you can greatly increase your chances of success in your garden. Taking into account your climate and soil conditions will ensure that you select plants that will thrive in your specific environment. Opting for disease-resistant varieties will help protect your garden from potential issues. Proper spacing and crop rotation will prevent overcrowding and the spread of diseases. Using organic fertilizers and pest control methods will promote a healthy and sustainable garden.

Now that you know the dos and don’ts, let’s move on to the mistakes to avoid when deciding what to plant in your garden.

Mistakes to Avoid

Now that we’ve covered the dos and don’ts of gardening, let’s discuss some common mistakes to avoid when deciding what to plant. One of the biggest mistakes people make is not properly considering tree selection. When choosing what to plant, it’s important to research and select trees that are well-suited to your specific climate, soil type, and available space. Failure to do so can result in poor growth, disease susceptibility, and even death of the tree.

Another mistake to avoid is not taking preventative measures to protect your trees from pests and diseases. It’s essential to regularly inspect your trees for signs of infestation or disease and take immediate action to prevent further damage. This can include applying appropriate insecticides or fungicides, implementing proper pruning techniques, and maintaining good tree health through proper watering and fertilization.

By avoiding these common mistakes, you can ensure that your tree selection is appropriate for your garden and take preventative measures to keep them healthy. Understanding the importance of these factors will help you make informed decisions and set your garden up for success.

Now, let’s move on to the key takeaways from this discussion on tree selection and preventative measures.

Key Takeaways

To summarize, the key takeaways from this discussion are that proper research and selection of trees suited to your climate and space, along with regular inspection and preventative measures against pests and diseases, are essential for maintaining healthy trees in your garden. When it comes to disease-resistant plants, it is crucial to choose varieties that have been bred or selected for their ability to resist common diseases, such as bacterial canker. These plants have built-in mechanisms that help them fight off infections and reduce the risk of spreading diseases in your garden.

In addition to selecting disease-resistant plants, preparing the soil properly is another important step in maintaining healthy trees. This involves assessing the soil’s pH, nutrient levels, and drainage capacity. By making necessary amendments and improvements, you can create a favorable environment for your trees to thrive. This also includes providing adequate water and mulching to retain moisture and protect the roots.

Specific Action Steps for Tree Replacement After Bacterial Cankor

When selecting disease-resistant tree options for replacement, it is important to consider the specific pathogens that caused the bacterial canker in the previous tree. Consult with a local arborist or horticulturist who can provide expert advice on suitable tree species that are resistant to those pathogens. Additionally, proper soil preparation techniques, such as amending the soil with organic matter and ensuring proper drainage, will create a favorable environment for the new tree to establish and thrive. Lastly, long-term tree care, including regular pruning, adequate watering, and monitoring for any signs of disease, will help maintain the health and vitality of the newly planted tree.

Disease-Resistant Tree Options

Consider planting disease-resistant trees, such as the Bradford pear or the London plane, after removing the tree affected by bacterial canker. Disease-resistant tree selection is crucial to prevent the recurrence of bacterial canker. The Bradford pear (Pyrus calleryana) is a popular choice due to its resistance to diseases and its beautiful white flowers in spring. Another option is the London plane (Platanus x acerifolia), which has a strong resistance to bacterial canker and can tolerate various soil conditions. When planting disease-resistant trees, it is important to follow proper planting techniques. Dig a hole that is wider and shallower than the root ball, ensuring that the top of the root ball is level with the ground. Backfill the hole with a mixture of soil and compost, gently firming it around the roots. Water the tree thoroughly after planting to help it establish. Now, let’s move on to soil preparation techniques.

Soil Preparation Techniques

Proper soil preparation techniques are essential for successful planting of disease-resistant trees. Before you start planting, it is important to assess your soil conditions. Conduct a soil test to determine the pH level and nutrient content of your soil. Based on the results, you may need to amend the soil with organic matter or fertilizers to provide optimal conditions for tree growth. It is also crucial to ensure good drainage to prevent waterlogged soil, which can lead to root rot. Consider the specific requirements of the disease-resistant tree options you have chosen and adjust your soil preparation accordingly. By properly preparing your soil, you will create an environment that promotes healthy tree growth and resistance to diseases. Now, let’s move on to long-term tree care, where you will learn how to maintain the health and vigor of your planted trees.

Long-Term Tree Care

Now that you have planted disease-resistant trees, it’s important to understand how to care for them in the long term. Long term care is crucial for maintaining the health and vitality of your trees. Regular maintenance and monitoring are essential to ensure that your trees remain strong and resilient. Pruning is a key aspect of long term tree care, as it helps to remove diseased or dead branches, promoting healthy growth. Adequate watering and fertilization are also important to provide the necessary nutrients for growth and to prevent stress. Additionally, it’s important to be vigilant for any signs of disease or pests and take appropriate action promptly. If, despite your efforts, a tree becomes severely damaged or diseased, it may be necessary to consider tree replacement to maintain the overall health and aesthetics of your landscape.

Frequently Asked Questions

Can I Replant a Tree in the Same Spot Where a Tree Affected by Bacterial Canker Was Removed?

You can replant a tree in the same spot if the soil is treated for bacterial canker. However, it is recommended to choose a different tree species that is resistant to the disease to prevent future infections.

Is There Any Way to Prevent the Spread of Bacterial Canker to Other Trees in My Yard?

To prevent the spread of bacterial canker to other trees in your yard, it’s crucial to remove and dispose of infected trees properly. Explore alternatives to tree removal, such as planting resistant species or implementing preventative measures.

What Are Some Signs That a Tree May Be Infected With Bacterial Canker?

If you suspect bacterial canker in a tree, look for sunken lesions, gumming, and dead branches. Promptly remove and destroy infected trees. After tree removal, choose resistant species and proper planting techniques to prevent reinfection.

Are There Any Specific Types of Trees That Are More Resistant to Bacterial Canker?

If bacterial canker was present in the tree you removed, it’s important to choose a resistant tree for replanting. Some types, like resistant cherry and plum varieties, can help prevent future infections.

How Long Should I Wait Before Replanting a Tree in an Area Where a Tree Affected by Bacterial Canker Was Removed?

After tree removal, you should wait at least one year before replanting in an area affected by bacterial canker. During this waiting period, consider planting alternative tree species that are more resistant to the disease.


Murray, Utah

About Murray, Utah

Murray is a city situated on the Wasatch Front in the core of Salt Lake Valley in the U.S. state of Utah. Named for territorial governor Eli Murray, it is the state's fourteenth largest city. According to the 2020 census, Murray had a population of 50,637. Murray shares borders with Taylorsville, Holladay, South Salt Lake and West Jordan, Utah. Once teeming with heavy industry, Murray's industrial sector now has little trace and has been replaced by major mercantile sectors. Known for its central location in Salt Lake County, Murray has been called the Hub of Salt Lake County. Unlike most of its neighboring communities, Murray operates its own police, fire, power, water, library, and parks and recreation departments and has its own school district. While maintaining many of its own services, Murray has one of the lowest city tax rates in the state.

Bus Stops in Murray, Utah to Truco Services, Inc.

Bus Stop in Murray Central Station (Bay C) Murray, Utah to Truco Services, Inc.

Bus Stop in State St @ 4801 S Murray, Utah to Truco Services, Inc.

Bus Stop in Murray North Station Murray, Utah to Truco Services, Inc.

Bus Stop in State St @ 4949 S Murray, Utah to Truco Services, Inc.

Bus Stop in Murray Central Frontrunner/Trax Station Murray, Utah to Truco Services, Inc.

Bus Stop in Murray Blvd / Vine St (SB) Murray, Utah to Truco Services, Inc.

Bus Stop in State St @ 3925 S Murray, Utah to Truco Services, Inc.

Bus Stop in State St @ 4824 S Murray, Utah to Truco Services, Inc.

Bus Stop in State St @ 5223 S Murray, Utah to Truco Services, Inc.

Bus Stop in Murray Blvd / Allendale Dr (NB) Murray, Utah to Truco Services, Inc.

Bus Stop in Murray Blvd @ 5039 S Murray, Utah to Truco Services, Inc.

Bus Stop in State St @ 4721 S Murray, Utah to Truco Services, Inc.

Map of Murray, Utah

Driving Directions in Murray, Utah to Truco Services, Inc.

Driving Directions from Woodruff Tree Trimming and Removal to 4640 Commerce Dr, Murray, UT 84107, USA

Driving Directions from Reliable Tree Care to 4640 Commerce Dr, Murray, UT 84107, USA

Driving Directions from Tree Pro-Tech to 4640 Commerce Dr, Murray, UT 84107, USA

Driving Directions from Prestige Tree And Landscape to 4640 Commerce Dr, Murray, UT 84107, USA

Driving Directions from Excellence Tree & Landscape to 4640 Commerce Dr, Murray, UT 84107, USA

Driving Directions from Amen Trees to 4640 Commerce Dr, Murray, UT 84107, USA

Driving Directions from Tim's Tree Care to 4640 Commerce Dr, Murray, UT 84107, USA

Driving Directions from Jordan Tree Service - Murray to 4640 Commerce Dr, Murray, UT 84107, USA

Driving Directions from Arbor Works to 4640 Commerce Dr, Murray, UT 84107, USA

Driving Directions from Diamond Tree Experts to 4640 Commerce Dr, Murray, UT 84107, USA

Driving Directions from Green Tree Arborist to 4640 Commerce Dr, Murray, UT 84107, USA

Driving Directions from TruCo Services to 4640 Commerce Dr, Murray, UT 84107, USA

Reviews for Truco Services, Inc. Murray, Utah

Truco Services, Inc. Reviews

Emily Abercrombie

starstarstarstarstar (5)

We had a great experience with TruCo! They were well priced, responsive and prompt. Michael was a pleasure to work with and gave us advice on which plants to put in where we took out our ugly old shrubs. I would highly recommend this company!!!

Truco Services, Inc. Reviews

Michelle Turpin

starstarstarstarstar (5)

TruCo Services gets 5 stars from us for customer service. We experienced a few issues with their services this last year and Rob Eccles in senior management, stepped in and immediately handled our issues. He was very committed to making sure they understood our expectations and would execute to make us happy.

Truco Services, Inc. Reviews

Siobhan Billingsley

starstarstarstarstar (5)

I work for a property management company and have the pleasure of working with Rob at a community in Sandy. He has been incredible to work with and always responds in a timely manner. He knows all the homeowners by name and address and is aware of all the "problem" areas when it comes to sprinklers. I never have to worry about following up with him because he always reaches out to provide me with an update. If you're looking to work with someone who takes pride in their job, is professional, and can solve the worst landscaping problems thrown your way, Rob is your guy. Thank you, Rob for all you do!

Truco Services, Inc. Reviews

Jaime S.

starstarstarstarstar (5)

We have used Truco at 2 of the complexes we manage, they have been great to work with. Good quality service, outstanding customer service with good communication. That's hard to find these days. I highly recommend them. Travis has been awesome to work with.

Truco Services, Inc. Reviews

Jerusha Smart

starstarstarstarstar (5)

We use TruCo for a majority of our properties and our home. While other landscaping companies we use come and go for various reasons like cost, communication issues, work performance, etc., TruCo is always consistent in price and work. Also, Rob is the best.

Tree Stump Removal: What to Use?

Tree Stump Removal: What to Use?

Are you tired of staring at that stubborn tree stump in your yard? Well, you’re not alone. Did you know that over 80% of homeowners struggle with removing tree stumps? But don’t worry, we’ve got you covered. In this article, we’ll guide you through the best techniques and tools to use for effective tree stump removal. Say goodbye to that eyesore and reclaim your yard with our expert advice. Let’s get started!

Key Takeaways

Introduction to Tree Stump Removal

If you want to remove a tree stump, you should know that there are various methods available. Here are some options to consider:

Removing tree stumps offers several benefits, including:

Understanding the different tree stump removal methods and their benefits is essential before deciding on the best approach for your specific situation. Now let’s delve into the history of tree stump removal.

History of Tree Stump Removal

To learn about the history of removing tree stumps, you can explore various resources online and in books. Understanding the history of this practice can provide insights into its significance and evolution over time. Tree stump removal has a long and storied history, dating back to ancient civilizations. In ancient Rome, for example, tree stumps were removed using axes and other manual tools. As technology advanced, so did the methods for removing tree stumps. In the 19th century, for instance, the invention of the stump grinder revolutionized the process, making it faster and more efficient. Today, there are numerous methods and tools available for removing tree stumps, including chemical stump removers, stump grinders, and even controlled burning. Each method has its own advantages and considerations, depending on factors such as the size and location of the stump. By understanding the history of tree stump removal, you can better appreciate the significance of modern techniques and make informed decisions when it comes to removing tree stumps on your property. Now, let’s explore some helpful tips for successful tree stump removal.

Tips

When it comes to removing tree stumps, there are several options to consider. You can choose to use chemical stump removers, which are designed to speed up the decomposition process. Alternatively, you may prefer manual removal techniques, such as digging or using a stump grinder. Lastly, if you want a hassle-free solution, hiring professional stump grinders can ensure efficient and effective stump removal.

Chemical Stump Removers

You can consider using chemical stump removers to effectively remove tree stumps from your yard. Chemical stump removal is one of the alternative methods available for getting rid of unwanted stumps. These products contain powerful chemicals that break down the wood, making it easier to remove. The process usually involves drilling holes into the stump and then pouring the chemical solution into them. Over time, the chemicals will speed up the decomposition process, allowing you to easily remove the stump. It’s important to follow the instructions carefully and take safety precautions when using chemical stump removers. However, if you prefer a more hands-on approach, manual removal techniques can also be effective in removing tree stumps from your yard.

Manual Removal Techniques

Using manual techniques, such as digging or pulling, can be effective in getting rid of unwanted stumps in your yard. These manual removal techniques are alternative methods to chemical stump removers. To manually remove a stump, you will need some basic tools like a shovel, an axe, and a chainsaw. Start by digging around the stump to expose the roots. Then, use the axe to cut through the roots and loosen the stump. Once the roots are cut, you can try pulling the stump out of the ground using a truck or tractor. However, keep in mind that manual removal can be physically demanding and time-consuming, especially for larger stumps. If you prefer a quicker and easier solution, hiring professional stump grinders is the way to go.

Hiring Professional Stump Grinders

Now that you’ve explored the various DIY methods for removing tree stumps, let’s discuss the option of hiring professional stump grinders. When it comes to tackling stubborn tree stumps, sometimes it’s best to leave it to the experts who have access to specialized professional equipment. Professional stump grinders are equipped with powerful machinery specifically designed for efficient and effective stump removal. These machines can quickly grind down stumps to below ground level, eliminating any trace of the stump. Unlike DIY methods, professional stump grinding ensures a thorough and complete removal, preventing any future regrowth. Additionally, hiring professionals saves you time and effort, allowing you to focus on other tasks. Now, let’s delve into the traits of effective tree stump removal techniques, which will further enhance your understanding of this process.

Traits of Effective Tree Stump Removal Techniques

One of the traits of effective tree stump removal techniques is their ability to completely eliminate the stump from the ground. When it comes to removing tree stumps, there are two main options that are considered effective: using chemical removers or employing efficient manual methods. Chemical removers are substances specially formulated to break down the stump over time. These products are applied directly to the stump, where they penetrate the wood and accelerate the decomposition process. While chemical removers can be effective, they take time to work and may require multiple applications. On the other hand, efficient manual methods involve physically removing the stump from the ground. This can be done by using a stump grinder, which is a powerful machine that grinds the stump into small wood chips. Alternatively, you can opt for digging out the stump using a shovel or an excavator. Both methods require physical labor and may be more time-consuming than using chemical removers. However, they offer the advantage of immediate stump removal. Now that you understand the traits of effective tree stump removal techniques, let’s explore the steps for effective tree stump removal.

Steps for Effective Tree Stump Removal

To effectively remove a tree stump, it’s important to start by assessing the size and condition of the stump. Here are three essential steps to follow:

  1. Dig around the stump: Use a shovel to dig a trench around the stump, exposing the roots. This will make it easier to access and remove the stump later on. Be sure to dig deep enough to reach the entire root system.
  2. Cut the roots: With a tree root saw or an axe, carefully cut through the roots that are connected to the stump. Start with the smaller roots and work your way up to the larger ones. This will loosen the stump and make it easier to remove.
  3. Remove the stump: Once the roots are cut, you can now attempt to remove the stump. Use a stump grinder or a pry bar to lift and extract the stump from the ground. If the stump is particularly large or stubborn, you may need to enlist the help of a professional.

Goals

By effectively removing a tree stump from your property, you can now focus on achieving your landscaping goals or creating space for new projects. Tree stump removal offers several benefits, but it also comes with its own set of challenges. Let’s take a closer look at both.

Benefits Challenges
Enhanced aesthetics Difficulties in extraction
Prevention of pests and diseases Potential damage to surrounding plants
Elimination of tripping hazards Heavy physical labor
Opportunity for new landscaping ideas Cost considerations
Increased property value

Removing a tree stump can greatly enhance the aesthetics of your property, allowing you to create the landscape of your dreams. It also helps prevent pests and diseases that can affect other plants in your garden. Additionally, eliminating tripping hazards ensures the safety of your family and visitors.

However, tree stump removal is not without its challenges. Extraction can be difficult, especially if the stump is large or deeply rooted. There is also a risk of damaging surrounding plants during the removal process. Moreover, the physical labor involved can be strenuous and time-consuming. Finally, cost considerations must be taken into account, as professional removal services can be expensive.

Habits for Effective Tree Stump Removal

Understanding the benefits and challenges of tree stump removal can help you approach the task more effectively. When it comes to removing tree stumps, there are certain habits and traits that can make the process smoother and more efficient. One important habit is being prepared with the right tools and equipment. This includes having a stump grinder or digging tools, safety gear such as gloves and goggles, and a plan for disposing of the stump debris. Another important habit is patience. Removing a tree stump can be a time-consuming process, especially if the roots are deep and extensive. Taking your time and being methodical in your approach will yield better results. Additionally, having a strong work ethic and determination are valuable traits for this task. It can be physically demanding, so being willing to put in the effort and stay focused will help you achieve your goal.

In a real-life story, a homeowner named Sarah was faced with the task of removing a large tree stump from her backyard. She diligently researched the best methods and tools for stump removal and gathered all the necessary equipment. With patience and determination, she slowly and methodically worked through the stump, carefully grinding away at the roots. It took several hours of hard work, but Sarah’s efforts paid off when she finally succeeded in removing the stump completely. Her commitment to the task and her willingness to put in the necessary effort were key factors in her success.

A Real-Life Story

In Sarah’s real-life story, you can see the impact of patience and determination on the successful removal of a large tree stump. Sarah had always dreamed of having a beautiful garden in her backyard, but there was one major obstacle standing in her way – a stubborn tree stump that refused to budge. She knew that removing a tree stump could be a challenging task, but she was determined to overcome it.

Sarah began by researching different methods for tree stump removal and decided to try the chemical method. She carefully followed the instructions and applied the stump remover to the stump. However, after several weeks, she realized that the chemical method was not working as effectively as she had hoped.

Undeterred, Sarah decided to try a more physical approach. She rented a stump grinder and spent hours grinding away at the stubborn stump. It was hard work, but Sarah persisted, fueled by her determination to achieve her dream garden.

After several days of grinding, Sarah finally succeeded in removing the tree stump. It was a moment of triumph for her, and she felt a great sense of accomplishment. Sarah’s real-life experience highlights the challenges faced when removing a large tree stump, but also demonstrates the importance of patience and determination in achieving success.

Transitioning to the section about ‘quotes,’ it is clear that Sarah’s story is just one example of the many real-life experiences people have had with tree stump removal.

Quotes

Sarah’s determination paid off as she successfully removed the stubborn tree stump from her backyard. Real life stories like Sarah’s showcase the benefits and insights gained from tackling challenging tasks head-on. Removing a tree stump can be a daunting task, but with the right tools and knowledge, it can be accomplished. One of the secrets to successful stump removal is using the right equipment. Stump grinders are commonly used to grind away the stump and its roots, making it easier to remove. These machines can be rented from equipment rental companies or hired from professionals. Another secret is to ensure safety during the removal process. Wearing protective gear, such as gloves and goggles, is essential to prevent injuries. Additionally, it is crucial to have a plan in place for disposing of the stump and any resulting debris. By following these tips and tricks, you can tackle tree stump removal with confidence and achieve a clean, stump-free yard.

Secrets

One of the secrets to successfully tackling the challenge of removing a stubborn tree stump is having the right equipment. Without the proper tools, the task can be incredibly difficult and time-consuming. So, what equipment should you use? Well, a stump grinder is often the best option. This powerful machine is specifically designed to grind away the stump and roots, making the removal process much easier. With its sharp teeth and high-speed cutting action, a stump grinder can quickly reduce even the largest stumps to wood chips. Another secret to effective stump removal is understanding the anatomy of the stump. By learning how the roots are connected and where they extend, you can strategically cut and remove them, minimizing the effort required. Additionally, applying a stump removal chemical can help to speed up the decomposition process, making it easier to remove the stump. Now that you know the secrets, let’s delve into some insights and techniques that will further assist you in successfully removing that stubborn tree stump.

Insights and Techniques

To make the process easier, you can try using a stump grinder to quickly reduce the size of the stubborn tree stump. Stump grinding is a popular technique for removing tree stumps effectively. This method involves using a powerful machine with a rotating cutting disk to grind the stump into small wood chips.

One of the key insights in stump grinding is the importance of safety precautions. Before using a stump grinder, it is crucial to wear protective gear, such as safety goggles, gloves, and sturdy boots. Additionally, it is recommended to clear the area around the stump of any debris or obstacles that could hinder the grinding process.

When operating a stump grinder, it is essential to follow proper technique. Start by positioning the machine’s cutting disk above the stump, ensuring that it is level and centered. Slowly lower the cutting disk onto the stump, gradually moving it from side to side. This technique allows the cutting disk to grind away the wood in a controlled manner.

Benefits of Tree Stump Removal

Now that you have gained insights into the techniques used for tree stump removal, let’s explore the benefits of this process. Removing tree stumps comes with a multitude of advantages that can greatly enhance your outdoor space.

Firstly, removing tree stumps improves the aesthetics of your yard or garden. Stumps can be unsightly and disrupt the overall appearance of your landscape. By removing them, you can create a more visually pleasing environment.

Secondly, stump removal eliminates potential hazards. Stumps can be a tripping hazard, especially if they are hidden by grass or foliage. Removing them reduces the risk of accidents, making your outdoor space safer for you, your family, and your guests.

Additionally, removing tree stumps allows you to fully utilize your outdoor space. Stumps can take up valuable space, making it difficult to plant new trees, flowers, or build structures. By removing them, you can maximize the use of your land and create more functional areas.

Furthermore, stump removal prevents the growth of new shoots. Tree stumps have the potential to sprout new shoots, leading to unwanted growth that can be difficult to manage. Removing the stumps eliminates this problem, ensuring that unwanted trees or shrubs do not take over your garden.

Lessons

When it comes to removing tree stumps, there are several effective techniques you can use. Whether you choose to grind, burn, or manually remove the stump, each method has its own advantages and considerations. It’s important to have the right tools for the job, such as stump grinders, axes, and chainsaws, to ensure efficient and safe removal. Additionally, it’s crucial to take safety precautions, such as wearing protective gear and assessing the surrounding area, to prevent accidents and injuries during the stump removal process.

Effective Stump Removal Techniques

You can try using a stump grinder to effectively remove tree stumps. When it comes to removing tree stumps, there are two main methods: chemical and manual. Chemical methods involve using chemicals to speed up the decomposition process, while manual methods require physical labor to dig and remove the stump. Both methods have their pros and cons. Chemical methods are relatively easy to use and require less physical effort, but they can take a long time to fully decompose the stump. On the other hand, manual methods can be time-consuming and physically demanding, but they offer immediate results. If you’re unsure about tackling the job yourself, hiring professionals can be a great option. They have the expertise and specialized tools to efficiently and safely remove tree stumps. Transitioning into the next section about ‘tools for tree stumps,’ it’s worth mentioning that having the right tools is essential for a successful stump removal process.

Tools for Tree Stumps

If you’re looking for an effective way to tackle those pesky tree stumps, having the right tools is crucial. One of the most efficient tools for tree stump removal is a tree stump grinder. This powerful machine is designed to grind down the stump and its roots into small wood chips, making it easier to remove or cover up. With its sharp rotating blades, the tree stump grinder can quickly and efficiently get the job done. If you prefer a more manual approach, there are also tools available for tree stump extraction. These tools, such as a stump puller or a digging bar, allow you to physically remove the stump by digging around it and pulling it out. However, it’s important to note that these methods can be more labor-intensive and time-consuming. Now that you know about the different tools available, let’s discuss some safety precautions for tree stump removal.

Safety Precautions for Removal

Before starting the process, it’s important to be aware of the safety precautions for removing tree stumps. Preventing accidents should be your top priority. Firstly, always wear proper protective gear, such as gloves, safety goggles, and sturdy boots. This will shield you from any flying debris or sharp objects. Additionally, make sure to inspect the area around the stump for any potential hazards, like rocks or roots, that could cause you to trip or fall. It’s also crucial to check if there are any underground utilities, such as gas or water lines, before digging. Lastly, use caution when using power tools or machinery, following the manufacturer’s guidelines and keeping a safe distance from others. By taking these safety measures, you can ensure a successful and accident-free stump removal process. Now, let’s move on to the next section about routines.

Routines

Once you’ve established a routine for tree stump removal, it becomes easier and more efficient to tackle the task. Developing good habits for success can make a significant difference in the outcome of your efforts. One common mistake that people make is not properly assessing the stump before starting the removal process. It’s crucial to determine the size, location, and condition of the stump to choose the right tools and techniques. Another mistake is neglecting safety precautions, such as wearing protective gear and ensuring the area is clear of bystanders. To establish an effective routine, start by gathering the necessary tools, including a chainsaw, shovel, and stump grinder. Clearing the area around the stump and removing any debris will make the task easier. Next, use the chainsaw to cut the stump as close to the ground as possible. Finally, utilize the stump grinder to remove the remaining wood and roots. By following these steps consistently, you’ll develop a routine that maximizes efficiency and minimizes mistakes. Now, let’s explore the pros and cons of different methods for tree stump removal.

Pros and Cons

To make an informed decision about which method for tree stump removal is best for you, consider the pros and cons of each option. One common mistake people make is underestimating the difficulty of removing a tree stump. It may seem like a simple task, but it can quickly become labor-intensive and time-consuming. Hiring a professional stump removal service has its pros and cons. On the positive side, professionals have the expertise and equipment to efficiently remove the stump, saving you time and effort. However, it can be expensive, and you may need to schedule an appointment, which could delay your project. Another option is using chemical stump removers. These products are convenient and relatively affordable. However, they can take several weeks or even months to fully break down the stump. Additionally, they may harm surrounding vegetation if not used properly. Lastly, manual removal is an option, but it requires physical strength and patience. It can be a cost-effective choice, but it is also the most labor-intensive. Now that you understand the pros and cons of each method, let’s move on to the dos and don’ts of tree stump removal.

Dos and Dont’s

When using chemical stump removers, it’s important to carefully follow the instructions to avoid harming surrounding vegetation. These products can be effective in getting rid of tree stumps, but they must be used correctly to ensure safety and success. Here are some dos and don’ts to keep in mind when using chemical stump removers:

Dos Don’ts Common Mistakes
Read the instructions carefully and follow them precisely Don’t apply the product in excessive amounts Using too little or too much product
Wear protective clothing, gloves, and eyewear Don’t leave the product unattended Neglecting safety precautions
Apply the chemical only to the stump and avoid contact with surrounding plants or grass Don’t mix different stump remover products Combining incompatible chemicals

Mistakes to Avoid

A common mistake is not wearing protective clothing when using chemical stump removers, which can lead to potential harm. When dealing with chemicals, it is crucial to prioritize your safety. Chemical stump removers contain powerful substances that can cause skin irritation or even burn your skin upon contact. To avoid this, always wear long sleeves, pants, gloves, and goggles before handling these products. Another common mistake is not following the instructions provided by the manufacturer. Each chemical stump remover has specific guidelines on how to use it effectively and safely. Failure to follow these instructions can lead to ineffective results or, worse, accidents. Additionally, it is important to be aware of the surrounding area when using chemical stump removers. Ensure that there are no flammable materials nearby and keep pets and children away to prevent any accidents. By avoiding these common mistakes and following best practices, you can safely and effectively remove tree stumps from your property.

These key takeaways will help you avoid potential harm and achieve successful stump removal.

Key Takeaways

By following these key takeaways, you can ensure a safer and more successful stump removal process. One of the main benefits of stump removal is the prevention of potential hazards. Tree stumps can pose dangers to people and property, especially when they are hidden and easily tripped over. Removing the stumps eliminates these risks, making your outdoor space safer for everyone. Additionally, stump removal can enhance the aesthetics of your landscape. Tree stumps can be unsightly and disrupt the overall beauty of your yard. By removing them, you can create a more visually appealing environment and improve the overall curb appeal of your property. Furthermore, stump removal allows for better utilization of your outdoor space. Tree stumps can take up valuable space that could be used for other purposes such as planting new trees, installing a garden, or creating a seating area. Removing the stumps opens up possibilities for enhancing the functionality of your yard. With these key takeaways in mind, let’s explore the specific action steps for tree stump removal.

Specific Action Steps for Tree Stump Removal

When it comes to removing tree stumps, having the right tools is essential. In this discussion, we will explore the various tools that can be used for stump removal, including stump grinders, hand tools, and chemical solutions. Additionally, we will delve into effective removal techniques that can help you tackle even the toughest stumps, as well as safety precautions that should be taken to ensure a successful and accident-free removal process.

Tools for Stump Removal

There’s no better tool for stump removal than a stump grinder. When it comes to removing tree stumps, manual and chemical methods are often considered. Manual removal involves digging around the stump and using tools like axes or shovels to break it apart. While this method can be effective for smaller stumps, it requires a lot of physical effort and time. On the other hand, chemical methods involve using chemicals to accelerate the decomposition process. This method is cost-effective and requires less physical labor, but it can take several weeks or even months for the stump to fully decay. Now that you understand the different approaches to stump removal, let’s explore some effective techniques for getting rid of those stubborn stumps.

Effective Removal Techniques

If you want to get rid of those stubborn stumps, you can try using a combination of manual and chemical methods for more effective removal. One popular technique is tree stump grinding, which involves using a stump grinder to break down the stump into small wood chips. This method is highly efficient and leaves you with a clean and level surface. Another option is natural stump decay, where you allow the stump to decompose over time. This method is less labor-intensive but can take several years for the stump to fully decay. Both methods have their advantages, so you can choose the one that suits your needs and preferences. Now that you know effective removal techniques, it’s important to consider safety precautions during the removal process.

Safety Precautions During Removal

To ensure your safety during the removal process, it’s important to wear protective gear such as gloves, goggles, and sturdy boots. Proper safety gear is essential to protect yourself from any potential hazards that may arise during tree stump removal. Gloves will shield your hands from sharp edges and splinters, while goggles will prevent any debris from entering your eyes. Sturdy boots will provide stability and protect your feet from falling branches or tools. Additionally, make sure to use the proper equipment for the job. This includes a chainsaw or stump grinder, depending on the size of the stump. Following these safety precautions and using the correct gear and equipment will help ensure a safe and successful tree stump removal process.

Frequently Asked Questions

How Long Does It Typically Take to Remove a Tree Stump?

Removing a tree stump can vary in time depending on the size and complexity of the stump. It typically takes a few hours to a few days. Factors such as the tools used and the skill of the person performing the removal can also affect the time.

Can Tree Stump Removal Be Done on Any Type of Tree?

To remove a tree stump, you can use various equipment and methods. However, it’s essential to consider the type of tree and its size. Hiring a professional for stump removal can be costly, but they have the expertise and necessary tools.

Are There Any Environmental Considerations to Take Into Account When Removing a Tree Stump?

When removing a tree stump, it’s important to consider the environmental impact. There are eco-friendly options available that minimize harm to the ecosystem. Choose methods that prioritize sustainability and prevent further damage to the environment.

What Are the Potential Risks or Dangers Associated With DIY Tree Stump Removal?

Potential injuries and equipment safety are important considerations when attempting DIY tree stump removal. Without proper knowledge and precautions, risks such as accidents and bodily harm can arise. It’s crucial to prioritize safety and seek professional help if needed.

Are There Any Alternative Methods to Physically Removing a Tree Stump?

There are alternative methods to physically removing a tree stump. Chemical alternatives, such as stump removal products, can be effective. Another option is natural decay, which involves letting the stump decompose over time.

BEST PRACTICES FOR MANAGING TREE ROOTS NEAR BUILDINGS AND INFRASTRUCTURE

BEST PRACTICES FOR MANAGING TREE ROOTS NEAR BUILDINGS AND INFRASTRUCTURE

Managing tree roots in urban environments is crucial to ensure the health of both trees and the urban infrastructure. Urban areas pose unique challenges to trees due to limited space, competition for resources, and the presence of buildings, roads, and utilities. Effective root management is essential to create a harmonious balance between the benefits of urban trees and the requirements of a functional urban landscape. Here’s why managing tree roots in urban environments is important:

Tree Health and Longevity

Infrastructure Protection

Safety and Liability Mitigation

Stormwater Management

Urban Heat Island Effect Mitigation

Aesthetic and Livability Improvement:

Air Quality and Biodiversity

Economic Benefits

Climate Resilience

Community Well-Being

Managing tree roots in urban environments is essential for the coexistence of trees and urban infrastructure. It ensures that trees can thrive and provide numerous benefits while minimizing risks and conflicts. Integrating proper root management into urban planning and development strategies is key to creating sustainable and resilient cities for both people and nature.


Balancing Tree Health and Structural Integrity

Balancing tree health and structural integrity refers to the careful consideration and management of trees in relation to the surrounding built environment. It involves making informed decisions that prioritize both the well-being of trees and the safety of structures, infrastructure, and people. This balance is essential to create harmonious urban landscapes where trees and man-made elements coexist without causing conflicts or hazards. Here’s a deeper explanation of this concept:

Tree Health

Structural Integrity

Challenges of Urban Environments

Importance of Balance

Root Management

Selective Pruning

Tree Selection and Placement

Monitoring and Maintenance

Collaboration and Education

Balancing tree health and structural integrity involves integrating tree care practices with urban planning to create safe, attractive, and functional environments. By considering both the needs of trees and the requirements of built structures, cities can achieve a harmonious coexistence that benefits residents, the environment, and future generations.

Site Selection and Planning

Site selection and planning are critical steps in urban tree management to ensure that trees are strategically placed and cared for in a way that benefits both the trees and the surrounding environment. Proper site selection and planning involve evaluating various factors to determine the best locations for planting and managing trees in urban settings. Here’s a detailed explanation of site selection and planning:

Assessment of Existing Conditions

Tree Species Selection

Functional Goals

Design Considerations

Utility and Infrastructure Coordination

Traffic and Pedestrian Safety:

Root Space and Soil Volume

Future Growth and Maintenance

Environmental Considerations

Public Engagement

Long-Term Vision

In summary, site selection and planning for urban trees involve a comprehensive analysis of site conditions, design considerations, infrastructure coordination, safety, and environmental factors. A well-planned approach ensures that trees thrive, enhance the urban environment, and coexist harmoniously with the surrounding landscape and built structures.


Murray, Utah

About Murray, Utah

Murray is a city situated on the Wasatch Front in the core of Salt Lake Valley in the U.S. state of Utah. Named for territorial governor Eli Murray, it is the state's fourteenth largest city. According to the 2020 census, Murray had a population of 50,637. Murray shares borders with Taylorsville, Holladay, South Salt Lake and West Jordan, Utah. Once teeming with heavy industry, Murray's industrial sector now has little trace and has been replaced by major mercantile sectors. Known for its central location in Salt Lake County, Murray has been called the Hub of Salt Lake County. Unlike most of its neighboring communities, Murray operates its own police, fire, power, water, library, and parks and recreation departments and has its own school district. While maintaining many of its own services, Murray has one of the lowest city tax rates in the state.

Bus Stops in Murray, Utah to Truco Services, Inc.

Bus Stop in Murray Central Station (Bay C) Murray, Utah to Truco Services, Inc.

Bus Stop in State St @ 4801 S Murray, Utah to Truco Services, Inc.

Bus Stop in Murray North Station Murray, Utah to Truco Services, Inc.

Bus Stop in State St @ 4949 S Murray, Utah to Truco Services, Inc.

Bus Stop in Murray Central Frontrunner/Trax Station Murray, Utah to Truco Services, Inc.

Bus Stop in Murray Blvd / Vine St (SB) Murray, Utah to Truco Services, Inc.

Bus Stop in State St @ 3925 S Murray, Utah to Truco Services, Inc.

Bus Stop in State St @ 4824 S Murray, Utah to Truco Services, Inc.

Bus Stop in State St @ 5223 S Murray, Utah to Truco Services, Inc.

Bus Stop in Murray Blvd / Allendale Dr (NB) Murray, Utah to Truco Services, Inc.

Bus Stop in Murray Blvd @ 5039 S Murray, Utah to Truco Services, Inc.

Bus Stop in State St @ 4721 S Murray, Utah to Truco Services, Inc.

Map of Murray, Utah

Driving Directions in Murray, Utah to Truco Services, Inc.

Driving Directions from Woodruff Tree Trimming and Removal to 4640 Commerce Dr, Murray, UT 84107, USA

Driving Directions from Reliable Tree Care to 4640 Commerce Dr, Murray, UT 84107, USA

Driving Directions from Tree Pro-Tech to 4640 Commerce Dr, Murray, UT 84107, USA

Driving Directions from Prestige Tree And Landscape to 4640 Commerce Dr, Murray, UT 84107, USA

Driving Directions from Excellence Tree & Landscape to 4640 Commerce Dr, Murray, UT 84107, USA

Driving Directions from Amen Trees to 4640 Commerce Dr, Murray, UT 84107, USA

Driving Directions from Tim's Tree Care to 4640 Commerce Dr, Murray, UT 84107, USA

Driving Directions from Jordan Tree Service - Murray to 4640 Commerce Dr, Murray, UT 84107, USA

Driving Directions from Arbor Works to 4640 Commerce Dr, Murray, UT 84107, USA

Driving Directions from Diamond Tree Experts to 4640 Commerce Dr, Murray, UT 84107, USA

Driving Directions from Green Tree Arborist to 4640 Commerce Dr, Murray, UT 84107, USA

Driving Directions from TruCo Services to 4640 Commerce Dr, Murray, UT 84107, USA

Reviews for Truco Services, Inc. Murray, Utah

Truco Services, Inc. Reviews

Emily Abercrombie

starstarstarstarstar (5)

We had a great experience with TruCo! They were well priced, responsive and prompt. Michael was a pleasure to work with and gave us advice on which plants to put in where we took out our ugly old shrubs. I would highly recommend this company!!!

Truco Services, Inc. Reviews

Michelle Turpin

starstarstarstarstar (5)

TruCo Services gets 5 stars from us for customer service. We experienced a few issues with their services this last year and Rob Eccles in senior management, stepped in and immediately handled our issues. He was very committed to making sure they understood our expectations and would execute to make us happy.

Truco Services, Inc. Reviews

Siobhan Billingsley

starstarstarstarstar (5)

I work for a property management company and have the pleasure of working with Rob at a community in Sandy. He has been incredible to work with and always responds in a timely manner. He knows all the homeowners by name and address and is aware of all the "problem" areas when it comes to sprinklers. I never have to worry about following up with him because he always reaches out to provide me with an update. If you're looking to work with someone who takes pride in their job, is professional, and can solve the worst landscaping problems thrown your way, Rob is your guy. Thank you, Rob for all you do!

Truco Services, Inc. Reviews

Jaime S.

starstarstarstarstar (5)

We have used Truco at 2 of the complexes we manage, they have been great to work with. Good quality service, outstanding customer service with good communication. That's hard to find these days. I highly recommend them. Travis has been awesome to work with.

Truco Services, Inc. Reviews

Jerusha Smart

starstarstarstarstar (5)

We use TruCo for a majority of our properties and our home. While other landscaping companies we use come and go for various reasons like cost, communication issues, work performance, etc., TruCo is always consistent in price and work. Also, Rob is the best.

THE PROS AND CONS OF USING SOIL AMENDMENTS FOR TREE HEALTH

THE PROS AND CONS OF USING SOIL AMENDMENTS FOR TREE HEALTH

The concept of soil amendments for tree health involves the practice of improving the quality and condition of the soil in which trees are planted or growing. Soil amendments are materials added to the soil to enhance its physical, chemical, or biological properties, ultimately promoting healthier and more robust tree growth. This practice is widely used in arboriculture and landscaping to address specific soil deficiencies or to create an optimal environment for tree root development and nutrient uptake.

Here are key aspects of the concept of soil amendments for tree health:

  1. Soil Enhancement: Soil amendments are employed to enhance the overall quality of the soil. This can involve improving nutrient levels, adjusting pH, enhancing soil structure, and increasing organic matter content.
  2. Nutrient Optimization: In some cases, the native soil may lack essential nutrients necessary for tree growth. Soil amendments can provide these nutrients or make them more accessible to tree roots, ensuring proper nutrition.
  3. pH Adjustment: Soil pH, which measures the acidity or alkalinity of the soil, plays a crucial role in nutrient availability. Amendments can help adjust pH levels to create a more suitable environment for tree root health.
  4. Soil Structure Improvement: Proper soil structure is vital for root growth, water infiltration, and aeration. Soil amendments can improve soil structure by reducing compaction and increasing porosity.
  5. Organic Matter Addition: Organic matter in the form of compost, mulch, or other amendments can enhance soil fertility and promote beneficial microbial activity in the root zone.
  6. Tailored Solutions: The choice of soil amendments depends on the specific needs of the tree species, the existing soil conditions, and the intended goals of the soil improvement efforts. Different trees may require different amendments.
  7. Professional Guidance: Soil amendment practices should ideally be carried out with guidance from certified arborists, horticulturists, or soil experts. These professionals can assess soil conditions, recommend appropriate amendments, and ensure proper application techniques.
  8. Environmental Considerations: It’s essential to consider the environmental impact of soil amendments. Care should be taken to choose environmentally friendly materials and application methods to minimize runoff and pollution.

In summary, soil amendments for tree health aim to create an optimal soil environment that supports healthy root development, nutrient uptake, and overall tree vitality. By addressing soil deficiencies and improving soil quality, these practices contribute to the long-term health and well-being of trees in urban and natural landscapes.


Importance of Soil Quality in Maintaining Healthy Trees

Soil quality is of paramount importance in maintaining healthy trees. It plays a foundational role in the overall well-being and vitality of trees, impacting their growth, development, and long-term survival. Here’s an explanation of the significance of soil quality for healthy trees:

  1. Nutrient Availability:
  1. Water Retention and Drainage:
  1. Root Health and Development:
  1. pH Balance:
  1. Microbial Activity:
  1. Disease Resistance:
  1. Long-Term Resilience:
  1. Overall Tree Vitality:

In conclusion, soil quality is the foundation upon which healthy trees depend. Proper soil management, including soil testing, amendment, and maintenance, is essential to ensure that trees receive the necessary nutrients, water, and support for robust growth and long-term survival. Trees and their surrounding soil form a symbiotic relationship, and investing in soil quality is a key aspect of tree care and preservation.


Pros of Using Soil Amendments

Using soil amendments offers numerous advantages for improving soil quality and supporting plant growth, including healthier and more robust trees. Here are some of the key pros of using soil amendments:

  1. Enhanced Nutrient Availability:
  1. Improved Soil Structure:
  1. pH Adjustment:
  1. Organic Matter Enrichment:
  1. Disease Suppression:
  1. Erosion Control:
  1. Water Retention:
  1. Reduced Soil Compaction:
  1. Increased Microbial Activity:
  1. Sustainable Soil Management: – Soil amendments promote sustainable soil management practices by improving soil health, reducing the need for chemical fertilizers, and enhancing plant resilience.
  2. Customization: – Soil amendments can be tailored to specific plant or tree needs, addressing deficiencies or imbalances in the soil. This customization ensures that the soil is optimized for the intended plantings.
  3. Long-Term Benefits: – Many amendments provide long-lasting benefits to the soil, continuing to improve its quality and fertility over time.
  4. Environmental Benefits: – Properly amended soils can reduce nutrient runoff and pollution, benefiting the environment by protecting water quality.
  5. Economic Benefits: – Improved soil quality can lead to healthier, more productive plants, potentially increasing crop yields, and reducing maintenance costs in landscaping and agriculture.

In summary, soil amendments offer a range of benefits for optimizing soil quality and supporting healthy plant growth, including trees. They can address nutrient deficiencies, improve soil structure, promote beneficial soil microorganisms, and enhance overall soil health, leading to healthier and more resilient trees and landscapes.


Cons of Using Soil Amendments

While soil amendments offer several advantages, they also come with certain drawbacks and potential challenges. It’s essential to consider these cons before deciding to use soil amendments for landscaping or tree care. Here are some of the common disadvantages associated with using soil amendments:

  1. Cost:
  1. Labor-Intensive:
  1. Risk of Over-Amendment:
  1. Compatibility with Native Soil:
  1. Short-Term Effects:
  1. Environmental Concerns:
  1. Potential for Nutrient Imbalances:
  1. Inconsistent Results:
  1. Soil Testing Required:
  1. Long-Term Maintenance: – Using soil amendments may necessitate ongoing maintenance and reapplication to sustain soil quality, which can be time-consuming and costly.
  2. Soil Microbial Imbalance: – Some amendments can disrupt the balance of beneficial soil microorganisms, potentially affecting soil health and nutrient cycling.
  3. Potential for Weed Seeds: – Organic amendments, such as compost, may contain weed seeds. If not properly composted, amendments can introduce weed problems into the landscape.
  4. Limited Amendment Options: – In some cases, finding the right soil amendments that are suitable for specific soil conditions or plant requirements can be challenging.
  5. Incompatibility with Plant Species: – Not all plants or tree species may benefit equally from certain soil amendments. Some trees have specific soil preferences that may not align with the chosen amendments.

In conclusion, while soil amendments offer various benefits for improving soil quality and plant health, they are not without potential drawbacks. It’s essential to carefully assess the specific needs of your soil and plants, as well as consider the long-term implications and costs of using amendments. Consulting with soil experts or arborists can help make informed decisions regarding soil improvement practices.


Murray, Utah

About Murray, Utah

Murray is a city situated on the Wasatch Front in the core of Salt Lake Valley in the U.S. state of Utah. Named for territorial governor Eli Murray, it is the state's fourteenth largest city. According to the 2020 census, Murray had a population of 50,637. Murray shares borders with Taylorsville, Holladay, South Salt Lake and West Jordan, Utah. Once teeming with heavy industry, Murray's industrial sector now has little trace and has been replaced by major mercantile sectors. Known for its central location in Salt Lake County, Murray has been called the Hub of Salt Lake County. Unlike most of its neighboring communities, Murray operates its own police, fire, power, water, library, and parks and recreation departments and has its own school district. While maintaining many of its own services, Murray has one of the lowest city tax rates in the state.

Bus Stops in Murray, Utah to Truco Services, Inc.

Bus Stop in Murray Central Station (Bay C) Murray, Utah to Truco Services, Inc.

Bus Stop in State St @ 4801 S Murray, Utah to Truco Services, Inc.

Bus Stop in Murray North Station Murray, Utah to Truco Services, Inc.

Bus Stop in State St @ 4949 S Murray, Utah to Truco Services, Inc.

Bus Stop in Murray Central Frontrunner/Trax Station Murray, Utah to Truco Services, Inc.

Bus Stop in Murray Blvd / Vine St (SB) Murray, Utah to Truco Services, Inc.

Bus Stop in State St @ 3925 S Murray, Utah to Truco Services, Inc.

Bus Stop in State St @ 4824 S Murray, Utah to Truco Services, Inc.

Bus Stop in State St @ 5223 S Murray, Utah to Truco Services, Inc.

Bus Stop in Murray Blvd / Allendale Dr (NB) Murray, Utah to Truco Services, Inc.

Bus Stop in Murray Blvd @ 5039 S Murray, Utah to Truco Services, Inc.

Bus Stop in State St @ 4721 S Murray, Utah to Truco Services, Inc.

Map of Murray, Utah

Driving Directions in Murray, Utah to Truco Services, Inc.

Driving Directions from Woodruff Tree Trimming and Removal to 4640 Commerce Dr, Murray, UT 84107, USA

Driving Directions from Reliable Tree Care to 4640 Commerce Dr, Murray, UT 84107, USA

Driving Directions from Tree Pro-Tech to 4640 Commerce Dr, Murray, UT 84107, USA

Driving Directions from Prestige Tree And Landscape to 4640 Commerce Dr, Murray, UT 84107, USA

Driving Directions from Excellence Tree & Landscape to 4640 Commerce Dr, Murray, UT 84107, USA

Driving Directions from Amen Trees to 4640 Commerce Dr, Murray, UT 84107, USA

Driving Directions from Tim's Tree Care to 4640 Commerce Dr, Murray, UT 84107, USA

Driving Directions from Jordan Tree Service - Murray to 4640 Commerce Dr, Murray, UT 84107, USA

Driving Directions from Arbor Works to 4640 Commerce Dr, Murray, UT 84107, USA

Driving Directions from Diamond Tree Experts to 4640 Commerce Dr, Murray, UT 84107, USA

Driving Directions from Green Tree Arborist to 4640 Commerce Dr, Murray, UT 84107, USA

Driving Directions from TruCo Services to 4640 Commerce Dr, Murray, UT 84107, USA

Reviews for Truco Services, Inc. Murray, Utah

Truco Services, Inc. Reviews

Emily Abercrombie

starstarstarstarstar (5)

We had a great experience with TruCo! They were well priced, responsive and prompt. Michael was a pleasure to work with and gave us advice on which plants to put in where we took out our ugly old shrubs. I would highly recommend this company!!!

Truco Services, Inc. Reviews

Michelle Turpin

starstarstarstarstar (5)

TruCo Services gets 5 stars from us for customer service. We experienced a few issues with their services this last year and Rob Eccles in senior management, stepped in and immediately handled our issues. He was very committed to making sure they understood our expectations and would execute to make us happy.

Truco Services, Inc. Reviews

Siobhan Billingsley

starstarstarstarstar (5)

I work for a property management company and have the pleasure of working with Rob at a community in Sandy. He has been incredible to work with and always responds in a timely manner. He knows all the homeowners by name and address and is aware of all the "problem" areas when it comes to sprinklers. I never have to worry about following up with him because he always reaches out to provide me with an update. If you're looking to work with someone who takes pride in their job, is professional, and can solve the worst landscaping problems thrown your way, Rob is your guy. Thank you, Rob for all you do!

Truco Services, Inc. Reviews

Jaime S.

starstarstarstarstar (5)

We have used Truco at 2 of the complexes we manage, they have been great to work with. Good quality service, outstanding customer service with good communication. That's hard to find these days. I highly recommend them. Travis has been awesome to work with.

Truco Services, Inc. Reviews

Jerusha Smart

starstarstarstarstar (5)

We use TruCo for a majority of our properties and our home. While other landscaping companies we use come and go for various reasons like cost, communication issues, work performance, etc., TruCo is always consistent in price and work. Also, Rob is the best.

THE PROS AND CONS OF USING FERTILIZER ON TREES

THE PROS AND CONS OF USING FERTILIZER ON TREES

Fertilizers play a significant role in tree care by providing essential nutrients that trees need for healthy growth, development, and overall vitality. Trees, like all plants, require specific nutrients to carry out vital physiological processes such as photosynthesis, root development, and resistance to stressors. Fertilizers are used to supplement soil nutrient levels when they are insufficient to support optimal tree health. Here’s an explanation of the role of fertilizers in tree care:

  1. Nutrient Availability Enhancement:
  1. Improved Growth and Canopy Density:
  1. Strengthened Resistance to Stressors:
  1. Correcting Nutrient Deficiencies:
  1. Promotion of Root Development:
  1. Support for Flowering and Fruiting:
  1. Stress Recovery and Rehabilitation:
  1. Enhancement of Overall Tree Health:

It’s important to note that while fertilizers are beneficial, their application requires careful consideration. Incorrect use of fertilizers, including overfertilization or using the wrong type, can lead to negative consequences such as nutrient imbalances, environmental pollution, and root damage. To effectively use fertilizers in tree care, it’s essential to conduct soil tests, understand the specific nutritional needs of trees, and follow recommended application guidelines. Consulting with certified arborists or tree care professionals can help ensure that fertilization practices are tailored to the unique requirements of each tree and its environment.

Importance of Understanding the Potential Benefits and Drawbacks

Understanding the potential benefits and drawbacks of any action or decision, including using fertilizers on trees, is crucial for making informed and responsible choices. This knowledge empowers tree caretakers to weigh the advantages against the disadvantages and make decisions that align with the long-term health and well-being of trees and the surrounding environment. Here’s why understanding the potential benefits and drawbacks of using fertilizers on trees is important:

  1. Informed Decision-Making:
  1. Maximizing Benefits:
  1. Minimizing Negative Impacts:
  1. Avoiding Unintended Consequences:
  1. Environmental Responsibility:
  1. Cost-Effectiveness:
  1. Tailored Approach:
  1. Long-Term Impact:
  1. Education and Communication:

In essence, understanding the potential benefits and drawbacks of using fertilizers on trees is a fundamental aspect of responsible tree care. It enables tree caretakers to make choices that align with their goals for tree health, environmental sustainability, and long-term positive outcomes. By striking a balance between the benefits and drawbacks, tree caretakers can contribute to thriving urban forests, healthier ecosystems, and a more sustainable future.


Pros of Using Fertilizer on Trees

Using fertilizer on trees offers several potential benefits that can enhance their growth, health, and overall well-being. Fertilizers provide essential nutrients that trees may not receive in sufficient quantities from the soil alone. When applied correctly and in moderation, fertilizers can contribute to the vitality and longevity of trees. Here are the pros of using fertilizer on trees:

  1. Enhanced Nutrient Availability:
  1. Improved Growth and Canopy Density:
  1. Strengthened Resistance to Stress:
  1. Corrections of Nutrient Deficiencies:
  1. Promotion of Root Development:
  1. Support for Flowering and Fruiting:
  1. Assistance in Stress Recovery:
  1. Enhanced Overall Tree Health:
  1. Increased Carbon Sequestration:
  1. Long-Term Landscape Value:

It’s important to note that while there are numerous benefits to using fertilizers on trees, they must be applied carefully and based on the specific needs of each tree and its environment. Overusing or misusing fertilizers can lead to adverse effects such as nutrient imbalances, pollution, and damage to the root system. Consulting with arborists or tree care professionals can help determine the appropriate type, amount, and timing of fertilizer application for optimal results.


Murray, Utah

About Murray, Utah

Murray is a city situated on the Wasatch Front in the core of Salt Lake Valley in the U.S. state of Utah. Named for territorial governor Eli Murray, it is the state's fourteenth largest city. According to the 2020 census, Murray had a population of 50,637. Murray shares borders with Taylorsville, Holladay, South Salt Lake and West Jordan, Utah. Once teeming with heavy industry, Murray's industrial sector now has little trace and has been replaced by major mercantile sectors. Known for its central location in Salt Lake County, Murray has been called the Hub of Salt Lake County. Unlike most of its neighboring communities, Murray operates its own police, fire, power, water, library, and parks and recreation departments and has its own school district. While maintaining many of its own services, Murray has one of the lowest city tax rates in the state.

Bus Stops in Murray, Utah to Truco Services, Inc.

Bus Stop in Murray Central Station (Bay C) Murray, Utah to Truco Services, Inc.

Bus Stop in State St @ 4801 S Murray, Utah to Truco Services, Inc.

Bus Stop in Murray North Station Murray, Utah to Truco Services, Inc.

Bus Stop in State St @ 4949 S Murray, Utah to Truco Services, Inc.

Bus Stop in Murray Central Frontrunner/Trax Station Murray, Utah to Truco Services, Inc.

Bus Stop in Murray Blvd / Vine St (SB) Murray, Utah to Truco Services, Inc.

Bus Stop in State St @ 3925 S Murray, Utah to Truco Services, Inc.

Bus Stop in State St @ 4824 S Murray, Utah to Truco Services, Inc.

Bus Stop in State St @ 5223 S Murray, Utah to Truco Services, Inc.

Bus Stop in Murray Blvd / Allendale Dr (NB) Murray, Utah to Truco Services, Inc.

Bus Stop in Murray Blvd @ 5039 S Murray, Utah to Truco Services, Inc.

Bus Stop in State St @ 4721 S Murray, Utah to Truco Services, Inc.

Map of Murray, Utah

Driving Directions in Murray, Utah to Truco Services, Inc.

Driving Directions from Woodruff Tree Trimming and Removal to 4640 Commerce Dr, Murray, UT 84107, USA

Driving Directions from Reliable Tree Care to 4640 Commerce Dr, Murray, UT 84107, USA

Driving Directions from Tree Pro-Tech to 4640 Commerce Dr, Murray, UT 84107, USA

Driving Directions from Prestige Tree And Landscape to 4640 Commerce Dr, Murray, UT 84107, USA

Driving Directions from Excellence Tree & Landscape to 4640 Commerce Dr, Murray, UT 84107, USA

Driving Directions from Amen Trees to 4640 Commerce Dr, Murray, UT 84107, USA

Driving Directions from Tim's Tree Care to 4640 Commerce Dr, Murray, UT 84107, USA

Driving Directions from Jordan Tree Service - Murray to 4640 Commerce Dr, Murray, UT 84107, USA

Driving Directions from Arbor Works to 4640 Commerce Dr, Murray, UT 84107, USA

Driving Directions from Diamond Tree Experts to 4640 Commerce Dr, Murray, UT 84107, USA

Driving Directions from Green Tree Arborist to 4640 Commerce Dr, Murray, UT 84107, USA

Driving Directions from TruCo Services to 4640 Commerce Dr, Murray, UT 84107, USA

Reviews for Truco Services, Inc. Murray, Utah

Truco Services, Inc. Reviews

Emily Abercrombie

starstarstarstarstar (5)

We had a great experience with TruCo! They were well priced, responsive and prompt. Michael was a pleasure to work with and gave us advice on which plants to put in where we took out our ugly old shrubs. I would highly recommend this company!!!

Truco Services, Inc. Reviews

Michelle Turpin

starstarstarstarstar (5)

TruCo Services gets 5 stars from us for customer service. We experienced a few issues with their services this last year and Rob Eccles in senior management, stepped in and immediately handled our issues. He was very committed to making sure they understood our expectations and would execute to make us happy.

Truco Services, Inc. Reviews

Siobhan Billingsley

starstarstarstarstar (5)

I work for a property management company and have the pleasure of working with Rob at a community in Sandy. He has been incredible to work with and always responds in a timely manner. He knows all the homeowners by name and address and is aware of all the "problem" areas when it comes to sprinklers. I never have to worry about following up with him because he always reaches out to provide me with an update. If you're looking to work with someone who takes pride in their job, is professional, and can solve the worst landscaping problems thrown your way, Rob is your guy. Thank you, Rob for all you do!

Truco Services, Inc. Reviews

Jaime S.

starstarstarstarstar (5)

We have used Truco at 2 of the complexes we manage, they have been great to work with. Good quality service, outstanding customer service with good communication. That's hard to find these days. I highly recommend them. Travis has been awesome to work with.

Truco Services, Inc. Reviews

Jerusha Smart

starstarstarstarstar (5)

We use TruCo for a majority of our properties and our home. While other landscaping companies we use come and go for various reasons like cost, communication issues, work performance, etc., TruCo is always consistent in price and work. Also, Rob is the best.

COMMON MISTAKES TO AVOID DURING TREE TRANSPLANTING

COMMON MISTAKES TO AVOID DURING TREE TRANSPLANTING

Tree planting holds significant importance for both environmental and community benefits, making it a crucial practice for sustainable urban and rural development. Here’s an overview of the key reasons why tree planting is essential:

Environmental Benefits:

Community Benefits:

Tree planting is a multifaceted practice that has far-reaching benefits for the environment, public health, and community well-being. It contributes to a sustainable and resilient future, where people and nature coexist harmoniously. Therefore, promoting tree planting initiatives and responsible tree care practices is essential for building greener, healthier, and more vibrant communities.

The Significance Of Proper Tree Planting Techniques

Proper tree planting techniques are of paramount significance because they ensure the successful establishment and long-term health of trees. When trees are planted correctly, they are more likely to thrive, provide their intended benefits, and contribute positively to the environment and community. Here’s why proper tree planting techniques are crucial:

Proper tree planting techniques are essential for maximizing the ecological, economic, and social benefits that trees offer. Investing time and effort in learning and implementing these techniques ensures that newly planted trees have the best chance of thriving and making a positive impact on the environment and society for generations to come.

Common Mistakes And Their Potential Consequences

Common mistakes in tree planting can have significant consequences for the health and vitality of trees, as well as for the environment and the community. Understanding these mistakes and their potential repercussions is essential for promoting successful tree planting initiatives. Here’s an overview of common mistakes and their consequences:

Wrong Tree Species Selection:

Inadequate Site Preparation:

Improper Planting Hole:

Ignoring Root Health:

Planting Depth Errors:

Incorrect Mulching:

Watering Mistakes:

Improper Staking and Guying:

Lack of Pruning and Maintenance:

Community Disengagement:

Planting in Inappropriate Locations:

Ignoring Local Regulations:

Inadequate Tree Care and Monitoring:

Understanding these common mistakes and their potential consequences underscores the importance of following proper tree planting techniques and best practices. By avoiding these errors and promoting responsible tree planting, communities can maximize the benefits of trees while minimizing risks and long-term maintenance challenges.

Murray, Utah

About Murray, Utah

Murray is a city situated on the Wasatch Front in the core of Salt Lake Valley in the U.S. state of Utah. Named for territorial governor Eli Murray, it is the state's fourteenth largest city. According to the 2020 census, Murray had a population of 50,637. Murray shares borders with Taylorsville, Holladay, South Salt Lake and West Jordan, Utah. Once teeming with heavy industry, Murray's industrial sector now has little trace and has been replaced by major mercantile sectors. Known for its central location in Salt Lake County, Murray has been called the Hub of Salt Lake County. Unlike most of its neighboring communities, Murray operates its own police, fire, power, water, library, and parks and recreation departments and has its own school district. While maintaining many of its own services, Murray has one of the lowest city tax rates in the state.

Bus Stops in Murray, Utah to Truco Services, Inc.

Bus Stop in Murray Central Station (Bay C) Murray, Utah to Truco Services, Inc.

Bus Stop in State St @ 4801 S Murray, Utah to Truco Services, Inc.

Bus Stop in Murray North Station Murray, Utah to Truco Services, Inc.

Bus Stop in State St @ 4949 S Murray, Utah to Truco Services, Inc.

Bus Stop in Murray Central Frontrunner/Trax Station Murray, Utah to Truco Services, Inc.

Bus Stop in Murray Blvd / Vine St (SB) Murray, Utah to Truco Services, Inc.

Bus Stop in State St @ 3925 S Murray, Utah to Truco Services, Inc.

Bus Stop in State St @ 4824 S Murray, Utah to Truco Services, Inc.

Bus Stop in State St @ 5223 S Murray, Utah to Truco Services, Inc.

Bus Stop in Murray Blvd / Allendale Dr (NB) Murray, Utah to Truco Services, Inc.

Bus Stop in Murray Blvd @ 5039 S Murray, Utah to Truco Services, Inc.

Bus Stop in State St @ 4721 S Murray, Utah to Truco Services, Inc.

Map of Murray, Utah

Driving Directions in Murray, Utah to Truco Services, Inc.

Driving Directions from Woodruff Tree Trimming and Removal to 4640 Commerce Dr, Murray, UT 84107, USA

Driving Directions from Reliable Tree Care to 4640 Commerce Dr, Murray, UT 84107, USA

Driving Directions from Tree Pro-Tech to 4640 Commerce Dr, Murray, UT 84107, USA

Driving Directions from Prestige Tree And Landscape to 4640 Commerce Dr, Murray, UT 84107, USA

Driving Directions from Excellence Tree & Landscape to 4640 Commerce Dr, Murray, UT 84107, USA

Driving Directions from Amen Trees to 4640 Commerce Dr, Murray, UT 84107, USA

Driving Directions from Tim's Tree Care to 4640 Commerce Dr, Murray, UT 84107, USA

Driving Directions from Jordan Tree Service - Murray to 4640 Commerce Dr, Murray, UT 84107, USA

Driving Directions from Arbor Works to 4640 Commerce Dr, Murray, UT 84107, USA

Driving Directions from Diamond Tree Experts to 4640 Commerce Dr, Murray, UT 84107, USA

Driving Directions from Green Tree Arborist to 4640 Commerce Dr, Murray, UT 84107, USA

Driving Directions from TruCo Services to 4640 Commerce Dr, Murray, UT 84107, USA

Reviews for Truco Services, Inc. Murray, Utah

Truco Services, Inc. Reviews

Emily Abercrombie

starstarstarstarstar (5)

We had a great experience with TruCo! They were well priced, responsive and prompt. Michael was a pleasure to work with and gave us advice on which plants to put in where we took out our ugly old shrubs. I would highly recommend this company!!!

Truco Services, Inc. Reviews

Michelle Turpin

starstarstarstarstar (5)

TruCo Services gets 5 stars from us for customer service. We experienced a few issues with their services this last year and Rob Eccles in senior management, stepped in and immediately handled our issues. He was very committed to making sure they understood our expectations and would execute to make us happy.

Truco Services, Inc. Reviews

Siobhan Billingsley

starstarstarstarstar (5)

I work for a property management company and have the pleasure of working with Rob at a community in Sandy. He has been incredible to work with and always responds in a timely manner. He knows all the homeowners by name and address and is aware of all the "problem" areas when it comes to sprinklers. I never have to worry about following up with him because he always reaches out to provide me with an update. If you're looking to work with someone who takes pride in their job, is professional, and can solve the worst landscaping problems thrown your way, Rob is your guy. Thank you, Rob for all you do!

Truco Services, Inc. Reviews

Jaime S.

starstarstarstarstar (5)

We have used Truco at 2 of the complexes we manage, they have been great to work with. Good quality service, outstanding customer service with good communication. That's hard to find these days. I highly recommend them. Travis has been awesome to work with.

Truco Services, Inc. Reviews

Jerusha Smart

starstarstarstarstar (5)

We use TruCo for a majority of our properties and our home. While other landscaping companies we use come and go for various reasons like cost, communication issues, work performance, etc., TruCo is always consistent in price and work. Also, Rob is the best.