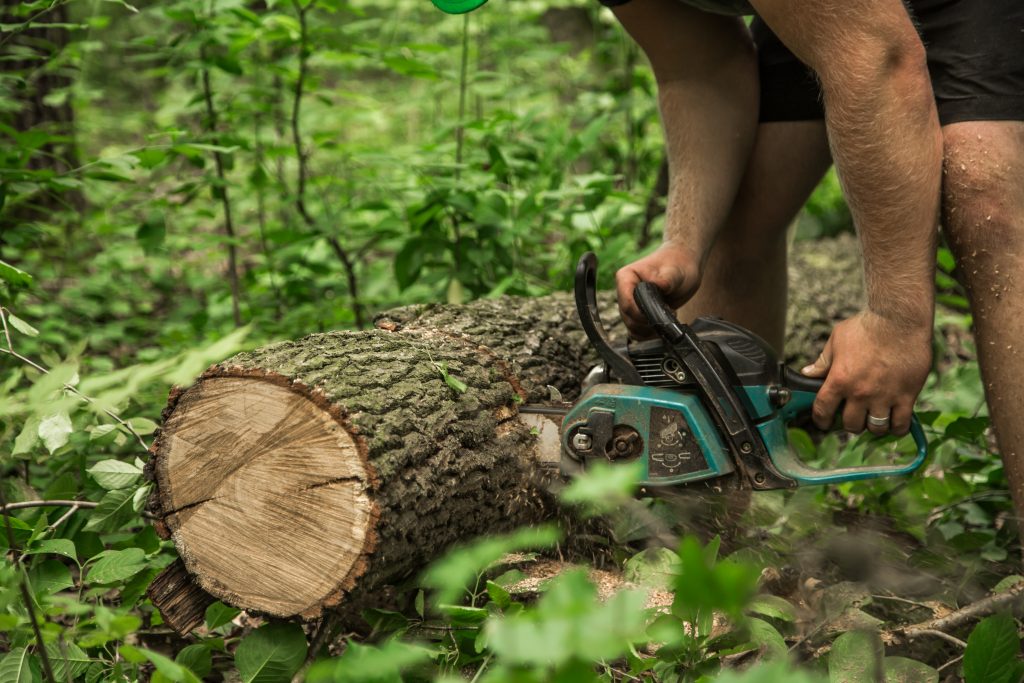
How to Seed the Lawn After Tree Removal

Are you ready to transform your yard after removing that old tree? Well, get ready to roll up your sleeves and get your hands dirty because we’ve got the ultimate guide on how to seed your lawn after tree removal. In this article, we’ll walk you through the step-by-step process of rejuvenating your grass and turning your yard into a lush green oasis. So grab your shovel, put on your gardening gloves, and let’s get started!

Key Takeaways

Introduction: Lawn Seeding Techniques After Tree Removal

Seeding the lawn after tree removal can be done using a variety of techniques. When it comes to lawn seeding techniques, there are a few options to consider. Here are four methods that can help you achieve a healthy and vibrant lawn:

  1. Overseeding: This technique involves spreading grass seed over an existing lawn to fill in bare patches and improve overall density. It is a great way to rejuvenate your lawn after tree removal.
  2. Hydroseeding: Hydroseeding is a process where a mixture of grass seed, fertilizer, mulch, and water is sprayed onto the soil. This method promotes faster germination and provides better coverage, resulting in a thicker and more uniform lawn.
  3. Slice seeding: In this technique, a machine is used to create small grooves in the soil and deposit grass seed directly into them. This method ensures good seed-to-soil contact, increasing the chances of successful germination.
  4. Hand seeding: If you have a small lawn or prefer a more hands-on approach, hand seeding is a viable option. Simply spread the grass seed evenly over the soil by hand and lightly rake it in.

Once you have chosen a seeding technique, it is crucial to take proper care of your lawn post-seeding. This includes regular watering, mowing at the appropriate height, and avoiding heavy foot traffic until the new grass is well-established.

Now that you know the various lawn seeding techniques and the importance of post-seeding care, let’s delve into the history of lawn seeding techniques after tree removal.

History of Lawn Seeding Techniques After Tree Removal

When it comes to establishing a healthy and lush lawn after removing a tree, you might be interested in learning about the various techniques that have been used over time. The history of lawn seeding techniques after tree removal is a fascinating one, filled with innovation and a quest for the best practices. In the past, people would simply remove the tree stump and plant grass seeds directly on the bare ground. However, this method often resulted in uneven growth and patchy areas. Over time, experts discovered that preparing the soil before seeding is crucial for success. Traits such as proper soil aeration, removing any remaining tree roots, and adding organic matter to improve soil fertility became common practices. Nowadays, the best practice for seeding a lawn after tree removal involves several steps, including soil testing, choosing the right grass seed, and proper watering and maintenance. By following these tips, you can ensure the success of your lawn seeding project and enjoy a beautiful, healthy lawn for years to come.

Tips

When it comes to creating a lush and healthy lawn, choosing the right seeds is crucial. You want to select seeds that are well-suited to your climate and soil type, as this will ensure optimal growth and resilience. Additionally, preparing the soil is just as important as choosing the right seeds, as it provides a solid foundation for the grass to grow. This involves removing any weeds or debris, aerating the soil, and adding necessary nutrients. Once your seeds are planted and the soil is prepared, proper watering and maintenance are key to ensure successful growth. Regular watering, as well as mowing and fertilizing as needed, will help your lawn thrive and maintain its lush appearance.

Choosing the Right Seeds

To choose the right seeds for your lawn, you’ll want to consider factors like the amount of sunlight and type of soil in your yard. There are different seed varieties available, each suited for specific conditions. For areas with full sunlight, opt for sun-loving grass seeds like Bermuda or Kentucky bluegrass. If your lawn is mostly shaded, choose shade-tolerant varieties such as fine fescue or creeping red fescue. It’s also important to consider the planting method that best suits your needs. You can choose to sow seeds directly onto the soil, or you may prefer to use a seed spreader for more even distribution. Now that you have an understanding of seed varieties and planting methods, let’s move on to preparing the soil for optimal growth.

Preparing the Soil

Once you’ve chosen the right seeds for your yard, it’s important to prepare the soil properly for optimal growth. Before seeding, it’s recommended to conduct a soil test to determine its pH level and nutrient content. This will help you understand what amendments, such as lime or fertilizer, are needed to create a favorable environment for your new grass. Additionally, weed control is essential to prevent unwanted plants from competing with your lawn. Remove any existing weeds by hand or use an appropriate herbicide, following the instructions carefully. Once the soil is tested and weed-free, it’s time to prepare it for seeding. Start by loosening the top few inches of soil, either by tilling or raking, to create a fine and level surface. This will ensure good seed-to-soil contact and allow the roots to penetrate easily. With the soil prepared, you can now move on to the next step of watering and maintenance to help your newly seeded lawn thrive.

Watering and Maintenance

Make sure you’re watering your newly seeded yard regularly to keep the soil moist and promote healthy growth. Proper watering techniques are crucial for successful lawn maintenance. After seeding, it’s important to water the area frequently, but not excessively. Watering too much can lead to shallow root growth and weak grass. Aim to water your lawn deeply, allowing the water to penetrate the soil at least 6 inches. This will encourage deep root development and make your lawn more drought-resistant. It’s best to water in the early morning or late afternoon when the temperatures are cooler, to minimize evaporation. Remember to adjust your watering schedule based on weather conditions, as rain can affect the amount of water your lawn needs. Now that you understand the importance of watering, let’s move on to the traits and best practices for maintaining a healthy lawn.

Traits and Best Practices

You should always consider the traits and best practices when seeding your lawn after tree removal. Seeding your lawn is an essential step in restoring its beauty and ensuring its health. To achieve the best results, there are certain practices you should follow and common mistakes to avoid.

Firstly, one of the best practices is to choose the right grass seed for your specific lawn conditions. Consider factors such as sunlight exposure, soil type, and climate when selecting the seed. This will ensure that the new grass grows well and blends seamlessly with the existing lawn.

Another important practice is to prepare the soil properly before seeding. Common mistakes include neglecting to remove tree stumps or roots, which can hinder the growth of new grass. It is also crucial to loosen the soil and remove any debris or rocks to create a favorable environment for the seed to germinate.

Once you have prepared the soil, it is time to spread the seed evenly. This can be done by hand or using a spreader. Be sure to follow the recommended seeding rate for the specific seed you have chosen. Over-seeding or under-seeding can lead to uneven growth and patchy areas in your lawn.

Key Steps

Now that you understand the traits and best practices for lawn seeding after tree removal, let’s dive into the key steps you need to take. By following these steps, you can ensure that your newly seeded lawn flourishes and thrives.

Here are the key steps to consider:

Goals

To achieve your desired outcome, it’s important to establish clear goals for your newly seeded grass. By setting specific goals, you can create a lawn seeding timeline and ensure proper post-seeding care. Here’s a breakdown of the goals you should aim for:

Goals Timeline
Germination 7-21 days
Root development 4-6 weeks
Establishment 8-12 weeks

During the germination phase, your focus should be on providing adequate moisture and protection to the newly seeded area. Watering lightly and frequently will help keep the soil consistently moist. Once the grass starts to grow, shift your attention to root development. This is the time to gradually reduce watering frequency and increase the depth to encourage deep root growth. Finally, the establishment phase is crucial for the grass to become resilient and healthy. Continue to provide regular irrigation and mow the grass when it reaches the recommended height.

Habits for Successful Lawn Seeding After Tree Removal

Establishing a consistent watering schedule and providing adequate nutrients are essential for the successful growth of newly seeded grass after a tree is removed. To ensure the best results, here are some tips for success and common challenges to be aware of.

Firstly, it is crucial to water the newly seeded area regularly. Watering deeply and frequently will promote root development and prevent the soil from drying out. It is recommended to water the area at least once a day, keeping the soil moist but not waterlogged.

In addition to regular watering, providing adequate nutrients is vital for the healthy growth of the new grass. Applying a high-quality fertilizer specifically formulated for newly seeded lawns will help promote strong root growth and lush green grass. Be sure to follow the instructions on the fertilizer package for the correct application rate.

One common challenge when seeding a lawn after tree removal is weed competition. Weeds can quickly invade the bare soil and compete with the new grass for nutrients and water. To prevent this, consider using a pre-emergent herbicide before seeding to suppress weed growth.

Now, let’s dive into a real-life story that demonstrates the importance of these habits for successful lawn seeding after tree removal.

A Real-Life Story

Providing consistent watering and proper nutrients are crucial for the successful growth of newly seeded grass after removing a tree, as demonstrated by this real-life story. A homeowner, let’s call him John, recently had a large tree removed from his front yard. He decided to seed the area with grass to restore the beauty of his lawn. John followed the recommended steps for lawn seeding after tree removal, including preparing the soil, spreading the grass seed evenly, and covering it with a thin layer of straw. However, what truly made a difference in the success of his lawn was his dedication to watering and providing the necessary nutrients.

John diligently watered the newly seeded area every day to keep the soil moist. He also applied a slow-release fertilizer to provide the grass with the nutrients it needed to grow strong and healthy. As a result of his efforts, the grass started germinating within a week, and after a few months, a lush green lawn replaced the bare patch where the tree once stood.

This real-life story is just one of many success stories when it comes to seeding grass after tree removal. It serves as a reminder of the importance of consistent watering and proper nutrients in achieving a vibrant and thriving lawn. Now, let’s delve into some quotes from experts in the field who can further guide us in this process.

Quotes

One expert in the field emphasizes the importance of consistent watering and proper nutrients for a successful grass growth. According to this expert, “Watering is crucial for newly seeded lawns. Keep the soil consistently moist, but avoid overwatering as it can lead to disease and shallow root growth.” Additionally, providing the right nutrients is essential. The expert suggests, “Using a balanced fertilizer with a high phosphorus content can promote root development and overall grass health.”

Another expert shares some secrets for successful lawn seeding. They say, “Before seeding, make sure to prepare the soil properly. Remove any debris, rocks, or old grass to create a smooth surface for the new seeds.” They also advise, “Aeration can greatly improve seed germination. It allows better water and nutrient penetration into the soil, resulting in healthier grass growth.”

It’s important to note that these quotes highlight the significance of consistent watering, proper nutrients, soil preparation, and aeration when seeding a lawn. These secrets, when followed correctly, can greatly increase the chances of a successful grass growth.

Secrets

Now that you’ve gathered inspiration from some insightful quotes, let’s dive into the secrets of successful lawn seeding techniques after tree removal. Seeding your lawn can be a daunting task, but with the right techniques and factors for success, you can achieve a lush and thriving lawn in no time.

One important factor to consider is the timing of your seeding. The best time to seed your lawn is in the early fall or spring when the soil temperature is ideal for seed germination. This will give your grass the best chance to establish strong roots before the harsh conditions of summer or winter.

Another key secret is proper soil preparation. Before seeding, make sure to remove any debris or tree roots left behind from the removal process. Loosen the soil to a depth of six inches and mix in compost to improve drainage and nutrient levels.

When it comes to seeding, make sure to choose the right type of grass seed for your region and soil conditions. Spread the seed evenly using a seed spreader and lightly rake it into the soil for good seed-to-soil contact.

With these secrets in mind, you’re now ready to gain some valuable insights on lawn seeding techniques after tree removal.

Insights on Lawn Seeding Techniques After Tree Removal

When it’s time to seed your yard after removing a tree, it’s important to consider the timing and soil preparation for successful lawn seeding techniques. First, make sure to remove any debris left behind from the tree removal process, such as roots or rocks, as they can interfere with the growth of new grass. Once the area is clear, prepare the soil by loosening it with a garden rake or tiller. This will help create a favorable environment for the seeds to germinate.

Before seeding, check the weather forecast to ensure a few days of mild temperatures and minimal rainfall. This will give the grass seeds the best chance of establishing themselves without being washed away or damaged. After spreading the seeds evenly across the prepared soil, lightly rake them in to ensure good seed-to-soil contact.

To promote proper germination, watering is crucial. Keep the seeded area consistently moist, but avoid overwatering, as this can lead to fungal diseases and weak root development. Water the lawn daily, applying enough water to penetrate the top inch of soil. As the grass begins to grow, gradually reduce the frequency of watering while increasing the amount of water applied each time.

Post-seeding maintenance is essential for the success of your new lawn. Regularly mow the grass once it reaches a height of three to four inches, taking care not to remove more than one-third of the grass blades in a single mowing. Additionally, fertilize the lawn about six weeks after seeding to provide essential nutrients for healthy growth.

Benefits of Lawn Seeding Techniques After Tree Removal

To maximize the benefits of your lawn seeding techniques after removing a tree, it’s important to properly time the seeding process and prepare the soil accordingly. Seeding your lawn after tree removal has numerous advantages. Firstly, it helps to fill in the bare spots left behind by the tree’s roots, ensuring a more uniform and attractive lawn. Additionally, lawn seeding can help to prevent soil erosion, as the new grass roots will hold the soil in place and prevent it from washing away during heavy rain. Moreover, by seeding your lawn, you can improve the overall health and vitality of your grass, as the new seedlings will compete with weeds for resources and create a denser, healthier turf. Lastly, lawn seeding after tree removal can enhance the aesthetic appeal of your outdoor space, giving it a fresh and rejuvenated look. By implementing proper seeding techniques, such as using high-quality grass seed and providing adequate watering and fertilization, you can enjoy these benefits and have a lush, green lawn in no time. Moving forward, there are also valuable lessons to learn from this process.

Lessons

When it comes to choosing the right seeds for your lawn, there are a few key factors to consider. First, you need to determine the type of grass that is best suited for your climate and soil conditions. Next, consider the specific needs of your lawn, such as high traffic areas or shaded spots. Lastly, look for seeds that are certified and labeled for quality assurance. Once you have selected the right seeds, it is important to understand the time to germination. This can vary depending on the type of grass you have chosen, but generally, it takes between 7-21 days for seeds to germinate. During this time, it is crucial to provide proper care and attention to ensure successful growth. This includes watering regularly, avoiding foot traffic, and keeping the soil moist. Finally, after seeding your lawn, there are a few post-seeding care tips to keep in mind. Avoid mowing the lawn until the new grass has reached a height of at least 3 inches. Additionally, continue to water the lawn regularly to promote healthy growth and establish strong roots. Following these tips will help you achieve a lush and vibrant lawn that you can enjoy for years to come.

Choosing the Right Seeds

You’ll want to make sure you choose the right seeds for your lawn after tree removal. When it comes to seed varieties, there are a few factors to consider. First, think about the type of grass that is best suited for your climate and soil conditions. Common seed varieties include Bermuda grass, Kentucky bluegrass, and fescue. Each has its own characteristics, such as drought tolerance or shade tolerance. Next, consider the planting techniques. Before seeding, make sure the soil is properly prepared by removing any debris or old tree roots. Then, spread the seeds evenly using a broadcast spreader or by hand. Finally, lightly rake the seeds into the soil and water thoroughly. By choosing the right seeds and using proper planting techniques, you’ll give your lawn the best chance for success.

As you wait for the seeds to germinate, it’s important to understand the time it takes for them to sprout. The time to germination can vary depending on the type of grass you have chosen. For example, Bermuda grass typically germinates within 7-10 days, while Kentucky bluegrass may take 14-21 days. It’s important to be patient during this stage and provide the seeds with consistent moisture. Water the area regularly, keeping the soil moist but not waterlogged. Additionally, avoid walking on the newly seeded area to prevent disturbing the seeds. With proper care and attention, you’ll soon see green sprouts emerging from your lawn, signaling the successful germination of your chosen seeds.

Time to Germination

The time it takes for the seeds to germinate can vary depending on the type of grass you’ve chosen. Typically, most grasses take about 7-14 days to germinate, but some varieties may take up to 21 days. It’s important to be patient during this time, as the seeds need the right conditions to sprout and establish roots. While waiting for germination, it’s crucial to keep the soil consistently moist but not waterlogged. This will help the seeds absorb water and nutrients, promoting healthy growth. Once the grass starts to sprout, it’s a sign that the lawn recovery process has begun. From here, you can transition into the next section to learn about post-seeding care tips for maintaining a lush and thriving lawn.

Post-Seeding Care Tips

For optimal results, it’s essential to water your newly seeded grass regularly to keep the soil moist. After seeding your lawn, post-seeding care is crucial to ensure healthy growth and establish a lush, green turf. Once you’ve finished seeding, it’s recommended to water the area thoroughly, making sure the soil is consistently moist. This will aid in seed germination and prevent the soil from drying out. Continue watering the seeded area daily, keeping the soil moist but not saturated. Avoid overwatering as it can lead to shallow root growth and fungal diseases. Additionally, it’s important to avoid walking or mowing on the newly seeded grass until it has reached a height of at least 3 inches. This will allow the young seedlings to establish a strong root system. By following these post-seeding care tips, you’ll give your lawn the best chance to thrive and flourish. Now let’s move on to routines {yt} that will help maintain your lawn’s health and beauty.

Routines

Make sure to establish a consistent routine for watering the newly seeded lawn after tree removal. Establishing good watering habits is one of the secrets to success when it comes to growing a healthy and vibrant lawn. Consistency is key, as it ensures that the seeds receive adequate moisture for germination and growth.

To start, water the newly seeded lawn lightly but frequently. Aim to keep the soil consistently moist, but not overly saturated. This can be achieved by watering the lawn two to three times a day for short durations. Avoid heavy watering, as it can lead to runoff and uneven moisture distribution.

As the grass begins to germinate and grow, adjust your watering routine accordingly. Gradually reduce the frequency of watering but increase the duration. This will encourage the roots to grow deeper into the soil, ensuring better drought tolerance in the future.

It is important to monitor the moisture levels of the soil regularly. Use a moisture meter or simply dig a small hole to check the soil’s moisture content. Adjust your watering routine based on the soil’s moisture needs.

Pros and Cons

Establishing a consistent watering routine has its pros and cons when it comes to growing a healthy and vibrant lawn. Let’s start with the pros. A regular watering schedule ensures that your lawn receives the necessary amount of moisture it needs to thrive. It helps to prevent under-watering, which can lead to dry and brown patches. Additionally, a consistent watering routine promotes deep root growth, making your lawn more resilient to drought conditions.

On the other hand, there are also some cons to consider. Over-watering is a common mistake that can have detrimental effects on your lawn. Too much water can lead to shallow root development, making your turf more susceptible to disease and pests. Moreover, excessive watering can also contribute to water wastage and higher utility bills.

To strike the right balance, it’s important to understand your lawn’s specific watering needs. Factors such as grass type, soil composition, and weather conditions should all be taken into account. By monitoring the moisture levels and adjusting your watering routine accordingly, you can avoid both under-watering and over-watering.

Now that you understand the pros and cons of establishing a watering routine, let’s move on to the dos and don’ts when it comes to watering your lawn.

Dos and Dont’s

It’s important to understand the dos and don’ts when it comes to watering your lawn. Proper watering is crucial for maintaining a healthy and lush lawn, while common mistakes can lead to wasted water, overwatering, or even damaging your grass. To help you navigate this important task, here are some key dos and don’ts to keep in mind:

Dos Don’ts
Water deeply Water shallowly
Water in the morning Water in the evening
Water infrequently Water too frequently
Water evenly Water unevenly

By following these dos, you can ensure that your lawn receives the right amount of water, promoting deep root growth and overall health. On the other hand, it’s important to avoid the common mistakes listed in the don’ts column. For example, watering shallowly can lead to shallow root systems, making your lawn more susceptible to drought and disease. Watering in the evening may cause the grass to stay wet overnight, increasing the risk of fungal diseases. Overwatering can drown the roots and cause the grass to become weak and vulnerable.

Understanding these dos and don’ts will set you on the right path to proper lawn watering. But what are the specific mistakes you should avoid? Let’s take a closer look in the next section.

Mistakes to Avoid

To ensure a healthy and vibrant lawn, it’s crucial to avoid these common watering mistakes. One of the most common mistakes people make is overwatering their lawn. While it may seem like more water is better, excessive watering can lead to shallow root growth and increase the risk of diseases. Another mistake to avoid is watering at the wrong time of day. Watering your lawn during the hottest part of the day can result in most of the water evaporating before it can be absorbed by the soil. Instead, water your lawn in the early morning or late afternoon to allow the water to penetrate deeper into the soil. Additionally, be mindful of the frequency of watering. Watering too frequently can cause the soil to become waterlogged, leading to root rot and other issues. Instead, water deeply but less frequently to encourage deep root growth. Finally, make sure to properly troubleshoot any issues with your irrigation system. Check for leaks, clogs, or misaligned sprinkler heads regularly to ensure efficient and effective watering. By avoiding these common watering mistakes and troubleshooting any issues, you can maintain a lush and healthy lawn.

Key Takeaways

One of the key takeaways is that avoiding common watering mistakes and regularly troubleshooting your irrigation system are essential for maintaining a healthy and vibrant lawn. By developing good watering habits and sticking to a routine, you can ensure that your lawn receives the right amount of water it needs to thrive. It’s important to avoid overwatering, as this can lead to shallow root growth and increase the risk of disease. On the other hand, underwatering can cause the grass to become weak and susceptible to drought stress. Regularly checking your irrigation system for leaks, clogs, or malfunctioning sprinkler heads is also crucial. This will help you identify and address any issues before they cause damage to your lawn. By making these habits and routines a part of your lawn care regimen, you can maintain a lush and healthy yard.

When it comes to seeding your lawn after tree removal, specific action steps can ensure successful growth.

Specific Action Steps for Lawn Seeding After Tree Removal

When it comes to seeding your lawn after tree removal, there are a few key points to consider. First, understanding the ideal seeding timeline is crucial for the success of your lawn. Next, you’ll need to learn about soil preparation techniques to create the optimal environment for seed germination. Lastly, choosing the right seed type is important to ensure that your new lawn thrives in your specific climate and conditions. By following these steps, you’ll be well on your way to a lush and healthy lawn.

Ideal Seeding Timeline

The ideal time to seed the lawn after tree removal is usually in the spring or fall. These seasons provide the optimal conditions for successful grass growth. When it comes to seeding techniques, there are a few key factors to keep in mind. First, make sure to choose the right grass seed for your specific climate and soil type. This will ensure that the grass has the best chance of thriving. Additionally, be sure to prepare the soil properly by removing any debris and loosening it with a rake or tiller. Common mistakes to avoid include overseeding, as this can lead to overcrowding and weak grass, and neglecting to water the newly seeded area adequately. By following these ideal seeding techniques and avoiding common mistakes, you can lay the foundation for a healthy and vibrant lawn. Now, let’s move on to soil preparation techniques.

Soil Preparation Techniques

To properly prepare your soil, start by removing any debris and loosening it with a rake or tiller. This will help create a smooth surface for seeding and allow the roots to penetrate easily. After clearing the area, it’s important to test the soil’s pH level and adjust it if necessary. Most grasses prefer a slightly acidic pH of around 6.0 to 7.5. Once the pH is balanced, apply a layer of compost or organic matter to improve the soil’s fertility and structure. This will provide essential nutrients and promote healthy root development. Before seeding, water the soil thoroughly to ensure it is evenly moist. Proper watering is crucial for seed germination and establishment. It’s important to keep the soil consistently moist, but not waterlogged, throughout the germination process. This will help the seeds to sprout and grow into a lush lawn. Now that you’ve prepared your soil, it’s time to choose the right seed type for your lawn.

Choosing Seed Type

Once you’ve decided on the type of grass you want, consider the climate and maintenance requirements before choosing the seed type. Different grasses thrive in different climates, so it’s important to choose a seed type that is well-suited to your region. For example, if you live in a hot and dry climate, you may want to choose a drought-resistant variety. On the other hand, if you live in a cooler climate with lots of shade, you’ll need to select a seed type that can tolerate those conditions. Additionally, consider the maintenance requirements of the seed type. Some grasses require more frequent mowing and watering, while others are low maintenance. By taking these factors into account, you can ensure that you choose the right seed type for your lawn.

Frequently Asked Questions

How Long Does It Typically Take for Grass to Grow After Seeding the Lawn Following Tree Removal?

To speed up grass growth after seeding the lawn following tree removal, you can try methods like watering regularly, providing adequate sunlight, and applying fertilizer. You can also consider using a different type of grass seed for your lawn after tree removal.

Can I Use the Same Grass Seed for My Lawn That Was Used Before the Tree Removal?

Yes, you can use the same grass seed for your lawn after tree removal, but there are also alternatives available. It’s important to prepare the soil properly before seeding to ensure successful growth.

Is It Necessary to Remove Any Remaining Tree Roots Before Seeding the Lawn?

Before seeding the lawn, it is essential to remove any remaining tree roots. This process has several benefits, such as preventing root competition and ensuring proper grass growth. However, if you prefer alternatives, they can be explored as well.

What Type of Fertilizer Should I Use When Seeding the Lawn After Tree Removal?

When seeding the lawn after tree removal, you should use a suitable grass seed for shady areas. Additionally, using organic fertilizer has many benefits for lawn seeding, such as promoting soil health and minimizing chemical runoff.

Are There Any Specific Watering Requirements for Newly Seeded Lawns After Tree Removal?

To ensure success when watering your newly seeded lawn after tree removal, follow these techniques: water lightly multiple times a day to keep the surface moist, avoid overwatering, and choose the best time to seed the lawn for optimal growth.

If you need a tree service in Utah, you can call:
Truco Services, Inc.
4640 Commerce Drive
Murray, Utah 84107
(801) 466-8044
https://truetreeservices.com/
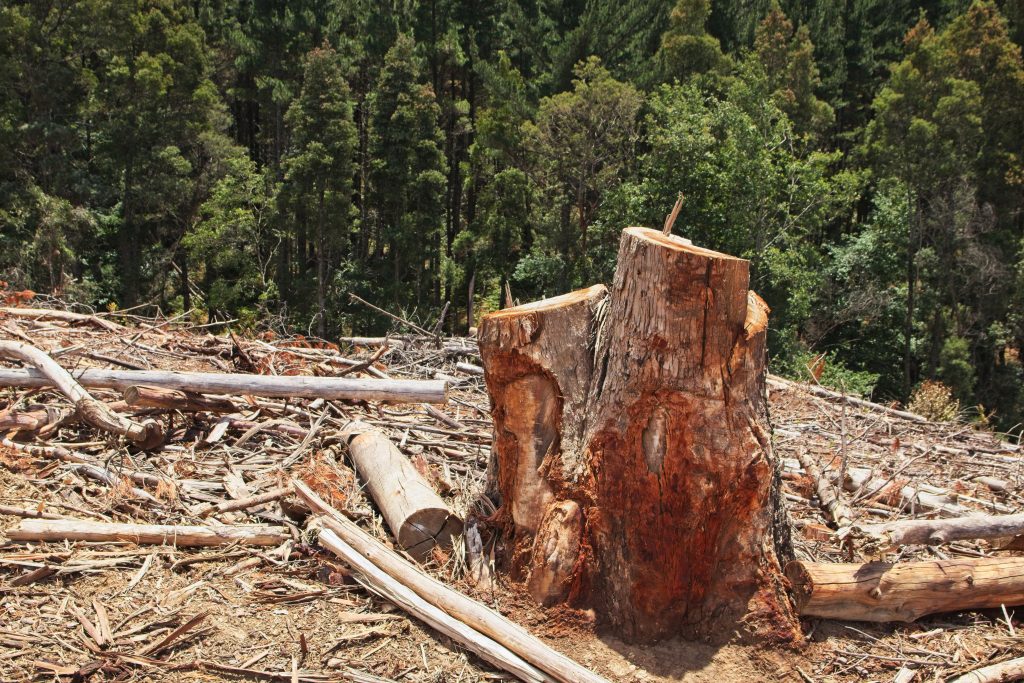
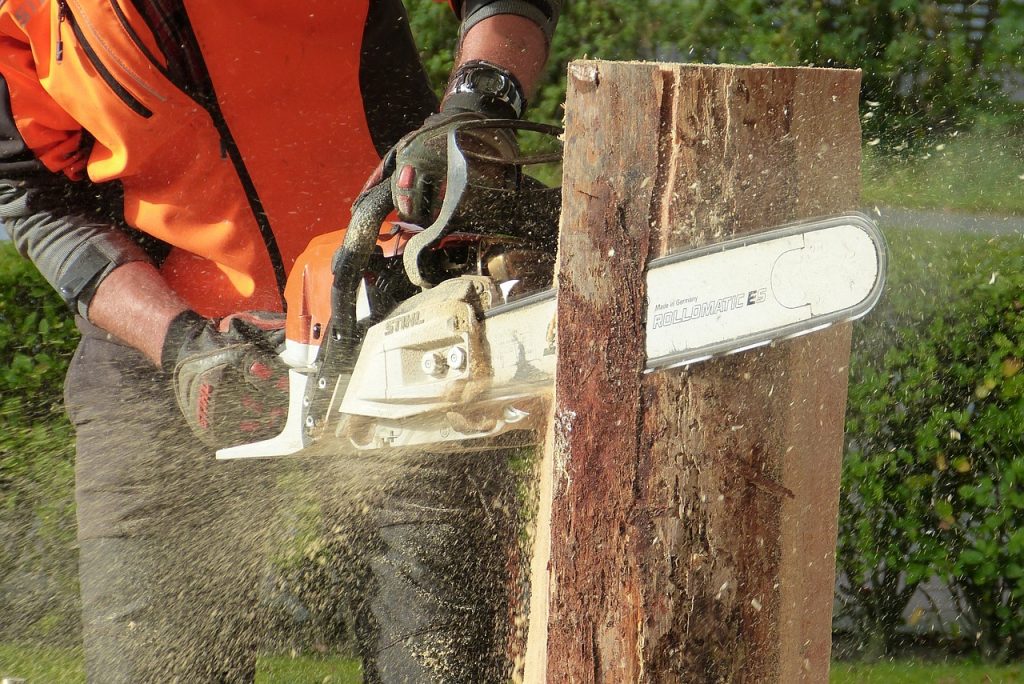
 

Tree Stump Removal: What to Use?

Tree Stump Removal: What to Use?

Are you tired of staring at that stubborn tree stump in your yard? Well, you’re not alone. Did you know that over 80% of homeowners struggle with removing tree stumps? But don’t worry, we’ve got you covered. In this article, we’ll guide you through the best techniques and tools to use for effective tree stump removal. Say goodbye to that eyesore and reclaim your yard with our expert advice. Let’s get started!

Key Takeaways

Introduction to Tree Stump Removal

If you want to remove a tree stump, you should know that there are various methods available. Here are some options to consider:

Removing tree stumps offers several benefits, including:

Understanding the different tree stump removal methods and their benefits is essential before deciding on the best approach for your specific situation. Now let’s delve into the history of tree stump removal.

History of Tree Stump Removal

To learn about the history of removing tree stumps, you can explore various resources online and in books. Understanding the history of this practice can provide insights into its significance and evolution over time. Tree stump removal has a long and storied history, dating back to ancient civilizations. In ancient Rome, for example, tree stumps were removed using axes and other manual tools. As technology advanced, so did the methods for removing tree stumps. In the 19th century, for instance, the invention of the stump grinder revolutionized the process, making it faster and more efficient. Today, there are numerous methods and tools available for removing tree stumps, including chemical stump removers, stump grinders, and even controlled burning. Each method has its own advantages and considerations, depending on factors such as the size and location of the stump. By understanding the history of tree stump removal, you can better appreciate the significance of modern techniques and make informed decisions when it comes to removing tree stumps on your property. Now, let’s explore some helpful tips for successful tree stump removal.

Tips

When it comes to removing tree stumps, there are several options to consider. You can choose to use chemical stump removers, which are designed to speed up the decomposition process. Alternatively, you may prefer manual removal techniques, such as digging or using a stump grinder. Lastly, if you want a hassle-free solution, hiring professional stump grinders can ensure efficient and effective stump removal.

Chemical Stump Removers

You can consider using chemical stump removers to effectively remove tree stumps from your yard. Chemical stump removal is one of the alternative methods available for getting rid of unwanted stumps. These products contain powerful chemicals that break down the wood, making it easier to remove. The process usually involves drilling holes into the stump and then pouring the chemical solution into them. Over time, the chemicals will speed up the decomposition process, allowing you to easily remove the stump. It’s important to follow the instructions carefully and take safety precautions when using chemical stump removers. However, if you prefer a more hands-on approach, manual removal techniques can also be effective in removing tree stumps from your yard.

Manual Removal Techniques

Using manual techniques, such as digging or pulling, can be effective in getting rid of unwanted stumps in your yard. These manual removal techniques are alternative methods to chemical stump removers. To manually remove a stump, you will need some basic tools like a shovel, an axe, and a chainsaw. Start by digging around the stump to expose the roots. Then, use the axe to cut through the roots and loosen the stump. Once the roots are cut, you can try pulling the stump out of the ground using a truck or tractor. However, keep in mind that manual removal can be physically demanding and time-consuming, especially for larger stumps. If you prefer a quicker and easier solution, hiring professional stump grinders is the way to go.

Hiring Professional Stump Grinders

Now that you’ve explored the various DIY methods for removing tree stumps, let’s discuss the option of hiring professional stump grinders. When it comes to tackling stubborn tree stumps, sometimes it’s best to leave it to the experts who have access to specialized professional equipment. Professional stump grinders are equipped with powerful machinery specifically designed for efficient and effective stump removal. These machines can quickly grind down stumps to below ground level, eliminating any trace of the stump. Unlike DIY methods, professional stump grinding ensures a thorough and complete removal, preventing any future regrowth. Additionally, hiring professionals saves you time and effort, allowing you to focus on other tasks. Now, let’s delve into the traits of effective tree stump removal techniques, which will further enhance your understanding of this process.

Traits of Effective Tree Stump Removal Techniques

One of the traits of effective tree stump removal techniques is their ability to completely eliminate the stump from the ground. When it comes to removing tree stumps, there are two main options that are considered effective: using chemical removers or employing efficient manual methods. Chemical removers are substances specially formulated to break down the stump over time. These products are applied directly to the stump, where they penetrate the wood and accelerate the decomposition process. While chemical removers can be effective, they take time to work and may require multiple applications. On the other hand, efficient manual methods involve physically removing the stump from the ground. This can be done by using a stump grinder, which is a powerful machine that grinds the stump into small wood chips. Alternatively, you can opt for digging out the stump using a shovel or an excavator. Both methods require physical labor and may be more time-consuming than using chemical removers. However, they offer the advantage of immediate stump removal. Now that you understand the traits of effective tree stump removal techniques, let’s explore the steps for effective tree stump removal.

Steps for Effective Tree Stump Removal

To effectively remove a tree stump, it’s important to start by assessing the size and condition of the stump. Here are three essential steps to follow:

  1. Dig around the stump: Use a shovel to dig a trench around the stump, exposing the roots. This will make it easier to access and remove the stump later on. Be sure to dig deep enough to reach the entire root system.
  2. Cut the roots: With a tree root saw or an axe, carefully cut through the roots that are connected to the stump. Start with the smaller roots and work your way up to the larger ones. This will loosen the stump and make it easier to remove.
  3. Remove the stump: Once the roots are cut, you can now attempt to remove the stump. Use a stump grinder or a pry bar to lift and extract the stump from the ground. If the stump is particularly large or stubborn, you may need to enlist the help of a professional.

Goals

By effectively removing a tree stump from your property, you can now focus on achieving your landscaping goals or creating space for new projects. Tree stump removal offers several benefits, but it also comes with its own set of challenges. Let’s take a closer look at both.

Benefits Challenges
Enhanced aesthetics Difficulties in extraction
Prevention of pests and diseases Potential damage to surrounding plants
Elimination of tripping hazards Heavy physical labor
Opportunity for new landscaping ideas Cost considerations
Increased property value

Removing a tree stump can greatly enhance the aesthetics of your property, allowing you to create the landscape of your dreams. It also helps prevent pests and diseases that can affect other plants in your garden. Additionally, eliminating tripping hazards ensures the safety of your family and visitors.

However, tree stump removal is not without its challenges. Extraction can be difficult, especially if the stump is large or deeply rooted. There is also a risk of damaging surrounding plants during the removal process. Moreover, the physical labor involved can be strenuous and time-consuming. Finally, cost considerations must be taken into account, as professional removal services can be expensive.

Habits for Effective Tree Stump Removal

Understanding the benefits and challenges of tree stump removal can help you approach the task more effectively. When it comes to removing tree stumps, there are certain habits and traits that can make the process smoother and more efficient. One important habit is being prepared with the right tools and equipment. This includes having a stump grinder or digging tools, safety gear such as gloves and goggles, and a plan for disposing of the stump debris. Another important habit is patience. Removing a tree stump can be a time-consuming process, especially if the roots are deep and extensive. Taking your time and being methodical in your approach will yield better results. Additionally, having a strong work ethic and determination are valuable traits for this task. It can be physically demanding, so being willing to put in the effort and stay focused will help you achieve your goal.

In a real-life story, a homeowner named Sarah was faced with the task of removing a large tree stump from her backyard. She diligently researched the best methods and tools for stump removal and gathered all the necessary equipment. With patience and determination, she slowly and methodically worked through the stump, carefully grinding away at the roots. It took several hours of hard work, but Sarah’s efforts paid off when she finally succeeded in removing the stump completely. Her commitment to the task and her willingness to put in the necessary effort were key factors in her success.

A Real-Life Story

In Sarah’s real-life story, you can see the impact of patience and determination on the successful removal of a large tree stump. Sarah had always dreamed of having a beautiful garden in her backyard, but there was one major obstacle standing in her way – a stubborn tree stump that refused to budge. She knew that removing a tree stump could be a challenging task, but she was determined to overcome it.

Sarah began by researching different methods for tree stump removal and decided to try the chemical method. She carefully followed the instructions and applied the stump remover to the stump. However, after several weeks, she realized that the chemical method was not working as effectively as she had hoped.

Undeterred, Sarah decided to try a more physical approach. She rented a stump grinder and spent hours grinding away at the stubborn stump. It was hard work, but Sarah persisted, fueled by her determination to achieve her dream garden.

After several days of grinding, Sarah finally succeeded in removing the tree stump. It was a moment of triumph for her, and she felt a great sense of accomplishment. Sarah’s real-life experience highlights the challenges faced when removing a large tree stump, but also demonstrates the importance of patience and determination in achieving success.

Transitioning to the section about ‘quotes,’ it is clear that Sarah’s story is just one example of the many real-life experiences people have had with tree stump removal.

Quotes

Sarah’s determination paid off as she successfully removed the stubborn tree stump from her backyard. Real life stories like Sarah’s showcase the benefits and insights gained from tackling challenging tasks head-on. Removing a tree stump can be a daunting task, but with the right tools and knowledge, it can be accomplished. One of the secrets to successful stump removal is using the right equipment. Stump grinders are commonly used to grind away the stump and its roots, making it easier to remove. These machines can be rented from equipment rental companies or hired from professionals. Another secret is to ensure safety during the removal process. Wearing protective gear, such as gloves and goggles, is essential to prevent injuries. Additionally, it is crucial to have a plan in place for disposing of the stump and any resulting debris. By following these tips and tricks, you can tackle tree stump removal with confidence and achieve a clean, stump-free yard.

Secrets

One of the secrets to successfully tackling the challenge of removing a stubborn tree stump is having the right equipment. Without the proper tools, the task can be incredibly difficult and time-consuming. So, what equipment should you use? Well, a stump grinder is often the best option. This powerful machine is specifically designed to grind away the stump and roots, making the removal process much easier. With its sharp teeth and high-speed cutting action, a stump grinder can quickly reduce even the largest stumps to wood chips. Another secret to effective stump removal is understanding the anatomy of the stump. By learning how the roots are connected and where they extend, you can strategically cut and remove them, minimizing the effort required. Additionally, applying a stump removal chemical can help to speed up the decomposition process, making it easier to remove the stump. Now that you know the secrets, let’s delve into some insights and techniques that will further assist you in successfully removing that stubborn tree stump.

Insights and Techniques

To make the process easier, you can try using a stump grinder to quickly reduce the size of the stubborn tree stump. Stump grinding is a popular technique for removing tree stumps effectively. This method involves using a powerful machine with a rotating cutting disk to grind the stump into small wood chips.

One of the key insights in stump grinding is the importance of safety precautions. Before using a stump grinder, it is crucial to wear protective gear, such as safety goggles, gloves, and sturdy boots. Additionally, it is recommended to clear the area around the stump of any debris or obstacles that could hinder the grinding process.

When operating a stump grinder, it is essential to follow proper technique. Start by positioning the machine’s cutting disk above the stump, ensuring that it is level and centered. Slowly lower the cutting disk onto the stump, gradually moving it from side to side. This technique allows the cutting disk to grind away the wood in a controlled manner.

Benefits of Tree Stump Removal

Now that you have gained insights into the techniques used for tree stump removal, let’s explore the benefits of this process. Removing tree stumps comes with a multitude of advantages that can greatly enhance your outdoor space.

Firstly, removing tree stumps improves the aesthetics of your yard or garden. Stumps can be unsightly and disrupt the overall appearance of your landscape. By removing them, you can create a more visually pleasing environment.

Secondly, stump removal eliminates potential hazards. Stumps can be a tripping hazard, especially if they are hidden by grass or foliage. Removing them reduces the risk of accidents, making your outdoor space safer for you, your family, and your guests.

Additionally, removing tree stumps allows you to fully utilize your outdoor space. Stumps can take up valuable space, making it difficult to plant new trees, flowers, or build structures. By removing them, you can maximize the use of your land and create more functional areas.

Furthermore, stump removal prevents the growth of new shoots. Tree stumps have the potential to sprout new shoots, leading to unwanted growth that can be difficult to manage. Removing the stumps eliminates this problem, ensuring that unwanted trees or shrubs do not take over your garden.

Lessons

When it comes to removing tree stumps, there are several effective techniques you can use. Whether you choose to grind, burn, or manually remove the stump, each method has its own advantages and considerations. It’s important to have the right tools for the job, such as stump grinders, axes, and chainsaws, to ensure efficient and safe removal. Additionally, it’s crucial to take safety precautions, such as wearing protective gear and assessing the surrounding area, to prevent accidents and injuries during the stump removal process.

Effective Stump Removal Techniques

You can try using a stump grinder to effectively remove tree stumps. When it comes to removing tree stumps, there are two main methods: chemical and manual. Chemical methods involve using chemicals to speed up the decomposition process, while manual methods require physical labor to dig and remove the stump. Both methods have their pros and cons. Chemical methods are relatively easy to use and require less physical effort, but they can take a long time to fully decompose the stump. On the other hand, manual methods can be time-consuming and physically demanding, but they offer immediate results. If you’re unsure about tackling the job yourself, hiring professionals can be a great option. They have the expertise and specialized tools to efficiently and safely remove tree stumps. Transitioning into the next section about ‘tools for tree stumps,’ it’s worth mentioning that having the right tools is essential for a successful stump removal process.

Tools for Tree Stumps

If you’re looking for an effective way to tackle those pesky tree stumps, having the right tools is crucial. One of the most efficient tools for tree stump removal is a tree stump grinder. This powerful machine is designed to grind down the stump and its roots into small wood chips, making it easier to remove or cover up. With its sharp rotating blades, the tree stump grinder can quickly and efficiently get the job done. If you prefer a more manual approach, there are also tools available for tree stump extraction. These tools, such as a stump puller or a digging bar, allow you to physically remove the stump by digging around it and pulling it out. However, it’s important to note that these methods can be more labor-intensive and time-consuming. Now that you know about the different tools available, let’s discuss some safety precautions for tree stump removal.

Safety Precautions for Removal

Before starting the process, it’s important to be aware of the safety precautions for removing tree stumps. Preventing accidents should be your top priority. Firstly, always wear proper protective gear, such as gloves, safety goggles, and sturdy boots. This will shield you from any flying debris or sharp objects. Additionally, make sure to inspect the area around the stump for any potential hazards, like rocks or roots, that could cause you to trip or fall. It’s also crucial to check if there are any underground utilities, such as gas or water lines, before digging. Lastly, use caution when using power tools or machinery, following the manufacturer’s guidelines and keeping a safe distance from others. By taking these safety measures, you can ensure a successful and accident-free stump removal process. Now, let’s move on to the next section about routines.

Routines

Once you’ve established a routine for tree stump removal, it becomes easier and more efficient to tackle the task. Developing good habits for success can make a significant difference in the outcome of your efforts. One common mistake that people make is not properly assessing the stump before starting the removal process. It’s crucial to determine the size, location, and condition of the stump to choose the right tools and techniques. Another mistake is neglecting safety precautions, such as wearing protective gear and ensuring the area is clear of bystanders. To establish an effective routine, start by gathering the necessary tools, including a chainsaw, shovel, and stump grinder. Clearing the area around the stump and removing any debris will make the task easier. Next, use the chainsaw to cut the stump as close to the ground as possible. Finally, utilize the stump grinder to remove the remaining wood and roots. By following these steps consistently, you’ll develop a routine that maximizes efficiency and minimizes mistakes. Now, let’s explore the pros and cons of different methods for tree stump removal.

Pros and Cons

To make an informed decision about which method for tree stump removal is best for you, consider the pros and cons of each option. One common mistake people make is underestimating the difficulty of removing a tree stump. It may seem like a simple task, but it can quickly become labor-intensive and time-consuming. Hiring a professional stump removal service has its pros and cons. On the positive side, professionals have the expertise and equipment to efficiently remove the stump, saving you time and effort. However, it can be expensive, and you may need to schedule an appointment, which could delay your project. Another option is using chemical stump removers. These products are convenient and relatively affordable. However, they can take several weeks or even months to fully break down the stump. Additionally, they may harm surrounding vegetation if not used properly. Lastly, manual removal is an option, but it requires physical strength and patience. It can be a cost-effective choice, but it is also the most labor-intensive. Now that you understand the pros and cons of each method, let’s move on to the dos and don’ts of tree stump removal.

Dos and Dont’s

When using chemical stump removers, it’s important to carefully follow the instructions to avoid harming surrounding vegetation. These products can be effective in getting rid of tree stumps, but they must be used correctly to ensure safety and success. Here are some dos and don’ts to keep in mind when using chemical stump removers:

Dos Don’ts Common Mistakes
Read the instructions carefully and follow them precisely Don’t apply the product in excessive amounts Using too little or too much product
Wear protective clothing, gloves, and eyewear Don’t leave the product unattended Neglecting safety precautions
Apply the chemical only to the stump and avoid contact with surrounding plants or grass Don’t mix different stump remover products Combining incompatible chemicals

Mistakes to Avoid

A common mistake is not wearing protective clothing when using chemical stump removers, which can lead to potential harm. When dealing with chemicals, it is crucial to prioritize your safety. Chemical stump removers contain powerful substances that can cause skin irritation or even burn your skin upon contact. To avoid this, always wear long sleeves, pants, gloves, and goggles before handling these products. Another common mistake is not following the instructions provided by the manufacturer. Each chemical stump remover has specific guidelines on how to use it effectively and safely. Failure to follow these instructions can lead to ineffective results or, worse, accidents. Additionally, it is important to be aware of the surrounding area when using chemical stump removers. Ensure that there are no flammable materials nearby and keep pets and children away to prevent any accidents. By avoiding these common mistakes and following best practices, you can safely and effectively remove tree stumps from your property.

These key takeaways will help you avoid potential harm and achieve successful stump removal.

Key Takeaways

By following these key takeaways, you can ensure a safer and more successful stump removal process. One of the main benefits of stump removal is the prevention of potential hazards. Tree stumps can pose dangers to people and property, especially when they are hidden and easily tripped over. Removing the stumps eliminates these risks, making your outdoor space safer for everyone. Additionally, stump removal can enhance the aesthetics of your landscape. Tree stumps can be unsightly and disrupt the overall beauty of your yard. By removing them, you can create a more visually appealing environment and improve the overall curb appeal of your property. Furthermore, stump removal allows for better utilization of your outdoor space. Tree stumps can take up valuable space that could be used for other purposes such as planting new trees, installing a garden, or creating a seating area. Removing the stumps opens up possibilities for enhancing the functionality of your yard. With these key takeaways in mind, let’s explore the specific action steps for tree stump removal.

Specific Action Steps for Tree Stump Removal

When it comes to removing tree stumps, having the right tools is essential. In this discussion, we will explore the various tools that can be used for stump removal, including stump grinders, hand tools, and chemical solutions. Additionally, we will delve into effective removal techniques that can help you tackle even the toughest stumps, as well as safety precautions that should be taken to ensure a successful and accident-free removal process.

Tools for Stump Removal

There’s no better tool for stump removal than a stump grinder. When it comes to removing tree stumps, manual and chemical methods are often considered. Manual removal involves digging around the stump and using tools like axes or shovels to break it apart. While this method can be effective for smaller stumps, it requires a lot of physical effort and time. On the other hand, chemical methods involve using chemicals to accelerate the decomposition process. This method is cost-effective and requires less physical labor, but it can take several weeks or even months for the stump to fully decay. Now that you understand the different approaches to stump removal, let’s explore some effective techniques for getting rid of those stubborn stumps.

Effective Removal Techniques

If you want to get rid of those stubborn stumps, you can try using a combination of manual and chemical methods for more effective removal. One popular technique is tree stump grinding, which involves using a stump grinder to break down the stump into small wood chips. This method is highly efficient and leaves you with a clean and level surface. Another option is natural stump decay, where you allow the stump to decompose over time. This method is less labor-intensive but can take several years for the stump to fully decay. Both methods have their advantages, so you can choose the one that suits your needs and preferences. Now that you know effective removal techniques, it’s important to consider safety precautions during the removal process.

Safety Precautions During Removal

To ensure your safety during the removal process, it’s important to wear protective gear such as gloves, goggles, and sturdy boots. Proper safety gear is essential to protect yourself from any potential hazards that may arise during tree stump removal. Gloves will shield your hands from sharp edges and splinters, while goggles will prevent any debris from entering your eyes. Sturdy boots will provide stability and protect your feet from falling branches or tools. Additionally, make sure to use the proper equipment for the job. This includes a chainsaw or stump grinder, depending on the size of the stump. Following these safety precautions and using the correct gear and equipment will help ensure a safe and successful tree stump removal process.

Frequently Asked Questions

How Long Does It Typically Take to Remove a Tree Stump?

Removing a tree stump can vary in time depending on the size and complexity of the stump. It typically takes a few hours to a few days. Factors such as the tools used and the skill of the person performing the removal can also affect the time.

Can Tree Stump Removal Be Done on Any Type of Tree?

To remove a tree stump, you can use various equipment and methods. However, it’s essential to consider the type of tree and its size. Hiring a professional for stump removal can be costly, but they have the expertise and necessary tools.

Are There Any Environmental Considerations to Take Into Account When Removing a Tree Stump?

When removing a tree stump, it’s important to consider the environmental impact. There are eco-friendly options available that minimize harm to the ecosystem. Choose methods that prioritize sustainability and prevent further damage to the environment.

What Are the Potential Risks or Dangers Associated With DIY Tree Stump Removal?

Potential injuries and equipment safety are important considerations when attempting DIY tree stump removal. Without proper knowledge and precautions, risks such as accidents and bodily harm can arise. It’s crucial to prioritize safety and seek professional help if needed.

Are There Any Alternative Methods to Physically Removing a Tree Stump?

There are alternative methods to physically removing a tree stump. Chemical alternatives, such as stump removal products, can be effective. Another option is natural decay, which involves letting the stump decompose over time.

How Much Tree Stump Removal?

How Much Tree Stump Removal

Did you know that there are over 3 billion trees cut down each year, leaving behind countless tree stumps? If you’re faced with the task of removing a tree stump, you’re not alone. In this article, we’ll guide you through the process of tree stump removal, giving you the knowledge and techniques needed to tackle this job effectively. From the history and techniques to the dos and don’ts, you’ll find everything you need to know to get rid of that stubborn stump.

Key Takeaways

Introduction to Tree Stump Removal

If you’re looking to get rid of a tree stump, you’ll want to learn more about tree stump removal. This process involves the complete elimination of a tree stump from the ground, allowing for a clean and level surface. Tree stump removal offers several benefits, including:

However, tree stump removal also comes with its challenges. Some of these include:

Understanding the benefits and challenges of tree stump removal will help you make an informed decision about the best approach for your specific situation. Now, let’s delve into the fascinating history and various techniques of tree stump removal.

Tree Stump Removal History and Techniques

You might be interested to know about the history and techniques used for getting rid of tree stumps. Tree stump removal has been a practice dating back centuries. In the past, people used manual labor to uproot stumps by digging around them and using brute force. However, this method was time-consuming and physically demanding. As technology advanced, so did the methods used for tree stump removal. Nowadays, there are various efficient methods available. One common method is stump grinding, which involves using a specialized machine to grind the stump into small wood chips. Another method is chemical stump removal, where chemicals are applied to the stump to decay it over time. Additionally, there are hydraulic stump grinders that use powerful hydraulic systems to remove stumps. For smaller stumps, manual tools like stump pullers or winches can be used. When it comes to equipment, there are different types of stump grinders, ranging from handheld models to large machines mounted on trucks. These machines consist of sharp cutting blades that grind the stump down to ground level. In conclusion, tree stump removal has evolved over time, and with the availability of various methods and equipment, it has become easier and more efficient to remove tree stumps. Now, let’s move on to some tips for effective tree stump removal.

Tips

When it comes to stump removal, there are several key points to consider. First and foremost, you will need the right tools for the job. This includes a stump grinder, shovel, ax, and safety equipment such as gloves and goggles. Secondly, it is important to take safety precautions during the removal process. This means wearing protective gear, keeping bystanders at a safe distance, and being mindful of any underground utilities. Lastly, effective removal techniques will ensure a successful outcome. This may involve grinding the stump down below ground level, using chemical treatments, or even hiring a professional service.

Tools Needed for Stump Removal

The tools needed for stump removal include a chainsaw, shovel, and stump grinder. These tools are essential for effectively removing tree stumps from your property. The chainsaw is used to cut down any remaining tree trunk above the ground level. Once the trunk is cut, the shovel can be used to dig around the stump, exposing the roots. Finally, the stump grinder is employed to grind the stump into small wood chips. While there are other methods and techniques available for stump removal, using these tools is one of the most efficient and cost-effective options. However, it is important to take safety precautions during the removal process to avoid potential risks. By understanding the proper techniques and best practices, you can successfully remove stumps from your property.

Safety Precautions During Removal

To ensure your safety while removing stumps, it’s crucial to wear protective gear such as gloves, goggles, and sturdy boots. These safety precautions are essential in preventing accidents and minimizing potential injuries. Gloves provide protection against splinters, cuts, and blisters that can occur while handling tools or debris. Goggles shield your eyes from flying debris and wood chips, preventing eye injuries. Sturdy boots with steel toes protect your feet from heavy objects and sharp tools. Additionally, wearing long sleeves and pants can help prevent scratches and cuts from branches or sharp edges. By properly equipping yourself with the necessary protective gear, you can significantly reduce the risk of accidents and injuries during stump removal. Now, let’s explore some effective removal techniques to help you tackle this task efficiently.

Effective Removal Techniques

Now that you have your protective gear on, let’s dive into some effective techniques for efficiently getting rid of those stubborn stumps. When it comes to effective tree stump removal, there are a few best practices to keep in mind. First, start by using a chainsaw to cut the stump as close to the ground as possible. This will make the rest of the removal process easier. Next, drill holes into the stump and fill them with a stump remover chemical. This will help to break down the wood over time. Once the stump has softened, use a stump grinder to grind it down to below ground level. This will ensure that the stump doesn’t grow back and will also provide a clean surface for landscaping. By following these effective techniques, you can efficiently remove those stubborn stumps and create a clear space for your outdoor projects.

Transitioning into the subsequent section about ‘traits of effective tree stump removal techniques‘, it is important to note that the success of your stump removal largely depends on the tools you use and your approach to the task.

Traits of Effective Tree Stump Removal Techniques

You’ll want to consider the traits of effective tree stump removal techniques. When it comes to habits for success, preparation is key. Before starting the removal process, make sure you have all the necessary tools and equipment, such as a chainsaw, a grinder, and safety gear. Common mistakes often occur when individuals underestimate the size and complexity of the stump, so it’s crucial to assess the stump’s dimensions and condition accurately. Additionally, taking the time to plan your approach and determine the best method for removal can save you time and effort in the long run.

Another important trait of effective tree stump removal techniques is patience. Removing a stump can be a time-consuming task, especially if the stump is large or deeply rooted. Rushing through the process can lead to accidents or inadequate removal. Take your time and work methodically to ensure a thorough job.

Incorporating proper safety measures is also essential. Always wear protective gear, such as goggles, gloves, and sturdy boots, to prevent injuries. Additionally, be cautious of any underground utilities or obstacles that may interfere with the removal process.

Transitioning into the subsequent section about steps for effective tree stump removal, it is crucial to follow a systematic approach to ensure success. By following a set of proven steps, you can effectively remove tree stumps without any hassle or complications.

Steps for Effective Tree Stump Removal

First, gather all the necessary tools and equipment. To effectively remove a tree stump, follow this step-by-step process:

  1. Dig around the stump: Use a shovel to dig a trench around the stump, exposing the roots. Dig deep enough to access the major roots for easier removal.
  2. Cut the roots: With a chainsaw or reciprocating saw, carefully cut through the major roots. Start with the smaller ones and work your way up to the larger ones. This will loosen the stump and make it easier to remove.
  3. Remove the stump: Use a stump grinder or an axe to break apart the stump. If using a grinder, position it over the stump and slowly grind it down. If using an axe, chop the stump into smaller pieces until it can be easily lifted and removed.

Goals

To achieve your goals for your outdoor space, it’s important to have a clear vision of what you want to accomplish. When it comes to tree stump removal, setting goals is crucial in order to determine the best course of action. Whether your goal is to create more space, improve aesthetics, or prevent potential hazards, having a plan will help you achieve the desired outcome.

Consider the following table to help you identify your goals and the benefits associated with tree stump removal:

Goal Benefits
Create more space Increase usable area for gardening, landscaping, or activities
Improve aesthetics Enhance the overall appearance of your outdoor space
Prevent hazards Eliminate tripping hazards and potential damage to property

By setting clear goals, you can tailor your tree stump removal approach accordingly. For example, if your goal is to create more space, you may choose to remove the stump completely to maximize the available area. On the other hand, if your goal is to improve aesthetics, you might opt for stump grinding, which allows you to cover the remaining stump with soil and plant grass or flowers on top.

In the next section, we will explore habits for effective tree stump removal, which will help you accomplish your goals efficiently and safely.

Habits for Effective Tree Stump Removal

When tackling the task of removing a tree stump effectively, it’s essential to develop consistent habits that prioritize safety and efficiency. By following these best practices, you can ensure a successful stump removal process.

Firstly, it’s crucial to choose the right tools for the job. Effective techniques for stump removal often involve the use of a stump grinder or a chainsaw. These tools allow you to cut through the stump and grind it down to the ground level. Make sure to wear appropriate safety gear, such as gloves, goggles, and sturdy boots, to protect yourself from flying debris.

Before starting the removal process, it’s important to assess the surrounding area carefully. Look out for any obstacles, such as underground cables or pipes, that may be damaged during the process. Additionally, ensure that there is enough space to maneuver the equipment safely.

Once you begin the removal process, focus on maintaining a steady and controlled approach. Gradually grind down the stump, working in small sections at a time. This will help you maintain control over the equipment and prevent any accidents.

A Real-Life Story

In this real-life story, a homeowner shares their experience of successfully removing a stubborn tree stump from their backyard. Like many homeowners, I faced the challenge of dealing with a tree stump that was not only an eyesore but also a potential hazard. I decided to tackle the task myself, armed with some basic knowledge and a determination to get the job done.

Removing the tree stump proved to be more challenging than I initially anticipated. I encountered several obstacles along the way, such as the extensive root system and the sheer size of the stump. However, I persevered and utilized various techniques to gradually chip away at the stump.

One of the most effective methods I used was using a stump grinder. This powerful machine allowed me to grind away the stump bit by bit, reducing it to wood chips. It required some skill and caution to operate, but it made the process much more manageable.

Another challenge I faced was the disposal of the wood chips and debris. I had to find a way to transport and dispose of the materials properly, which required some planning and coordination.

Overall, my real-life experience of removing a stubborn tree stump taught me valuable lessons about the challenges and rewards of tackling such a project. It highlighted the importance of careful planning, perseverance, and utilizing the right tools and techniques.

Transitioning into the subsequent section about ‘quotes,’ it’s important to note that while my experience was successful, it may not necessarily apply to every situation. As one homeowner wisely said, “Tree stump removal can be a complex task, and it’s crucial to assess the specific challenges and seek professional assistance if needed.”

Quotes

Did you know that one homeowner wisely said, “Assessing the specific challenges and seeking professional assistance if needed is crucial when dealing with tree stump removal”? When it comes to removing tree stumps from your property, it is important to understand the pricing and find reputable stump removal services. Tree stump removal pricing can vary depending on several factors such as the size and location of the stump, the type of tree, and the equipment required for the job. It is recommended to obtain quotes from multiple professionals to ensure you are getting a fair price. When searching for reputable stump removal services, consider asking for recommendations from friends or neighbors who have had similar work done. Additionally, you can check online reviews and ratings to get an idea of the quality of service provided by different companies. By doing your due diligence and finding a reputable service provider, you can ensure a smooth and efficient tree stump removal process. Now, let’s dive into some secrets that will make the task even easier.

Secrets

One secret to make the task of removing a tree stump easier is to use a chemical stump remover. These products are designed to accelerate the decomposition process of the stump, making it softer and easier to remove. When using a chemical stump remover, you simply drill holes into the stump and fill them with the product. Over time, the chemicals will break down the stump, allowing you to easily chip away at it or even pull it out with a stump grinder or tractor.

Another secret is to use a high-powered chainsaw to cut the stump as close to the ground as possible. This will make it easier to access and remove the stump. Additionally, using a stump grinder can be an effective option for removing tree stumps. These machines have rotating blades that grind the stump into small pieces, making it easier to remove or cover with soil.

Insights on Tree Stump Removal Techniques

Now that you know some secrets about tree stump removal, let’s delve into the different techniques you can use to get rid of those stubborn stumps. There are two main methods commonly used: tree stump grinding and chemical stump removal.

Tree stump grinding is a popular technique that involves using a specialized machine to grind the stump down into small wood chips. This method is effective for removing stumps of all sizes and is relatively quick. The grinding machine has a rotating blade that chips away at the stump until it is completely ground down. Once the stump is ground down, you can cover it with soil or use the wood chips as mulch.

On the other hand, chemical stump removal involves the use of chemicals to accelerate the natural decomposition of the stump. This method involves drilling holes into the stump and then applying the chemical solution. The chemicals break down the fibers of the stump, making it easier to remove over time. Chemical stump removal is a slower process compared to grinding, but it is less labor-intensive.

Now that you have an understanding of the different tree stump removal techniques, let’s explore the benefits of these methods and why it’s important to remove tree stumps from your property.

Benefits of Tree Stump Removal Techniques

Using chemical stump removal can be a slower process compared to grinding, but it is less labor-intensive. However, the benefits of using chemical stump removal techniques outweigh the drawbacks. One of the main advantages of chemical stump removal is its effectiveness in completely eliminating the stump. The chemicals used in this process are designed to break down the stump’s cellular structure, causing it to decay over time. This ensures that the stump is fully removed, preventing any potential issues such as regrowth or attracting pests.

Another benefit of chemical stump removal is its affordability. While grinding may require expensive equipment and professional services, chemical stump removal can be done with a simple and inexpensive solution. This makes it a viable option for homeowners who want to remove stumps from their yards without breaking the bank.

Furthermore, chemical stump removal is environmentally friendly. Unlike grinding, which produces wood chips that need to be disposed of, chemical stump removal leaves no trace behind. The stump gradually decomposes into the soil, providing natural nutrients to the surrounding plants.

Lessons

When it comes to efficient removal techniques for tree stumps, there are several options to consider. From using a stump grinder to chemical treatments, each method has its own advantages and drawbacks. Additionally, cost-effective stump removal is a key consideration for many homeowners, as professional services can be quite expensive. However, there are also potential DIY options available for those who are willing to put in the time and effort to remove the stump themselves.

Efficient Removal Techniques

You can easily speed up the process of tree stump removal by using efficient techniques. To save time and effort, there are several effective methods you can employ. One option is using a stump grinder, a powerful machine that grinds the stump into small pieces. This method is quick and ensures complete removal of the stump. Another technique is chemical stump removal, which involves applying a chemical solution to the stump to accelerate decomposition. This process may take several weeks, but it requires minimal physical labor. Alternatively, you can use the burning method, where you ignite the stump and let it burn until it is reduced to ashes. This technique can be time-consuming but is effective for smaller stumps. By utilizing these time-saving methods, you can efficiently remove tree stumps from your property.

When it comes to cost-effective stump removal, there are several options available.

Cost-Effective Stump Removal

Now that you are familiar with efficient stump removal techniques, let’s explore cost-effective options that can help you save money while being environmentally friendly. One of the most popular cost-saving methods is stump grinding. This process involves using a specialized machine to grind the stump into small wood chips. These chips can then be repurposed as mulch for your garden, saving you the cost of buying mulch while providing nutrients to your plants. Another eco-friendly option is chemical stump removal. This method involves applying a stump remover chemical to the stump, which accelerates the decomposition process. While it may take longer than other methods, it is a cost-effective and environmentally friendly solution. By utilizing these cost-saving methods and eco-friendly options, you can effectively remove tree stumps without breaking the bank or harming the environment.

Moving forward, let’s explore some potential DIY options for tree stump removal.

Potential DIY Options

One popular option for DIY stump removal is renting a stump grinder, which allows you to easily and effectively grind the stump down to ground level. Stump grinders are powerful machines with a rotating cutting wheel that chips away at the stump. To use a stump grinder, you will need to wear protective gear, such as goggles and gloves, and follow the manufacturer’s instructions carefully. Another DIY method for stump removal is using natural alternatives. One option is to drill holes into the stump and fill them with a high-nitrogen substance, such as fertilizer or Epsom salts. This will help speed up the decomposition process. Alternatively, you can cover the stump with a tarp and keep it moist to encourage natural decay. These methods may take longer than using a stump grinder, but they are more environmentally friendly. Moving on to routines {yt}, let’s explore some effective ways to incorporate stump removal into your regular maintenance tasks.

Routines

There’s no easy way to incorporate tree stump removal into your daily routine. However, with the right tools and techniques, you can efficiently remove tree stumps from your property. To begin, you will need a few essential tree stump removal tools. First, a stump grinder is a powerful machine that can quickly grind away the stump and its roots. It operates by rotating a cutting wheel that grinds the wood into small chips. Another tool you may need is a chainsaw, which can be used to cut the stump into manageable sections before grinding. Additionally, a shovel and an ax will come in handy for clearing debris and loosening the soil around the stump.

When it comes to tree stump removal techniques, there are a few options to consider. One common method is using a chemical stump remover, which involves applying a product that accelerates the decomposition process. Another technique is burning the stump, but this should only be done with caution and adherence to local regulations.

As you explore the various tree stump removal methods, it’s essential to weigh the pros and cons of each approach. With proper research and preparation, you can find a technique that suits your needs and allows you to efficiently remove tree stumps from your property.

Pros and Cons

Using a chemical stump remover has its advantages and disadvantages that should be carefully considered before choosing this method. Let’s start with the pros. One of the main benefits is cost. When compared to other methods like stump grinding or hiring professionals, using a chemical stump remover is usually more affordable. Additionally, it requires less physical labor, making it a suitable option for those who may not have the strength or tools for other methods. Another advantage is that it is a relatively straightforward process. You simply apply the chemical to the stump and wait for it to decompose over time.

However, there are also cons to using a chemical stump remover. Firstly, it can be a time-consuming process. Depending on the size and type of stump, it may take several weeks or even months for the chemical to fully break it down. Additionally, the chemicals used can be harmful to the environment, so it’s important to use them cautiously and follow the instructions carefully.

In conclusion, while using a chemical stump remover may be cost-effective and require less physical effort, it does come with drawbacks such as the time it takes and potential environmental impact. Before deciding on this method, it’s essential to weigh the pros and cons and consider other alternatives.

Dos and Dont’s

Before deciding on a method, it’s important to be aware of the dos and don’ts when it comes to removing a stump. By following these guidelines, you can ensure a successful and safe stump removal process. Here are the dos and dont’s you need to keep in mind:

Dos Don’ts
Wear protective gear Use flammable materials
Call professionals for large stumps Neglect safety precautions
Research and choose the right method Remove stump without proper tools

One of the most common mistakes people make when removing a stump is not wearing protective gear. Stump removal can be hazardous, with flying debris and sharp tools involved. Always wear safety goggles, gloves, and sturdy footwear to protect yourself from potential injuries.

Another mistake to avoid is using flammable materials to remove the stump. While it may seem like a quick and easy solution, using fire accelerants can be dangerous and lead to uncontrolled fires. It’s best to opt for safer and more reliable methods such as grinding or chemical stump removal.

Now that you know the dos and dont’s, let’s explore some common mistakes to avoid when removing a stump.

Mistakes to Avoid

One of the most common mistakes people make when removing a stump is neglecting proper safety precautions. Stump removal can be a hazardous task if not approached with care. One mistake often made is not wearing appropriate protective gear, such as goggles, gloves, and sturdy footwear. It is crucial to protect yourself from flying debris and sharp tools. Another common mistake is not properly assessing the stability of the stump. Before beginning the removal process, it is essential to ensure that the stump is not rotted or unstable. Failing to do so can lead to accidents and injuries. Additionally, using improper tools or techniques can result in ineffective removal and potential damage to surrounding structures. It is crucial to use the right equipment and follow best practices to ensure a safe and successful stump removal.

Key Takeaways

To summarize, it’s important to prioritize safety, assess stability, and use proper tools and techniques for a successful and risk-free stump removal process. When it comes to tree stump removal, there are several key takeaways to keep in mind. First, removing stumps not only improves the appearance of your property but also eliminates potential hazards such as tripping hazards and pest infestations. Additionally, removing stumps allows for more space to plant new trees or use the area for other purposes. Another benefit of tree stump removal techniques is that they prevent the spread of diseases and pests to nearby healthy trees, ensuring the overall health and longevity of your landscape. Furthermore, removing stumps can also improve the value of your property by enhancing its curb appeal. By understanding the key takeaways and benefits of tree stump removal techniques, you can make an informed decision and take the necessary steps to remove stumps from your property. Now, let’s explore specific action steps for tree stump removal techniques.

Specific Action Steps for Tree Stump Removal Techniques

When it comes to efficient stump removal, you have two main options: DIY or hiring a professional. DIY stump removal involves using various tools and techniques to manually remove the stump from the ground. This can be time-consuming and physically demanding, but it allows you to save money and have control over the process. On the other hand, hiring a professional stump removal service guarantees a quicker and more efficient removal process, as they have the necessary experience, equipment, and expertise to get the job done effectively.

Efficient Stump Removal

You can save time and effort by hiring a professional for efficient stump removal. When it comes to removing tree stumps, efficiency is key. One of the most efficient methods is stump grinding, which involves using a specialized machine to grind the stump into small wood chips. This method not only removes the stump entirely but also prevents regrowth. Additionally, it is important to consider eco-friendly removal methods. Many professionals use equipment that is designed to minimize environmental impact. They may also offer options for recycling the wood chips or using them as mulch. By choosing an eco-friendly approach, you can ensure that the stump removal process is not only efficient but also environmentally responsible. Now, let’s delve into DIY stump removal methods.

DIY Stump Removal

Consider renting a stump grinder from your local equipment rental store for a cost-effective DIY solution. Stump grinding is a popular method for removing tree stumps, as it efficiently grinds the stump into small wood chips. The process involves using a powerful machine with a rotating cutting wheel to chip away at the stump until it is below ground level. However, there are potential challenges to consider when taking on this task yourself. Stump grinding can be physically demanding and requires proper safety precautions, such as wearing protective gear and ensuring the area is clear of obstacles. Additionally, you may need to deal with the disposal of the wood chips afterwards. If you prefer an alternative method, there are other options like chemical stump removal or manual digging. However, professional stump removal offers a more efficient and hassle-free solution.

Professional Stump Removal

Hiring a professional for stump removal can save you time and effort. When it comes to professional tree removal, stump grinding techniques are commonly used to ensure complete removal. Stump grinding involves the use of a specialized machine that grinds the stump into small wood chips, making it easier to remove and eliminating the need for manual digging. The grinding process is carried out by trained professionals who have the expertise to handle the machinery safely and efficiently. They will also ensure that the surrounding area is protected and that the job is done in a manner that minimizes any potential damage to your property. By entrusting the task to professionals, you can be confident that the stump will be completely removed, leaving your yard clean and stump-free.

Frequently Asked Questions

What Are the Potential Risks or Dangers of Removing a Tree Stump?

There are potential risks and dangers associated with tree stump removal. It is important to be aware of potential hazards such as tripping, damage to underground utilities, and the use of heavy machinery.

Are There Any Regulations or Permits Required for Tree Stump Removal?

Before diving into the cost, let’s first address the regulations and permits. It’s essential to check with your local authorities to ensure compliance and avoid any legal complications during the tree stump removal process.

When it comes to tree stump removal, you have options. DIY tree stump removal can save you money, but it requires time, effort, and the right tools. Hiring a professional ensures efficiency and expertise, but comes at a cost. Consider the pros and cons before deciding.

How Long Does It Typically Take for a Tree Stump to Decompose Naturally?

The time it takes for a tree stump to decompose naturally varies depending on several factors. These include the type of tree, size of the stump, environmental conditions, and the presence of decomposing organisms.

What Is the Average Cost of Hiring a Professional for Tree Stump Removal?

On average, hiring a professional for tree stump removal can cost you a pretty penny. The average cost varies depending on the size of the stump and the complexity of the job.

Murray, Utah

About Murray, Utah

Murray is a city situated on the Wasatch Front in the core of Salt Lake Valley in the U.S. state of Utah. Named for territorial governor Eli Murray, it is the state's fourteenth largest city. According to the 2020 census, Murray had a population of 50,637. Murray shares borders with Taylorsville, Holladay, South Salt Lake and West Jordan, Utah. Once teeming with heavy industry, Murray's industrial sector now has little trace and has been replaced by major mercantile sectors. Known for its central location in Salt Lake County, Murray has been called the Hub of Salt Lake County. Unlike most of its neighboring communities, Murray operates its own police, fire, power, water, library, and parks and recreation departments and has its own school district. While maintaining many of its own services, Murray has one of the lowest city tax rates in the state.

Bus Stops in Murray, Utah to Truco Services, Inc.

Bus Stop in Murray Central Station (Bay C) Murray, Utah to Truco Services, Inc.

Bus Stop in State St @ 4801 S Murray, Utah to Truco Services, Inc.

Bus Stop in Murray North Station Murray, Utah to Truco Services, Inc.

Bus Stop in State St @ 4949 S Murray, Utah to Truco Services, Inc.

Bus Stop in Murray Central Frontrunner/Trax Station Murray, Utah to Truco Services, Inc.

Bus Stop in Murray Blvd / Vine St (SB) Murray, Utah to Truco Services, Inc.

Bus Stop in State St @ 3925 S Murray, Utah to Truco Services, Inc.

Bus Stop in State St @ 4824 S Murray, Utah to Truco Services, Inc.

Bus Stop in State St @ 5223 S Murray, Utah to Truco Services, Inc.

Bus Stop in Murray Blvd / Allendale Dr (NB) Murray, Utah to Truco Services, Inc.

Bus Stop in Murray Blvd @ 5039 S Murray, Utah to Truco Services, Inc.

Bus Stop in State St @ 4721 S Murray, Utah to Truco Services, Inc.

Map of Murray, Utah

Driving Directions in Murray, Utah to Truco Services, Inc.

Driving Directions from Woodruff Tree Trimming and Removal to 4640 Commerce Dr, Murray, UT 84107, USA

Driving Directions from Reliable Tree Care to 4640 Commerce Dr, Murray, UT 84107, USA

Driving Directions from Tree Pro-Tech to 4640 Commerce Dr, Murray, UT 84107, USA

Driving Directions from Prestige Tree And Landscape to 4640 Commerce Dr, Murray, UT 84107, USA

Driving Directions from Excellence Tree & Landscape to 4640 Commerce Dr, Murray, UT 84107, USA

Driving Directions from Amen Trees to 4640 Commerce Dr, Murray, UT 84107, USA

Driving Directions from Tim's Tree Care to 4640 Commerce Dr, Murray, UT 84107, USA

Driving Directions from Jordan Tree Service - Murray to 4640 Commerce Dr, Murray, UT 84107, USA

Driving Directions from Arbor Works to 4640 Commerce Dr, Murray, UT 84107, USA

Driving Directions from Diamond Tree Experts to 4640 Commerce Dr, Murray, UT 84107, USA

Driving Directions from Green Tree Arborist to 4640 Commerce Dr, Murray, UT 84107, USA

Driving Directions from TruCo Services to 4640 Commerce Dr, Murray, UT 84107, USA

Reviews for Truco Services, Inc. Murray, Utah

Truco Services, Inc. Reviews

Emily Abercrombie

starstarstarstarstar (5)

We had a great experience with TruCo! They were well priced, responsive and prompt. Michael was a pleasure to work with and gave us advice on which plants to put in where we took out our ugly old shrubs. I would highly recommend this company!!!

Truco Services, Inc. Reviews

Michelle Turpin

starstarstarstarstar (5)

TruCo Services gets 5 stars from us for customer service. We experienced a few issues with their services this last year and Rob Eccles in senior management, stepped in and immediately handled our issues. He was very committed to making sure they understood our expectations and would execute to make us happy.

Truco Services, Inc. Reviews

Siobhan Billingsley

starstarstarstarstar (5)

I work for a property management company and have the pleasure of working with Rob at a community in Sandy. He has been incredible to work with and always responds in a timely manner. He knows all the homeowners by name and address and is aware of all the "problem" areas when it comes to sprinklers. I never have to worry about following up with him because he always reaches out to provide me with an update. If you're looking to work with someone who takes pride in their job, is professional, and can solve the worst landscaping problems thrown your way, Rob is your guy. Thank you, Rob for all you do!

Truco Services, Inc. Reviews

Jaime S.

starstarstarstarstar (5)

We have used Truco at 2 of the complexes we manage, they have been great to work with. Good quality service, outstanding customer service with good communication. That's hard to find these days. I highly recommend them. Travis has been awesome to work with.

Truco Services, Inc. Reviews

Jerusha Smart

starstarstarstarstar (5)

We use TruCo for a majority of our properties and our home. While other landscaping companies we use come and go for various reasons like cost, communication issues, work performance, etc., TruCo is always consistent in price and work. Also, Rob is the best.

THE PROS AND CONS OF USING CHEMICALS FOR TREE STUMP REMOVAL

THE PROS AND CONS OF USING CHEMICALS FOR TREE STUMP REMOVAL

Stump removal is a common task that follows the felling or removal of a tree. When a tree is cut down, the portion of the trunk that remains rooted in the ground is called the stump. Removing this stump is often necessary for various reasons, including aesthetics, safety, and preventing potential issues such as regrowth or decay. Stump removal involves completely extracting the stump from the ground, including its root system, to leave a clear and level surface. Here’s an explanation of the process and its significance:

Reasons for Stump Removal:

  1. Aesthetic Purposes: Stumps can be unsightly and disrupt the appearance of a landscape, especially in residential or commercial areas where aesthetics matter.
  2. Obstruction and Safety: Stumps left in the ground can become trip hazards for pedestrians, create obstacles for landscaping activities, and interfere with mowing and other maintenance tasks.
  3. Regrowth Prevention: Some tree species are capable of regrowing from the remaining root system, leading to unwanted sprouts and growth that can be difficult to manage.
  4. Decay and Pest Management: Stumps left to decay can become habitats for pests, fungi, and diseases that may spread to other plants.
  5. Reclamation of Space: Removing stumps can free up space for new plantings, landscaping, or construction projects.

Methods of Stump Removal:

  1. Stump Grinding: This is the most common method. Stump grinding involves using specialized machinery to grind the stump and its roots into small wood chips, which can be used as mulch or disposed of.
  2. Manual Removal: Smaller stumps can be removed manually using tools like axes, mattocks, and shovels. This method requires physical effort and is generally more suitable for smaller stumps.
  3. Chemical Removal: Chemical stump removal involves applying chemicals to the stump to accelerate its decay. This method takes time and may not result in complete removal.

Process of Stump Removal:

  1. Assessment: The size, type, and location of the stump are evaluated to determine the appropriate removal method.
  2. Equipment Setup: For stump grinding, a stump grinder is brought in and positioned over the stump. Safety measures are taken to protect the operator and surroundings.
  3. Grinding: The stump grinder’s rotating cutting wheel grinds the stump and its roots below the surface, breaking them into wood chips.
  4. Cleanup: After grinding, the wood chips are collected and can be used as mulch or removed from the site.
  5. Backfilling: The hole left by stump grinding can be backfilled with soil and leveled to create a smooth surface.

Significance of Stump Removal:

  1. Enhanced Aesthetics: Removing stumps improves the appearance of the landscape, creating a cleaner and more appealing environment.
  2. Safety: Stump removal eliminates trip hazards and potential obstacles, making the area safer for people and equipment.
  3. Preventing Regrowth: Complete stump removal prevents new shoots from sprouting and eliminates the need for ongoing maintenance.
  4. Healthy Environment: Removing decaying stumps reduces the risk of pests, diseases, and fungi spreading to nearby plants.
  5. Usable Space: After stump removal, the area becomes usable for new plantings, landscaping, or other activities.

Stump removal is an essential step in completing the process of tree removal and ensuring the overall health, safety, and aesthetics of the landscape. Depending on the size and location of the stump, as well as the intended use of the space, different methods can be employed to achieve effective removal.


Emphasis on the Potential Hazards of Attempting DIY Stump Removal

Emphasizing the potential hazards of attempting DIY stump removal is important to raise awareness about the risks involved and encourage individuals to seek professional assistance. Removing tree stumps may seem like a straightforward task, but it can pose serious dangers to both personal safety and property. Here are the key hazards associated with DIY stump removal:

  1. Physical Injury:
  1. Equipment Mishaps:
  1. Flying Debris:
  1. Root Systems:
  1. Unstable Ground:
  1. Hidden Hazards:
  1. Toxic Chemicals:
  1. Lack of Expertise:
  1. Property Damage:
  1. Environmental Impact:
  1. Fire Risk:
  1. Time and Effort:
  1. Legal Liabilities:
  1. Unpredictable Challenges:

In conclusion, DIY stump removal is not only a risky endeavor but also one that can lead to severe consequences for personal safety and property. To avoid these hazards, it’s recommended to consult professional arborists or tree care specialists who have the expertise, proper equipment, and safety protocols to safely and effectively remove tree stumps.


Importance of specialized equipment for safe and effective stump removal

Specialized equipment is of paramount importance when it comes to safe and effective stump removal. Stump removal is not only physically demanding but also involves potential risks to individuals, property, and the environment. Utilizing the right tools and machinery designed specifically for stump removal ensures that the task is performed efficiently, without causing harm or damage. Here’s why specialized equipment is crucial for safe and effective stump removal:

  1. Safety of Operators and Others:
  1. Efficiency and Speed:
  1. Precision:
  1. Reduced Physical Strain:
  1. Minimized Environmental Impact:
  1. Consistent Results:
  1. Root Removal:
  1. Expertise Requirement:
  1. Property Protection:
  1. Risk Mitigation:
  1. Compliance with Regulations:
  1. Long-Term Benefits:

In summary, specialized equipment is essential for safe, efficient, and environmentally responsible stump removal. Whether performed by certified professionals or skilled operators, using the right equipment ensures that stump removal is conducted with precision, minimal impact, and adherence to safety standards.


Murray, Utah

About Murray, Utah

Murray is a city situated on the Wasatch Front in the core of Salt Lake Valley in the U.S. state of Utah. Named for territorial governor Eli Murray, it is the state's fourteenth largest city. According to the 2020 census, Murray had a population of 50,637. Murray shares borders with Taylorsville, Holladay, South Salt Lake and West Jordan, Utah. Once teeming with heavy industry, Murray's industrial sector now has little trace and has been replaced by major mercantile sectors. Known for its central location in Salt Lake County, Murray has been called the Hub of Salt Lake County. Unlike most of its neighboring communities, Murray operates its own police, fire, power, water, library, and parks and recreation departments and has its own school district. While maintaining many of its own services, Murray has one of the lowest city tax rates in the state.

Bus Stops in Murray, Utah to Truco Services, Inc.

Bus Stop in Murray Central Station (Bay C) Murray, Utah to Truco Services, Inc.

Bus Stop in State St @ 4801 S Murray, Utah to Truco Services, Inc.

Bus Stop in Murray North Station Murray, Utah to Truco Services, Inc.

Bus Stop in State St @ 4949 S Murray, Utah to Truco Services, Inc.

Bus Stop in Murray Central Frontrunner/Trax Station Murray, Utah to Truco Services, Inc.

Bus Stop in Murray Blvd / Vine St (SB) Murray, Utah to Truco Services, Inc.

Bus Stop in State St @ 3925 S Murray, Utah to Truco Services, Inc.

Bus Stop in State St @ 4824 S Murray, Utah to Truco Services, Inc.

Bus Stop in State St @ 5223 S Murray, Utah to Truco Services, Inc.

Bus Stop in Murray Blvd / Allendale Dr (NB) Murray, Utah to Truco Services, Inc.

Bus Stop in Murray Blvd @ 5039 S Murray, Utah to Truco Services, Inc.

Bus Stop in State St @ 4721 S Murray, Utah to Truco Services, Inc.

Map of Murray, Utah

Driving Directions in Murray, Utah to Truco Services, Inc.

Driving Directions from Woodruff Tree Trimming and Removal to 4640 Commerce Dr, Murray, UT 84107, USA

Driving Directions from Reliable Tree Care to 4640 Commerce Dr, Murray, UT 84107, USA

Driving Directions from Tree Pro-Tech to 4640 Commerce Dr, Murray, UT 84107, USA

Driving Directions from Prestige Tree And Landscape to 4640 Commerce Dr, Murray, UT 84107, USA

Driving Directions from Excellence Tree & Landscape to 4640 Commerce Dr, Murray, UT 84107, USA

Driving Directions from Amen Trees to 4640 Commerce Dr, Murray, UT 84107, USA

Driving Directions from Tim's Tree Care to 4640 Commerce Dr, Murray, UT 84107, USA

Driving Directions from Jordan Tree Service - Murray to 4640 Commerce Dr, Murray, UT 84107, USA

Driving Directions from Arbor Works to 4640 Commerce Dr, Murray, UT 84107, USA

Driving Directions from Diamond Tree Experts to 4640 Commerce Dr, Murray, UT 84107, USA

Driving Directions from Green Tree Arborist to 4640 Commerce Dr, Murray, UT 84107, USA

Driving Directions from TruCo Services to 4640 Commerce Dr, Murray, UT 84107, USA

Reviews for Truco Services, Inc. Murray, Utah

Truco Services, Inc. Reviews

Emily Abercrombie

starstarstarstarstar (5)

We had a great experience with TruCo! They were well priced, responsive and prompt. Michael was a pleasure to work with and gave us advice on which plants to put in where we took out our ugly old shrubs. I would highly recommend this company!!!

Truco Services, Inc. Reviews

Michelle Turpin

starstarstarstarstar (5)

TruCo Services gets 5 stars from us for customer service. We experienced a few issues with their services this last year and Rob Eccles in senior management, stepped in and immediately handled our issues. He was very committed to making sure they understood our expectations and would execute to make us happy.

Truco Services, Inc. Reviews

Siobhan Billingsley

starstarstarstarstar (5)

I work for a property management company and have the pleasure of working with Rob at a community in Sandy. He has been incredible to work with and always responds in a timely manner. He knows all the homeowners by name and address and is aware of all the "problem" areas when it comes to sprinklers. I never have to worry about following up with him because he always reaches out to provide me with an update. If you're looking to work with someone who takes pride in their job, is professional, and can solve the worst landscaping problems thrown your way, Rob is your guy. Thank you, Rob for all you do!

Truco Services, Inc. Reviews

Jaime S.

starstarstarstarstar (5)

We have used Truco at 2 of the complexes we manage, they have been great to work with. Good quality service, outstanding customer service with good communication. That's hard to find these days. I highly recommend them. Travis has been awesome to work with.

Truco Services, Inc. Reviews

Jerusha Smart

starstarstarstarstar (5)

We use TruCo for a majority of our properties and our home. While other landscaping companies we use come and go for various reasons like cost, communication issues, work performance, etc., TruCo is always consistent in price and work. Also, Rob is the best.

THE BASICS OF STUMP GRINDING AND REMOVAL

THE BASICS OF STUMP GRINDING AND REMOVAL

Stump grinding and removal are essential steps in tree care and property maintenance that address the remnants of trees after they have been cut down. These processes go beyond tree removal by eliminating the stumps left behind, which can have various implications for safety, aesthetics, and the overall health of your landscape. Here’s an explanation of why stump grinding and removal are crucial aspects of tree care and property maintenance:

1. Safety and Accessibility:

Tree stumps left in your landscape pose potential safety hazards. They can be tripping hazards, especially if they’re not easily visible, which can lead to accidents for people walking or running on your property. Stump removal eliminates this risk, making your outdoor space safer for residents, visitors, and even wildlife.

2. Aesthetic Appeal:

• Stumps can be eyesores in an otherwise well-maintained landscape. Removing them improves the overall visual appeal of your property, enhancing its aesthetics and creating a more polished appearance.

This is especially important if you plan to sell or rent the property, as curb appeal plays a significant role in attracting potential buyers or tenants.

3. Regrowth Prevention:

• If a tree stump is left in the ground, there’s a possibility of regrowth. Shoots and sprouts can emerge from the remaining root system, leading to the re-establishment of the tree. Stump removal not only prevents this regrowth but also eliminates the potential for future maintenance challenges.

4. Land Use and Landscaping:

• Stump-free land offers greater flexibility for landscaping projects. Removing stumps clears the way for planting new trees, shrubs, flowers, or other features, allowing you to design and utilize your outdoor space more effectively.

5. Disease Prevention:

Tree stumps can harbor diseases and pests that can spread to other nearby plants. Removing the stump reduces the risk of diseases and pests affecting the health of other trees and vegetation in your landscape.

6. Property Value:

• The appearance of your property significantly impacts its value. Stump removal contributes to an improved appearance, which in turn can enhance your property’s value and make it more appealing to potential buyers or tenants.

7. Space Optimization:

– Removing stumps opens up valuable space that can be used for various purposes, such as creating recreational areas, installing outdoor structures, or expanding your garden.

8. Preventing Root Decay:

– Over time, the decaying root system of a stump can attract insects and fungi that may spread to other healthy plants. Stump removal eliminates this potential source of root decay.

9. Eco-Friendly Approach:

Stump grinding often produces wood chips that can be repurposed as mulch or compost, promoting sustainable landscaping practices.

In summary, stump grinding and removal are essential steps in tree care and property maintenance that go beyond the initial tree removal process. They address safety concerns, enhance property aesthetics, prevent regrowth, and create a more functional and visually appealing landscape. By investing in stump removal, you not only improve the immediate appearance of your property but also contribute to its long-term health and value.

A tree stump is the portion of a tree trunk that remains in the ground after a tree has been cut down or removed. It is the base of the tree that’s left behind, usually extending a certain distance above the ground level. Stumps can vary in size and appearance depending on the tree species, the method of tree removal, and the depth to which the tree was cut.

Stumps are often left after tree removal due to several reasons, including the challenges associated with complete removal and the potential impact they can have on the landscape:


1. Removal Complexity:

• Completely removing a tree stump can be a labor-intensive and technically demanding task. The root system of a tree can extend far and deep into the ground, making it difficult to extract the entire stump without damaging surrounding structures or the landscape.

2. Cost Considerations:

• The process of fully removing a tree stump involves specialized equipment and expertise, which can lead to higher costs compared to simply cutting the tree down. As a result, property owners sometimes opt to leave the stump as a cost-saving measure.

3. Regrowth Potential:

• Stumps left behind have the potential to regrow through the shoots and sprouts that emerge from the remaining root system. This regrowth can lead to new tree growth, which might not be desirable, especially if the tree was removed for specific reasons such as disease or safety concerns.

4. Landscape Impact:

• Tree stumps left in the landscape can have several potential impacts:

• Aesthetic Disruption: Stumps can be unsightly and disrupt the overall appearance of the landscape, detracting from the visual appeal of the property.

• Obstruction: Stumps can get in the way of mowing, landscaping, or other outdoor activities, limiting the use of your outdoor space.

• Tripping Hazards: Stumps that are not easily visible can become tripping hazards, posing safety risks to people and pets.

5. Decay and Pest Concerns:

• Over time, the stump and its remaining root system can decay. Decaying stumps attract insects, fungi, and other pests, which can spread to nearby plants and affect the overall health of the landscape.

6. Land Use Limitations:

Stumps left in the ground restrict the potential use of the land for other purposes, such as planting new trees, installing structures, or creating new landscaping features.

7. Incomplete Transformation:

– Leaving a stump after tree removal might leave a property with a sense of unfinished transformation, hindering efforts to create a well-maintained and cohesive landscape.

In summary, tree stumps are the remaining portions of tree trunks left in the ground after tree removal. Stumps are often left due to challenges in complete removal, cost considerations, and the potential impacts they can have on the landscape. However, it’s important to consider the potential drawbacks of leaving stumps, including aesthetic disruption, regrowth potential, and safety concerns. Property owners should weigh these factors and consider stump grinding or removal as part of their landscape maintenance and improvement plans.

Removing tree stumps is important for a variety of reasons, encompassing safety, aesthetics, and the prevention of potential regrowth. Addressing these factors is crucial for maintaining a visually appealing, functional, and hazard-free landscape. Here’s an explanation of why it’s essential to remove tree stumps:

1. Safety Concerns:

• Tripping Hazards: Stumps left in the ground can pose tripping hazards, especially if they’re not easily visible. This can lead to accidents for both pedestrians and those engaged in outdoor activities on the property.

• Machinery Hazards: Stumps can be hazardous to lawnmowers, vehicles, and other machinery that come into contact with them, potentially causing damage or accidents.

2. Aesthetic Considerations:

• Visual Appeal: Stumps are often unsightly and can disrupt the overall aesthetic of your landscape. Removing them enhances the visual appeal of your property, creating a more polished and well-maintained appearance.

• Landscape Cohesion: Stump-free landscapes offer a more cohesive and harmonious look, allowing other landscaping elements to shine without the distraction of stumps.

3. Prevention of Regrowth:

• Shoots and Sprouts: Tree stumps left in the ground can lead to regrowth through shoots and sprouts emerging from the remaining root system. This regrowth can result in new trees or shrubs that might not align with your landscape design goals.

4. Land Use Flexibility:

• Enhanced Landscaping: Removing stumps opens up space for landscaping projects, allowing you to design and utilize your outdoor area more effectively. You can plant new trees, create garden beds, or install structures without the hindrance of stumps.

5. Disease and Pest Prevention:

• Disease Spread: Decaying stumps can attract diseases and pests that may spread to other nearby plants, potentially affecting the health of your landscape.

• Insect Attraction: Decaying wood is attractive to insects, which could find their way into your property, potentially leading to infestations.

6. Future Maintenance Challenges:

• Complications in Lawn Care: Stumps can make lawn maintenance difficult, obstructing mowing and trimming efforts. This can lead to uneven grass growth and an unkempt appearance.

7. Property Value and Curb Appeal:

– Curb Appeal: Stump-free landscapes contribute to a more attractive and inviting curb appeal, which positively impacts your property’s overall value and desirability. – Potential Buyers: For those looking to sell their property, a well-maintained landscape without unsightly stumps can make a more favorable impression on potential buyers.

8. Environmental Considerations:

– Rotting Wood: Decaying stumps can release carbon dioxide into the atmosphere as they break down. Removing stumps reduces this source of carbon emissions.

In summary, removing tree stumps is important for ensuring safety, enhancing the appearance of your property, preventing regrowth, and maintaining a functional landscape. By addressing these aspects, property owners can create a safer and more attractive outdoor space, reduce potential maintenance issues, and contribute to the overall health and beauty of their landscape.

How Stump Grinding Works

Stump grinding is a mechanical process used to remove tree stumps from the ground. It involves using specialized equipment called a stump grinder to chip away the stump and its root system until it is ground down below the surface level. Stump grinding is an effective method to eliminate stumps while minimizing impact on the surrounding landscape. Here’s how stump grinding works:

1. Equipment Setup:

• A stump grinder is a heavy-duty machine equipped with a spinning cutting wheel or blade. The size and power of the grinder depend on the size and hardness of the stump.

2. Safety Precautions:

• Before starting the process, the operator wears appropriate protective gear, including safety goggles, gloves, and hearing protection. The area around the stump is cleared of debris and obstacles.

3. Stump Positioning:

• The stump grinder is maneuvered into position near the stump. The operator positions the grinder to ensure safe and efficient grinding.

4. Initial Grinding Pass:

• The grinding process begins with the operator lowering the cutting wheel onto the stump. The wheel rotates rapidly and chips away at the stump material.

5. Gradual Grinding:

• The operator gradually moves the cutting wheel back and forth across the stump, grinding it down layer by layer. The grinding depth can be adjusted based on the depth of the stump and the desired outcome.

6. Root System Grinding:

• As the stump is ground down, the operator also grinds the exposed portions of the root system. This is crucial for preventing potential regrowth and eliminating any remaining root material.

7. Wood Chips and Mulch:

• The grinding process generates wood chips and mulch-like material, which are typically left on the ground as they can serve as natural mulch. These wood chips can be raked into the surrounding soil or used for other landscaping purposes.

8. Grinding Depth:

• Depending on the situation and the intended use of the area, the operator can adjust the grinding depth to remove the stump to a specific level below the ground.

9. Leveling and Cleanup:

• Once the stump is ground down to the desired level, the operator stops the grinder. Any remaining wood chips and debris are cleared away, and the area is leveled if needed.

10. Disposal or Reuse of Wood Chips:

– The resulting wood chips and mulch can be used as natural ground cover or added to compost piles. Some property owners choose to have the wood chips removed, while others use them as a landscaping resource.

Stump grinding is an efficient and practical method for removing stumps from the landscape. It eliminates the majority of the stump, including the root system, preventing regrowth and allowing for easier landscaping and future planting in the area. While stump grinding may leave behind some wood chips, these can be integrated into the soil, providing nutrient-rich organic material. Hiring a professional stump grinding service ensures proper equipment use, safety, and effective stump removal.

Murray, Utah

About Murray, Utah

Murray is a city situated on the Wasatch Front in the core of Salt Lake Valley in the U.S. state of Utah. Named for territorial governor Eli Murray, it is the state's fourteenth largest city. According to the 2020 census, Murray had a population of 50,637. Murray shares borders with Taylorsville, Holladay, South Salt Lake and West Jordan, Utah. Once teeming with heavy industry, Murray's industrial sector now has little trace and has been replaced by major mercantile sectors. Known for its central location in Salt Lake County, Murray has been called the Hub of Salt Lake County. Unlike most of its neighboring communities, Murray operates its own police, fire, power, water, library, and parks and recreation departments and has its own school district. While maintaining many of its own services, Murray has one of the lowest city tax rates in the state.

Bus Stops in Murray, Utah to Truco Services, Inc.

Bus Stop in Murray Central Station (Bay C) Murray, Utah to Truco Services, Inc.

Bus Stop in State St @ 4801 S Murray, Utah to Truco Services, Inc.

Bus Stop in Murray North Station Murray, Utah to Truco Services, Inc.

Bus Stop in State St @ 4949 S Murray, Utah to Truco Services, Inc.

Bus Stop in Murray Central Frontrunner/Trax Station Murray, Utah to Truco Services, Inc.

Bus Stop in Murray Blvd / Vine St (SB) Murray, Utah to Truco Services, Inc.

Bus Stop in State St @ 3925 S Murray, Utah to Truco Services, Inc.

Bus Stop in State St @ 4824 S Murray, Utah to Truco Services, Inc.

Bus Stop in State St @ 5223 S Murray, Utah to Truco Services, Inc.

Bus Stop in Murray Blvd / Allendale Dr (NB) Murray, Utah to Truco Services, Inc.

Bus Stop in Murray Blvd @ 5039 S Murray, Utah to Truco Services, Inc.

Bus Stop in State St @ 4721 S Murray, Utah to Truco Services, Inc.

Map of Murray, Utah

Driving Directions in Murray, Utah to Truco Services, Inc.

Driving Directions from Woodruff Tree Trimming and Removal to 4640 Commerce Dr, Murray, UT 84107, USA

Driving Directions from Reliable Tree Care to 4640 Commerce Dr, Murray, UT 84107, USA

Driving Directions from Tree Pro-Tech to 4640 Commerce Dr, Murray, UT 84107, USA

Driving Directions from Prestige Tree And Landscape to 4640 Commerce Dr, Murray, UT 84107, USA

Driving Directions from Excellence Tree & Landscape to 4640 Commerce Dr, Murray, UT 84107, USA

Driving Directions from Amen Trees to 4640 Commerce Dr, Murray, UT 84107, USA

Driving Directions from Tim's Tree Care to 4640 Commerce Dr, Murray, UT 84107, USA

Driving Directions from Jordan Tree Service - Murray to 4640 Commerce Dr, Murray, UT 84107, USA

Driving Directions from Arbor Works to 4640 Commerce Dr, Murray, UT 84107, USA

Driving Directions from Diamond Tree Experts to 4640 Commerce Dr, Murray, UT 84107, USA

Driving Directions from Green Tree Arborist to 4640 Commerce Dr, Murray, UT 84107, USA

Driving Directions from TruCo Services to 4640 Commerce Dr, Murray, UT 84107, USA

Reviews for Truco Services, Inc. Murray, Utah

Truco Services, Inc. Reviews

Emily Abercrombie

starstarstarstarstar (5)

We had a great experience with TruCo! They were well priced, responsive and prompt. Michael was a pleasure to work with and gave us advice on which plants to put in where we took out our ugly old shrubs. I would highly recommend this company!!!

Truco Services, Inc. Reviews

Michelle Turpin

starstarstarstarstar (5)

TruCo Services gets 5 stars from us for customer service. We experienced a few issues with their services this last year and Rob Eccles in senior management, stepped in and immediately handled our issues. He was very committed to making sure they understood our expectations and would execute to make us happy.

Truco Services, Inc. Reviews

Siobhan Billingsley

starstarstarstarstar (5)

I work for a property management company and have the pleasure of working with Rob at a community in Sandy. He has been incredible to work with and always responds in a timely manner. He knows all the homeowners by name and address and is aware of all the "problem" areas when it comes to sprinklers. I never have to worry about following up with him because he always reaches out to provide me with an update. If you're looking to work with someone who takes pride in their job, is professional, and can solve the worst landscaping problems thrown your way, Rob is your guy. Thank you, Rob for all you do!

Truco Services, Inc. Reviews

Jaime S.

starstarstarstarstar (5)

We have used Truco at 2 of the complexes we manage, they have been great to work with. Good quality service, outstanding customer service with good communication. That's hard to find these days. I highly recommend them. Travis has been awesome to work with.

Truco Services, Inc. Reviews

Jerusha Smart

starstarstarstarstar (5)

We use TruCo for a majority of our properties and our home. While other landscaping companies we use come and go for various reasons like cost, communication issues, work performance, etc., TruCo is always consistent in price and work. Also, Rob is the best.