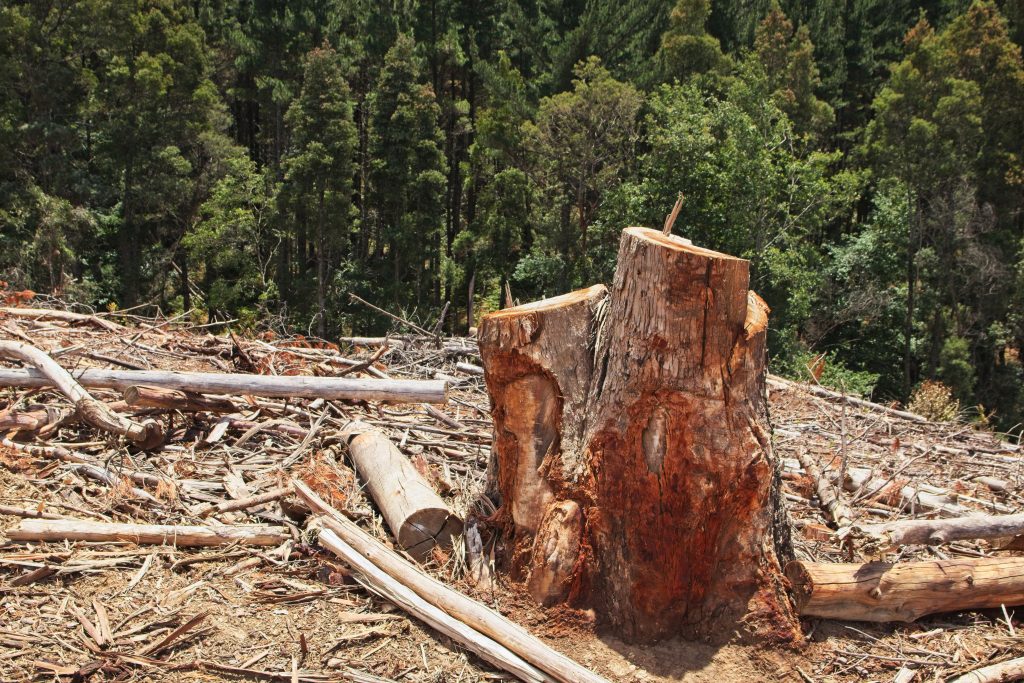
How to Kill Tree Roots After Stump Removal
Are you tired of dealing with stubborn tree roots even after removing the stump? Look no further! In this article, we’ll show you how to effectively kill tree roots after stump removal. Say goodbye to those pesky roots that keep causing trouble in your yard. We’ll guide you through the steps, provide helpful tips, and highlight common mistakes to avoid. Get ready to reclaim your space and enjoy a root-free environment once and for all.

Key Takeaways
- There are several methods for killing tree roots including chemical root killers, mechanical removal, natural methods, and professional assistance.
- Using a combination of herbicide and physical barrier is highly effective in preventing regrowth.
- Eco-friendly root control methods, such as organic herbicides and manual removal, should be considered to minimize harm to the environment.
- Monitoring trees after root removal is important for their long-term health and to prevent complications.
Introduction to Tree Root Removal Methods
There are several methods for removing tree roots after stump removal. Here are some tree root removal techniques that you can consider:
- Chemical Root Killers: These are substances specifically designed to kill tree roots. They are usually applied directly to the root system or poured into the stump hole. Chemical root killers work by penetrating the root system and effectively killing the roots.
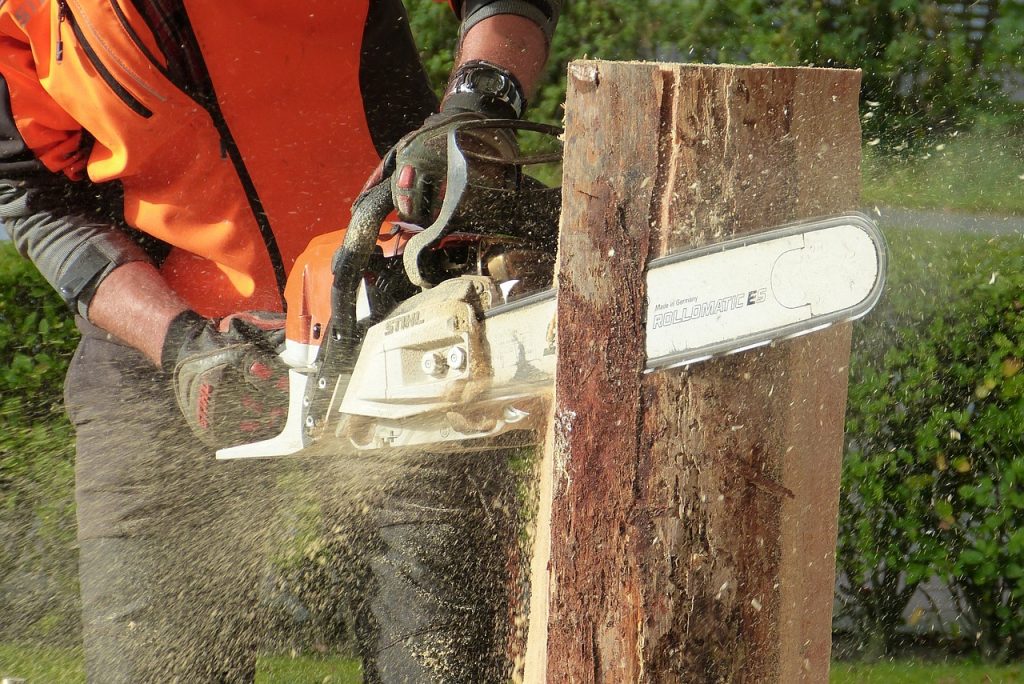
- Mechanical Removal: This method involves physically removing the tree roots using tools such as an axe, shovel, or root saw. It requires a lot of physical effort and can be time-consuming, especially for larger and deeper roots.
- Natural Root Killing Methods: If you prefer a more environmentally friendly approach, there are natural root killing methods available. These include using hot water or vinegar to kill the roots. While these methods may take longer to show results, they are safe for the environment.
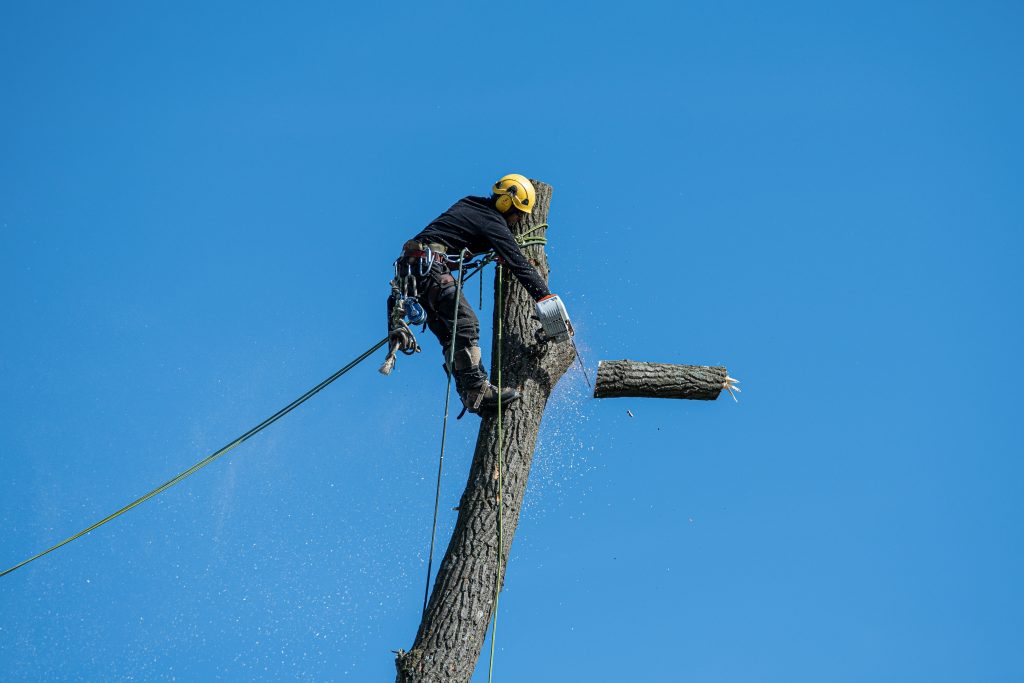
- Professional Assistance: If you are unsure or uncomfortable with removing tree roots yourself, it is always advisable to seek professional assistance. Arborists or tree care specialists have the expertise and equipment necessary to safely and effectively remove tree roots.
Tree Root Removal History
To better understand the history of removing tree roots, you might be interested to know that this practice dates back to ancient civilizations. Tree root removal techniques have been employed for centuries in various cultures around the world. In ancient Egypt, for example, tree roots were removed to make way for the construction of monumental structures such as the pyramids. Historical tree root removal also played a significant role in the development of agriculture. Early farmers had to clear tree roots from their fields to create arable land for planting crops.
Throughout history, different methods have been used to remove tree roots. In ancient times, manual labor was the primary approach. People would use tools such as axes, shovels, and picks to dig around the roots and cut them off. In some cases, fire was employed to burn away the roots, making it easier to remove them. As technology advanced, more specialized techniques were developed, including the use of mechanical equipment like stump grinders and root saws.
Understanding the historical context of tree root removal can provide valuable insights into the techniques that have been used throughout the ages. By examining the methods employed by our ancestors, we can gain a deeper appreciation for the tools and technologies available to us today. Now, let’s explore some tips on how to effectively remove tree roots after stump removal.
Tips
If you’re looking for effective root removal techniques, tips on preventing regrowth, and eco-friendly solutions for dealing with tree roots, you’ve come to the right place. Removing tree roots can be a challenging task, but with the right methods and tools, you can ensure that the roots are completely eliminated. Additionally, it’s important to take steps to prevent regrowth and choose environmentally-friendly solutions that minimize harm to the surrounding ecosystem.
Effective Root Removal
One effective way of removing tree roots after stump removal is by using a root grinder. Root removal techniques are crucial in preventing regrowth and ensuring the long-term success of your stump removal. A root grinder is a powerful machine specifically designed to grind and remove tree roots from the ground. It works by using sharp, rotating blades to cut through the roots and turn them into small wood chips. This method not only removes the roots but also helps with root decay, as the grinding process exposes the roots to air and accelerates their natural decomposition. By using a root grinder, you can effectively and efficiently remove tree roots, ensuring that they won’t cause any future problems or regrow in the area where the stump was removed.
Preventing Regrowth
Using a root grinder can effectively prevent the regrowth of tree roots in the area where the stump was removed. This method ensures long-term effectiveness in keeping the roots from sprouting again. By grinding the roots down to small wood chips, you eliminate the chances of regrowth and the need for future removal. The root grinder works by mechanically grinding and chipping away the remaining roots, making it almost impossible for them to regrow. This process not only saves you time and effort but also saves your yard from potential damage caused by the regrowth of tree roots. After using a root grinder, you can move on to eco-friendly root solutions to further enhance the health and appearance of your landscape.
Eco-Friendly Root Solutions
By utilizing eco-friendly root solutions, you can promote a healthier and more sustainable landscape without causing harm to the environment. When it comes to controlling tree roots, it’s important to consider natural root removal methods that are safe and effective. One eco-friendly option is using organic herbicides that target the roots while leaving the surrounding soil and plants unharmed. These herbicides contain natural ingredients such as vinegar or citric acid, which break down the roots over time. Another method is manual removal, where you dig out the roots by hand or with tools. This allows you to selectively remove the roots without causing damage to the surrounding area. By opting for these eco-friendly root control methods, you can effectively manage tree roots without compromising the health of your landscape.
Transitioning to the next section about ‘root traits’, it’s important to understand the characteristics of tree roots in order to effectively control their growth.
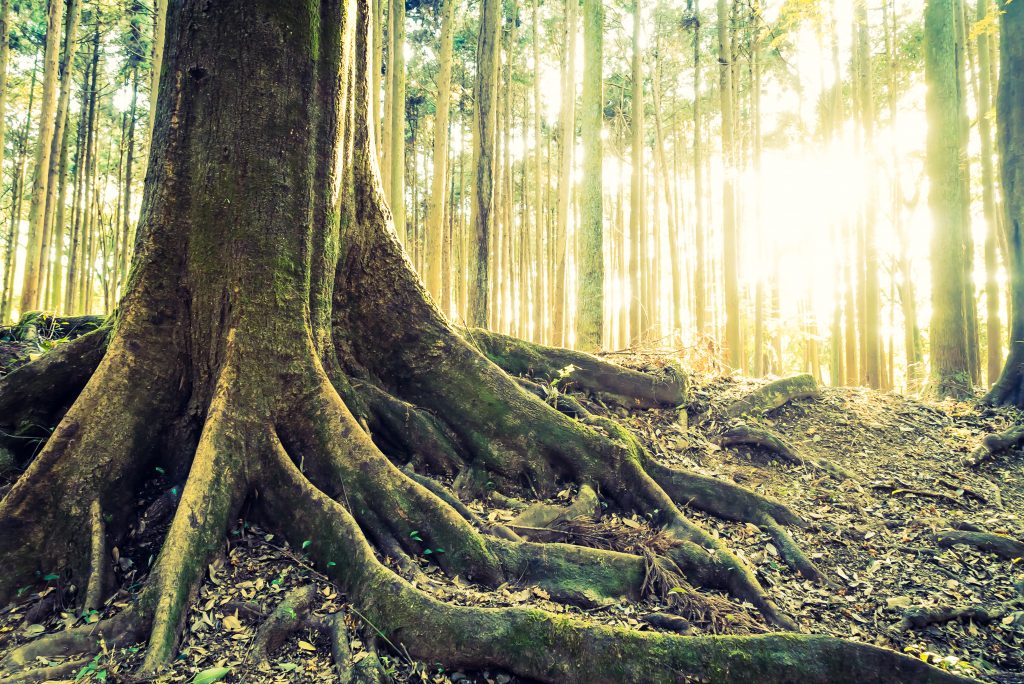
Root Traits
The roots of a tree can be quite resilient, making it difficult to completely remove them after a stump has been taken out. Root pruning is a common technique used to control the growth of tree roots. By cutting away certain roots, you can prevent them from spreading and causing damage to nearby structures or infrastructure. However, it is important to note that root pruning should be done carefully and only when necessary, as excessive pruning can lead to root decay and weaken the overall health of the tree. Root decay occurs when the roots are damaged or exposed to certain pathogens, leading to rot and eventual death of the tree. Therefore, it is crucial to strike a balance between root pruning and maintaining the tree’s overall health.
Now that you understand the traits of tree roots and the potential risks associated with root pruning, let’s explore the steps you can take to kill tree roots after stump removal.
Steps to Kill Tree Roots After Stump Removal
Once you’ve removed the stump, there are steps you can take to effectively eliminate the remaining tree root system. Here are some root killing techniques and regrowth prevention strategies you can employ:
- Chemical treatments: Apply a powerful herbicide directly to the roots. This will kill the roots and prevent them from regrowing. Be sure to follow the manufacturer’s instructions and take necessary safety precautions when using chemicals.
- Physical removal: Dig around the remaining roots and cut them with a sharp axe or saw. Removing as much of the root system as possible will minimize the chances of regrowth.
- Burning: If the roots are accessible and safe to burn, you can use a controlled fire to destroy them. This method requires careful supervision and adherence to local fire regulations.
- Salt application: Spread a generous amount of rock salt over the remaining roots. The salt will dehydrate the roots and inhibit their growth.
Goals
After removing a tree stump, your next goal is to prevent regrowth and ensure that the tree roots are completely dead. This is important because if the roots are still alive, they can continue to grow and cause problems such as damage to foundations or underground utilities. Fortunately, there are eco-friendly solutions available to achieve this.
One effective method is to apply a herbicide directly to the stump and any exposed roots. This will kill the remaining roots and prevent new growth. Another option is to use a physical barrier, such as a thick layer of mulch or landscaping fabric, to block sunlight and nutrients from reaching the roots. This will effectively starve them and prevent regrowth.
To give you a clear understanding of the different solutions available, here is a table outlining the methods and their effectiveness in preventing regrowth:
| Method | Effectiveness in Preventing Regrowth |
|---|---|
| Herbicide | High |
| Physical Barrier | Moderate |
| Combination | Very High |
Now that you understand the goals of preventing regrowth and the eco-friendly solutions available, let’s explore some habits you can adopt to ensure the complete eradication of tree roots after stump removal.
Habits for Killing Tree Roots After Stump Removal
To ensure complete eradication of tree roots after removing a stump, it’s important to adopt certain habits. Killing tree roots requires a systematic approach that includes both root killing techniques and regrowth prevention. After stump removal, it’s crucial to actively monitor the area for any signs of root regrowth. Regularly inspect the soil around the stump to identify any new shoots or suckers emerging. When you notice these signs, promptly remove them using a root saw or pruning shears. It’s essential to cut the shoots as close to the ground as possible to prevent regrowth. Additionally, applying a root killer directly to the cut surface can effectively eliminate any remaining root fragments. As a preventive measure, consider using a commercial root killer product to treat the soil around the stump. These products contain herbicides that penetrate the soil and inhibit root growth. By establishing these habits, you can ensure that tree roots are effectively killed and prevent any future regrowth. Now let’s delve into a real-life story that showcases the importance of these habits in achieving complete eradication of tree roots.
A Real-Life Story
Imagine yourself facing the frustrating task of dealing with persistent regrowth of tree roots even after removing a stump. You may have tried various methods to kill the roots, but they keep coming back, causing damage to your property and hindering your landscaping efforts. Let me share a real-life experience that might help you tackle this issue.
A few years ago, I had a similar problem after removing a large tree stump from my backyard. Despite my best efforts, the roots continued to sprout, making it difficult to grow new plants in that area. I tried cutting the roots, applying herbicides, and even pouring boiling water, but nothing seemed to work.
After consulting with a professional arborist, I learned that the key to killing tree roots lies in treating the stump immediately after removal. By applying a stump killer, such as potassium nitrate, directly to the freshly cut stump, you can prevent regrowth and ensure that the roots die off completely.
Now, let’s move on to what other experts have to say about killing tree roots after stump removal.
Quotes
Experts in the field have shared their insights and opinions on effectively eliminating stubborn tree roots that persist even after removing a stump. When it comes to root removal, there are various methods and techniques that can be employed. One expert suggests using a chemical root killer, stating, “Chemical treatments are highly effective in killing the remaining tree roots. These products contain powerful ingredients that penetrate deep into the root system, ensuring complete eradication.” Another expert recommends physical removal, saying, “Digging out the remaining roots is a reliable method. By using a shovel or a root saw, you can cut through the roots and remove them from the ground. This method ensures that no roots are left behind to regrow.” Additionally, another expert advises using natural remedies, such as vinegar or boiling water, stating, “These natural alternatives can be poured directly onto the roots, causing them to wither and die.” These quotes highlight the diverse approaches that can be taken to effectively eliminate stubborn tree roots. Now, let’s delve into some secrets for successful root removal without writing a ‘step’.
Secrets
Discover some hidden techniques that can help you effectively eradicate stubborn tree roots that persist even after you’ve removed a stump. When it comes to killing tree roots, there are a few secrets and habits that can make the process more efficient. First, it’s important to understand that tree roots can continue to grow even after the stump has been removed. To prevent this, one secret is to apply a chemical stump killer to the freshly cut surface of the stump. This will prevent any regrowth from occurring. Additionally, regularly monitoring the area for any signs of new growth and promptly treating it with a root killer will help ensure that the roots are completely eradicated. Another secret is to create physical barriers around the area where the stump was removed. This can be done by installing a root barrier or using thick layers of landscaping fabric to prevent the roots from spreading. By implementing these habits and secrets, you can effectively kill tree roots after stump removal and prevent any further growth. Now, let’s explore some insights for killing tree roots after stump removal.
Insights for Killing Tree Roots After Stump Removal
To effectively ensure that the tree roots are completely eradicated, you can implement these habits and secrets after removing the stump. Tree root control is essential to prevent any future growth and potential damage to your property. After stump removal, it is crucial to focus on killing the remaining tree roots to ensure they don’t regrow. There are various root removal techniques you can employ for this purpose.
One effective method is to apply a root killer directly to the stump and surrounding soil. These root killers contain powerful chemicals that penetrate the roots and inhibit their growth. Another technique is to use a root grinder to physically remove the remaining roots. This machine grinds the roots into small pieces, making it easier to dispose of them.
It is important to note that killing tree roots requires persistence and regular maintenance. You may need to repeat the root removal process several times to ensure complete eradication. Additionally, regularly checking the area for any signs of root regrowth is crucial.
Benefits of Killing Tree Roots After Stump Removal
Now that you understand the insights for killing tree roots after stump removal, let’s explore the benefits of this process. Killing tree roots has several advantages, one of which is preventing regrowth. By eliminating the roots, you ensure that the tree will not grow back, saving you from future removal efforts.
Additionally, killing tree roots helps maintain the integrity of your landscape. Tree roots have the potential to cause damage to underground structures like pipes, sewers, and foundations. By getting rid of the roots, you reduce the risk of costly repairs and maintain the stability of your property.
Moreover, killing tree roots can improve the aesthetic appeal of your garden or yard. With the roots gone, you have more freedom to redesign the space, plant new trees or flowers, and create a cohesive and visually pleasing environment.
Lessons
When it comes to effectively killing tree roots after stump removal, there are several methods you can employ. From chemical treatments to physical removal, each method has its own advantages and considerations. Additionally, once the roots have been killed, it is crucial to take steps to prevent regrowth and ensure a long-lasting solution. Finally, it is important to consider the environmental impact of these treatments, as some methods may have unintended consequences on the surrounding ecosystem.
Effective Root Killing Methods
Using herbicides such as glyphosate or triclopyr can be an effective method for killing tree roots after stump removal. These chemicals work by being absorbed into the root system, ultimately killing the entire root structure. Glyphosate is a commonly used herbicide that is effective in preventing regrowth of tree roots. It targets the enzymes that are essential for plant growth, causing the roots to wither and die. Triclopyr, on the other hand, is known for its ability to control woody plants like tree roots. It affects the growth hormones in the roots, stunting their growth and preventing regrowth. While herbicides may be effective, it is important to choose eco-friendly solutions that do not harm the environment. Transitioning into the subsequent section, preventing regrowth after removal can be achieved through other methods.
Preventing Regrowth After Removal
To prevent regrowth, you should consider applying a layer of mulch around the area where the tree was removed. Mulch acts as a barrier, preventing sunlight from reaching the roots and inhibiting their growth. Additionally, mulch helps retain moisture in the soil, which can be beneficial for other plants in the area. When applying mulch, make sure to spread it evenly and maintain a thickness of about 2 to 4 inches. This will provide adequate coverage and ensure long term root control. Mulching is a simple and effective method for preventing regrowth after tree removal, and it is environmentally friendly. It helps to suppress weed growth, conserves water, and improves soil health.
Environmental Impact of Treatments
Now that you know how to prevent regrowth after removing a tree stump, let’s discuss the environmental impact of the treatments you might consider. It’s essential to assess the long-term effects before deciding on a course of action. Some methods, such as using chemical herbicides, may have negative consequences for the surrounding ecosystem. These chemicals can leach into the soil and harm nearby plants, animals, and even groundwater. To minimize environmental damage, it’s crucial to explore alternative approaches. For example, physical removal methods like digging out the roots or using a root grinder are more environmentally friendly options. These techniques may require more effort, but they avoid the use of harmful chemicals. By considering the long-term effects and exploring alternative approaches, you can make a more informed decision about how to address tree roots after stump removal. Now, let’s move on to discussing routines for maintaining a healthy yard.
Routines
When it comes to killing tree roots after stump removal, your regular maintenance routines are crucial. By developing good habits for killing tree roots, you can ensure the long-term health and safety of your landscape. One important routine is to regularly inspect the area where the stump was removed. Look for any signs of regrowth or new shoots emerging from the ground. If you spot any, it is important to act quickly to prevent the roots from regenerating. One effective method is to apply a commercial root killer directly to the exposed roots. These products contain chemicals that penetrate the root system and kill it from within. Another routine to incorporate is to regularly water the area surrounding the stump. This will help soften the soil and make it easier to remove any remaining roots. Additionally, you should consider reapplying the root killer every few months to ensure that any remaining roots are fully eradicated. By maintaining these routines, you can effectively kill tree roots after stump removal and prevent any future regrowth.
Transitioning into the subsequent section about the ‘pros and cons’ of killing tree roots, it is important to consider the potential drawbacks of these methods.
Pros and Cons
If you’re considering the pros and cons of getting rid of tree roots, you should be aware of the potential benefits and drawbacks. On one hand, removing tree roots can have several advantages. It can prevent damage to underground utilities such as pipes and cables, ensuring the smooth functioning of your home. Additionally, removing roots can prevent them from encroaching on your property, reducing the risk of structural damage to your house or driveway. Moreover, by eliminating tree roots, you can create more space for planting new trees or landscaping.
However, there are also some drawbacks to consider. Removing tree roots can be a labor-intensive and time-consuming process. You may need to use heavy machinery or hire professionals to get the job done effectively. Additionally, tree roots play a crucial role in stabilizing the soil and preventing erosion. Removing them may lead to soil instability and the potential for landslides or sinkholes. Furthermore, tree roots contribute to the overall health and biodiversity of the environment. They provide habitat for various organisms and help in nutrient cycling. Removing them can disrupt the natural balance and have long-term environmental impacts.
Considering both the pros and cons, it is important to carefully weigh the potential benefits against the environmental impact and the additional efforts required for root removal. In the next section, we will discuss the dos and don’ts when dealing with tree roots to help you make an informed decision.
Dos and Dont’s
To ensure the safety of your property and the health of your trees, it’s important to follow these dos and don’ts when dealing with tree roots. Tree roots can be a nuisance, causing damage to structures and interfering with other plants in your yard. By following these guidelines, you can effectively manage tree roots without causing harm.
| Dos | Dont’s |
|---|---|
| 1. Do a thorough assessment of the root system before taking any action. | 1. Don’t cut tree roots without professional guidance. |
| 2. Do consider alternative methods before resorting to root removal. | 2. Don’t use harsh chemicals or excessive force to remove roots. |
| 3. Do consult an arborist or tree care professional for expert advice. | 3. Don’t neglect to monitor the health of your trees after root removal. |
| 4. Do consider installing barriers to prevent root encroachment. | 4. Don’t ignore signs of root damage or disease in your trees. |
Mistakes to Avoid
One mistake you should avoid when dealing with tree roots is neglecting to monitor the health of your trees after removing the roots. It is crucial to remember that tree root removal can have a significant impact on the overall health and stability of your trees. One of the most common root killing errors is not taking proper precautions to prevent damage to the tree’s root system during the removal process. When removing tree roots, it is important to use the right tools and techniques to minimize harm to the tree. Another mistake to avoid is removing too many roots at once, as this can cause irreversible damage to the tree’s ability to absorb nutrients and water. Additionally, failing to address any underlying issues that may have caused the excessive root growth in the first place can lead to recurring problems. To ensure the long-term health of your trees, it is essential to carefully monitor them after root removal, looking for signs of stress or decline. By being proactive and attentive, you can prevent further complications and maintain the vitality of your trees.
Key Takeaways
By being proactive and attentive, you can prevent complications and maintain the vitality of your trees after removing the roots. Preventing regrowth of tree roots is an essential step in ensuring the long-term health of your landscape. After all, you wouldn’t want those pesky roots to resurface and cause issues down the line. Luckily, there are eco-friendly solutions available to help you in this endeavor. One effective method is using natural herbicides that are specifically designed to kill tree roots. These herbicides contain active ingredients that penetrate deep into the root system, effectively killing the remaining roots and preventing regrowth. Another eco-friendly option is to physically remove any remaining root fragments that may have been left behind during the stump removal process. This can be done by carefully digging around the area and using a root saw or pruners to cut and remove any remaining roots. By taking these proactive measures and using eco-friendly solutions, you can ensure that the roots are completely eradicated and your trees can thrive without any complications. In the next section, we will discuss specific action steps for killing tree roots after stump removal, so you can confidently tackle this task.
Specific Action Steps for Killing Tree Roots After Stump Removal
When it comes to effectively killing tree roots, there are several methods you can employ. From chemical treatments to physical removal, each method has its own advantages and considerations. However, it’s important to take safety precautions while killing roots, as some methods can pose risks to yourself and the environment. Additionally, understanding the environmental impact of root killing is crucial in making responsible choices for the health of your surroundings.
Effective Root Killing Methods
There are several effective methods for killing tree roots after stump removal. One option is to use chemical treatments specifically designed to kill roots. These treatments can be applied directly to the stump or injected into the ground near the roots. Another method is to physically remove the roots by digging them out with a shovel or using a root saw. Be sure to remove as much of the root system as possible to prevent regrowth. Additionally, natural root removal methods can be effective. These include pouring boiling water on the roots, applying salt or vinegar to the area, or using a natural herbicide made from ingredients like citrus oil or clove oil. When using any root killing technique, it is important to take safety precautions to protect yourself and the surrounding environment.
Safety Precautions for Killing Roots
Now that you are aware of effective root killing methods, it is crucial to prioritize safety when dealing with tree roots. Root killing techniques can involve the use of chemicals or physical removal methods, both of which come with their own risks. When using chemicals, always follow the manufacturer’s instructions and wear protective gear such as gloves and goggles. Chemicals can be harmful to humans and the environment, so it is essential to handle them with caution. In terms of physical root removal, ensure that you have the right tools and equipment to avoid injuries. Take note of underground utilities to prevent any accidents. By prioritizing safety during root killing, you can minimize the risks and ensure a smooth and incident-free process.
When it comes to the environmental impact of root killing…
Environmental Impact of Root Killing
Using chemicals for root removal can harm both humans and the environment, so it’s important to handle them with caution. When it comes to root killing techniques, it’s crucial to consider the environmental impact. Chemical-based root killers may contain harmful substances that can seep into the soil, affecting nearby plants and animals. Instead, consider using eco-friendly alternatives that are safer for both you and the environment. One option is to physically remove the roots by digging them out or cutting them with a root saw. Another eco-friendly method is using natural ingredients such as vinegar or boiling water, which can help kill the roots without causing harm to the surrounding ecosystem. Remember, by choosing eco-friendly root killing methods, you’re not only protecting the environment but also ensuring the safety of yourself and others.
Frequently Asked Questions
Can Tree Roots Grow Back After Stump Removal?
Yes, tree roots can regrow after stump removal. To prevent regrowth, you should apply a root killer or herbicide directly to the stump and surrounding area. Regular maintenance and monitoring are also essential to ensure no new roots appear.
How Long Does It Take for Tree Roots to Decompose Naturally?
Natural methods can help speed up the decomposition of tree roots after stump removal. While the time it takes for roots to decompose naturally can vary, factors such as soil conditions and tree species play a role.
Are There Any Natural Methods to Kill Tree Roots After Stump Removal?
After stump removal, you may wonder if there are natural methods to kill tree roots. While chemical solutions are commonly used, alternative solutions like salt, vinegar, or boiling water can also be effective.
Can Killing Tree Roots Affect the Surrounding Plants and Soil?
Killing tree roots can have adverse effects on nearby plants and soil. To prevent soil damage during root removal, take precautions like avoiding excessive digging, using herbicides cautiously, and considering natural alternatives.
What Should I Do if the Tree Roots Continue to Cause Damage Even After Stump Removal?
If tree roots persistently cause damage after stump removal, consider installing a tree root barrier to prevent further issues. Additionally, you may want to consult professional root removal services for a more effective and long-lasting solution.
If you need a tree service in Utah, you can call:
Truco Services, Inc.
4640 Commerce Drive
Murray, Utah 84107
(801) 466–8044
https://truetreeservices.com/
About Murray, Utah
Murray is a city situated on the Wasatch Front in the core of Salt Lake Valley in the U.S. state of Utah. Named for territorial governor Eli Murray, it is the state's fourteenth largest city. According to the 2020 census, Murray had a population of 50,637. Murray shares borders with Taylorsville, Holladay, South Salt Lake and West Jordan, Utah. Once teeming with heavy industry, Murray's industrial sector now has little trace and has been replaced by major mercantile sectors. Known for its central location in Salt Lake County, Murray has been called the Hub of Salt Lake County. Unlike most of its neighboring communities, Murray operates its own police, fire, power, water, library, and parks and recreation departments and has its own school district. While maintaining many of its own services, Murray has one of the lowest city tax rates in the state.
Neighborhoods in Murray, Utah
Murray Oakes, Grant Park, Southwood Park, Murray Park, Murray Park Restrooms, Willow Pond Park, Neighborhood Veterinary Care
Things To Do in Murray, Utah


Bus Stops in Murray, Utah to Truco Services, Inc.
Bus Stop in Murray Central Station (Bay C) Murray, Utah to Truco Services, Inc.
Bus Stop in State St @ 4801 S Murray, Utah to Truco Services, Inc.
Bus Stop in Murray North Station Murray, Utah to Truco Services, Inc.
Bus Stop in State St @ 4949 S Murray, Utah to Truco Services, Inc.
Bus Stop in Murray Central Frontrunner/Trax Station Murray, Utah to Truco Services, Inc.
Bus Stop in Murray Blvd / Vine St (SB) Murray, Utah to Truco Services, Inc.
Bus Stop in State St @ 3925 S Murray, Utah to Truco Services, Inc.
Bus Stop in State St @ 4824 S Murray, Utah to Truco Services, Inc.
Bus Stop in State St @ 5223 S Murray, Utah to Truco Services, Inc.
Bus Stop in Murray Blvd / Allendale Dr (NB) Murray, Utah to Truco Services, Inc.
Bus Stop in Murray Blvd @ 5039 S Murray, Utah to Truco Services, Inc.
Bus Stop in State St @ 4721 S Murray, Utah to Truco Services, Inc.
Driving Directions in Murray, Utah to Truco Services, Inc.
Driving Directions from Woodruff Tree Trimming and Removal to 4640 Commerce Dr, Murray, UT 84107, USA
Driving Directions from Reliable Tree Care to 4640 Commerce Dr, Murray, UT 84107, USA
Driving Directions from Tree Pro-Tech to 4640 Commerce Dr, Murray, UT 84107, USA
Driving Directions from Prestige Tree And Landscape to 4640 Commerce Dr, Murray, UT 84107, USA
Driving Directions from Excellence Tree & Landscape to 4640 Commerce Dr, Murray, UT 84107, USA
Driving Directions from Amen Trees to 4640 Commerce Dr, Murray, UT 84107, USA
Driving Directions from Tim's Tree Care to 4640 Commerce Dr, Murray, UT 84107, USA
Driving Directions from Jordan Tree Service - Murray to 4640 Commerce Dr, Murray, UT 84107, USA
Driving Directions from Arbor Works to 4640 Commerce Dr, Murray, UT 84107, USA
Driving Directions from Diamond Tree Experts to 4640 Commerce Dr, Murray, UT 84107, USA
Driving Directions from Green Tree Arborist to 4640 Commerce Dr, Murray, UT 84107, USA
Driving Directions from TruCo Services to 4640 Commerce Dr, Murray, UT 84107, USA
Reviews for Truco Services, Inc. Murray, Utah

Emily Abercrombie
We had a great experience with TruCo! They were well priced, responsive and prompt. Michael was a pleasure to work with and gave us advice on which plants to put in where we took out our ugly old shrubs. I would highly recommend this company!!!

Michelle Turpin
TruCo Services gets 5 stars from us for customer service. We experienced a few issues with their services this last year and Rob Eccles in senior management, stepped in and immediately handled our issues. He was very committed to making sure they understood our expectations and would execute to make us happy.

Siobhan Billingsley
I work for a property management company and have the pleasure of working with Rob at a community in Sandy. He has been incredible to work with and always responds in a timely manner. He knows all the homeowners by name and address and is aware of all the "problem" areas when it comes to sprinklers. I never have to worry about following up with him because he always reaches out to provide me with an update. If you're looking to work with someone who takes pride in their job, is professional, and can solve the worst landscaping problems thrown your way, Rob is your guy. Thank you, Rob for all you do!

Jaime S.
We have used Truco at 2 of the complexes we manage, they have been great to work with. Good quality service, outstanding customer service with good communication. That's hard to find these days. I highly recommend them. Travis has been awesome to work with.

Jerusha Smart
We use TruCo for a majority of our properties and our home. While other landscaping companies we use come and go for various reasons like cost, communication issues, work performance, etc., TruCo is always consistent in price and work. Also, Rob is the best.