How to Stop Tree Rot After Limb Removal?
How to Stop Tree Rot After Limb Removal?
So, you’ve just removed a limb from your tree, and now you’re worried about tree rot creeping in? Don’t fret, my friend! In this article, we’re going to dive into the world of tree rot prevention and give you all the juicy details on how to stop it in its tracks after limb removal. We’ll explore the history of tree rot, share some expert tips, discuss the traits of this pesky problem, and provide you with specific action steps to ensure your tree stays healthy and strong. Get ready to become a tree rot prevention pro!
Key Takeaways
- Proper pruning techniques such as removing dead or damaged branches are crucial to prevent tree rot after limb removal.
- Cleaning the area with a diluted bleach solution and applying a wound dressing or sealant can help protect the wood and prevent decay.
- Regular inspection and maintenance of trees are important to monitor for signs of decay or further damage.
- Consulting with a professional arborist may be necessary for proper treatment and prevention of tree rot after limb removal.
Introduction to Tree Rot Prevention
Tree rot can be prevented by taking certain measures after removing a limb. When it comes to preserving the health and longevity of your trees, it is crucial to be proactive in preventing tree rot. Here are some effective tree rot prevention methods that you can implement:
- Proper pruning: Ensure that you use clean and sharp tools to make clean cuts when pruning your trees. This helps to minimize the risk of introducing pathogens that can lead to rot.
- Regular inspection: Regularly inspect your trees for any signs of decay or damage. Look out for soft spots, fungal growth, or hollow areas, as these are common indicators of tree rot.
- Adequate drainage: Make sure your trees are planted in well-drained soil to prevent waterlogged conditions that can promote rot.
- Avoiding unnecessary wounds: Be cautious when performing any activities near your trees that may cause wounds, such as construction work. These wounds can serve as entry points for pathogens.
- Promoting tree health: Maintain the overall health of your trees by providing proper nutrition, watering, and mulching. Healthy trees are better equipped to resist diseases, including rot.
Tree Rot History
You might want to know about the history of rot in your tree before you take any action. Understanding the origins and progression of tree rot can help you develop an effective prevention and treatment plan. Tree rot is a common problem that can weaken and eventually kill your trees if left untreated. It is caused by various fungi that thrive in moist and decaying wood. These fungi enter the tree through wounds or openings, such as pruning cuts or damaged bark. Once inside, they consume the wood, causing it to decay and become structurally unsound. Over time, the rot can spread from the infected area to other parts of the tree, compromising its stability and health. To prevent tree rot, it is essential to maintain good tree care practices, such as regular pruning, proper watering, and avoiding damage to the trunk and branches. Additionally, treating any existing rot is crucial to stop its progression and save the tree. In the next section, you will find tips on how to prevent and treat tree rot effectively.
Tips
When it comes to maintaining the health and longevity of your trees, there are several key points to keep in mind. Firstly, preventing future decay is crucial in ensuring the overall health of your trees. This can be achieved through proper pruning techniques, which not only promote healthy growth but also help prevent the spread of disease. Additionally, treating damaged wood is essential in preventing further decay and potential hazards in your landscape. By following these tips, you can ensure the continued health and beauty of your trees.
Preventing Future Decay
To prevent future decay, it’s important to regularly inspect and maintain the tree. Tree rot can have detrimental long-term effects on the health and stability of your tree. Luckily, there are effective tree rot prevention methods that you can implement. One important method is to ensure proper drainage around the tree to prevent excess moisture, as waterlogged soil can lead to rot. Additionally, removing dead or decaying branches and pruning the tree regularly will help maintain its overall health and prevent the spread of rot. It’s also crucial to avoid damaging the tree during landscaping activities. By taking these preventative measures, you can minimize the risk of tree rot and ensure the longevity of your tree. Now, let’s explore proper pruning techniques to further care for your tree.
Proper Pruning Techniques
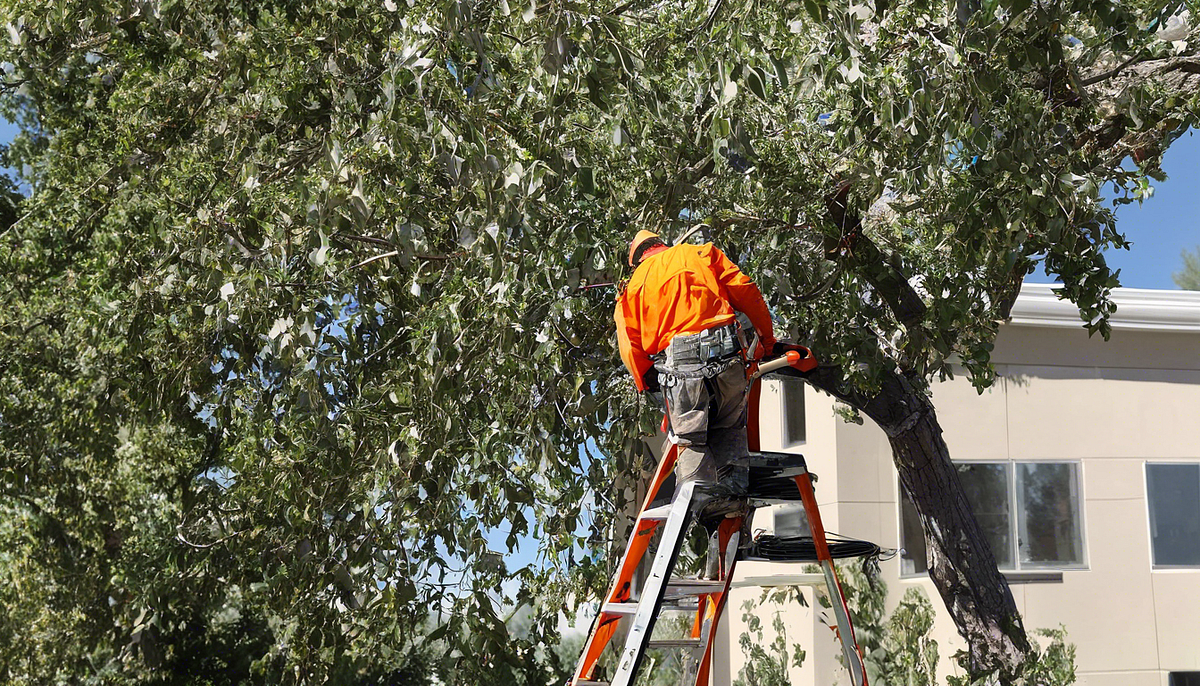
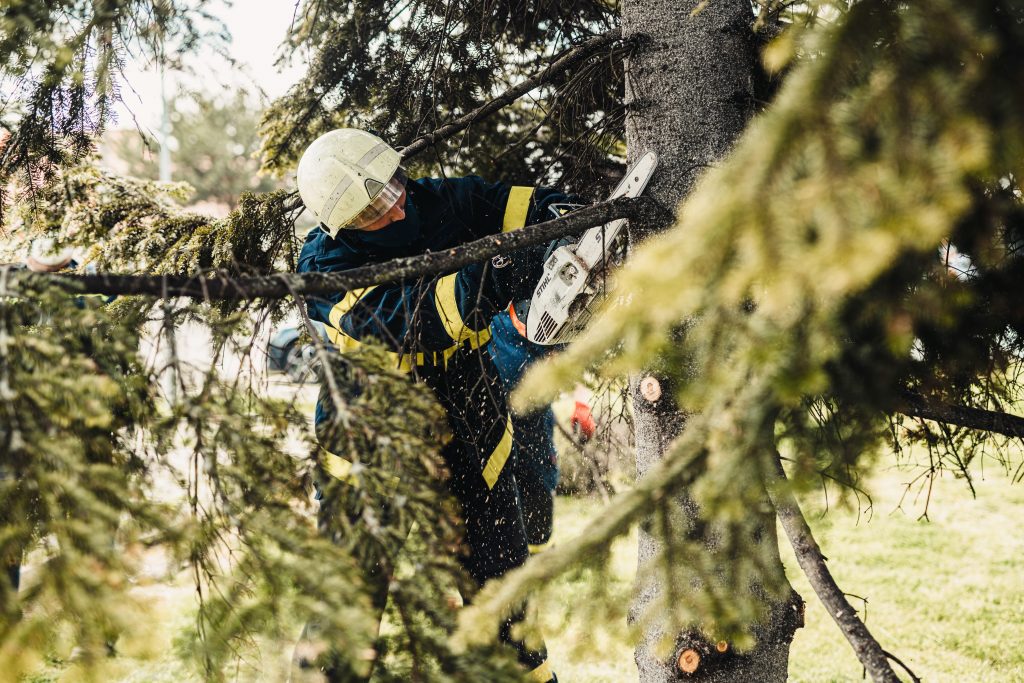
Proper pruning techniques are essential for maintaining the health and structure of your tree. When it comes to tree rot prevention, pruning plays a crucial role. By following the correct methods, you can minimize the risk of rot and ensure the longevity of your tree. Start by removing any dead, diseased, or damaged branches. Make clean cuts close to the branch collar, without leaving stubs. Avoid pruning during periods of active growth and in extreme weather conditions. It is also important to sterilize your pruning tools between cuts to prevent the spread of diseases. By practicing proper pruning techniques, you can promote healthy growth and reduce the likelihood of tree rot. Now, let’s move on to treating damaged wood without further delay.
Treating Damaged Wood
If you notice any damaged wood on your tree, it’s important to address it promptly to prevent further issues. Damaged wood can lead to decay, especially after limb removal. To treat damaged wood and prevent decay, start by removing any loose or jagged edges using a sharp pruning saw or shears. Next, clean the area with a diluted bleach solution to kill any bacteria or fungi that may be present. Once the area is clean, apply a wound dressing or sealant to protect the exposed wood from moisture and pests. Regularly monitor the treated area for signs of decay or further damage, and consult with a professional arborist if necessary. By taking these steps, you can ensure the health and longevity of your tree. Speaking of tree health, let’s now discuss the traits of tree rot.
Traits of Tree Rot
The signs of tree rot include soft or spongy wood and the presence of fungal growth. When it comes to preventing tree rot, there are several methods you can employ. First and foremost, it is important to regularly inspect your trees for any signs of decay. Look out for soft or spongy wood, as this indicates that rot may be present. Additionally, keep an eye out for any fungal growth on the trunk or branches, as this is another telltale sign of tree rot.
To prevent tree rot, it is crucial to maintain the overall health of your trees. This means providing proper irrigation, fertilization, and pruning. Keeping the tree properly pruned helps to reduce the risk of limb breakage, which can lead to rot. Removing dead or diseased branches promptly also helps prevent the spread of decay.
In order to prevent tree rot after limb removal, there are a few key steps you should take. First, make sure to make clean cuts when removing limbs, as jagged or rough cuts can create entry points for rot-causing organisms. Secondly, treat the cut surfaces with a fungicide to inhibit the growth of fungi. Lastly, monitor the tree closely for any signs of decay in the area where the limb was removed, and take immediate action if necessary.
Steps to Prevent Tree Rot After Limb Removal
When it comes to preventing decay and promoting tree health after limb removal, there are several important steps you can take. By implementing these measures, you can ensure that your tree remains strong and resilient. Here are some key strategies to consider:
- Proper pruning techniques: When removing a limb, it’s essential to make a clean cut to minimize the risk of rot. Remove any jagged or torn edges, as they can provide an entry point for decay-causing organisms.
- Apply a wound dressing: After a limb is removed, applying a wound dressing can help protect the tree from potential infections. This can be especially beneficial during the tree’s vulnerable healing period.
- Promote tree vigor: A healthy tree is more resistant to decay. Ensure your tree receives adequate sunlight, water, and nutrients. Regularly fertilize and monitor for any signs of stress or disease.
- Regular inspections: Stay vigilant and regularly inspect your tree for any signs of decay or rot. Early detection allows for timely intervention, preventing the spread of decay and potential tree failure.
Goals
One important goal is to promote tree health and prevent decay by following these preventive measures. Taking proper care of your trees after limb removal is crucial to ensure their long-term health and prevent the onset of decay. By implementing these post limb care practices, you can significantly reduce the risk of tree rot and maintain the vitality of your trees.
| Preventive Measures | Description |
|---|---|
| Pruning Techniques | Utilize proper pruning techniques to remove dead or diseased branches, promoting healthy growth and preventing decay. |
| Correct Wound Care | Treat any wounds or cuts on the tree with wound dressing to prevent entry of pathogens and promote faster healing. |
| Avoid Overwatering | Overwatering can lead to root rot and weaken the tree’s defense against decay. Water your tree sparingly, following recommended watering guidelines. |
Following these preventive measures will help prevent decay and ensure the longevity of your trees. By implementing proper pruning techniques, providing correct wound care, and avoiding overwatering, you can significantly reduce the risk of tree rot.
Transition: Developing good habits for preventing tree rot is essential for maintaining the health and vitality of your trees.
Habits for Preventing Tree Rot
To maintain the health and vitality of your trees, it’s important to develop good habits for preventing decay. Proper tree maintenance is crucial in keeping your trees strong and free from rot. One of the most effective ways to prevent decay is by pruning your trees regularly. By removing dead or diseased branches, you can eliminate potential entry points for decay-causing organisms. It’s also essential to ensure that your trees receive adequate water and nutrients. Proper irrigation and fertilization can help strengthen the trees’ immune systems, making them more resistant to decay. Additionally, practicing good tree care techniques such as avoiding excessive pruning and protecting the base of the tree from damage can go a long way in preventing decay. Regular inspections by a certified arborist can help identify early signs of decay and take appropriate action. By implementing these habits, you can significantly reduce the risk of tree decay and maintain the health of your trees for years to come.
Now, let’s dive into a real-life story that showcases the importance of preventing decay in tree maintenance.
A Real-Life Story
Make sure you take the necessary steps to prevent decay in your trees, as neglecting tree maintenance can lead to costly and devastating consequences. Let me share with you a real-life story that highlights the importance of proactive tree care. In a small town, a homeowner had a beautiful oak tree in their backyard. Unfortunately, they failed to properly maintain it, and one day, a large limb fell off during a storm. The homeowner was lucky that no one got hurt, but the damage was significant. Upon inspection, it was discovered that rot had set in, causing the limb to weaken and eventually break. This case study serves as a reminder that regular tree inspections and pruning are critical in preventing decay and potential accidents. It is essential to hire a professional arborist who can assess the health of your trees and recommend necessary actions to prevent future problems. By taking proactive measures, you can avoid costly repairs and ensure the safety of your property and loved ones. Now, let’s delve into some expert quotes on how to address tree rot after limb removal.
Quotes
Now that you have heard a real-life story about the consequences of not properly addressing tree rot after limb removal, it is important to understand the significance of preventing decay and the potential long-term effects it can have on your trees. By taking proactive measures, you can ensure the health and longevity of your trees.
Preventing decay starts with proper pruning techniques. When removing limbs, it is crucial to make clean cuts, avoiding any unnecessary damage to the tree. Additionally, treating the wounds with a tree paint or sealant can provide an extra layer of protection against decay-causing organisms.
Regular inspections are also essential in identifying early signs of decay. Look out for discoloration, cavities, or fungal growth on the trunk or branches. If you notice any of these symptoms, it is crucial to consult an arborist who can assess the extent of the damage and recommend appropriate treatment options.
Remember, the long-term effects of untreated tree rot can be devastating. It can lead to weakened structural integrity, increased risk of falling limbs, and even tree death. By being proactive and taking the necessary steps to prevent decay, you can ensure the health and safety of your trees for years to come.
As we delve into the next section, we will uncover the secrets to effectively preventing and addressing tree rot after limb removal.
Secrets
By following these tips, you’ll be able to effectively prevent and address tree rot after removing limbs. Tree rot prevention techniques are crucial to maintaining the health and longevity of your trees. One of the most common causes of tree rot is improper pruning, which can create entry points for pathogens to enter the tree. To prevent this, make sure to use proper pruning techniques, such as making clean cuts and avoiding cutting too close to the trunk. Another cause of tree rot is excessive moisture, which creates a favorable environment for fungi and decay organisms. To prevent this, ensure proper drainage around the tree and avoid overwatering. Additionally, regularly inspect your trees for signs of decay, such as discolored or soft wood, and promptly address any issues. By taking these preventative measures, you can significantly reduce the risk of tree rot and maintain the health of your trees for years to come.
Transition: Now that you are aware of the common causes of tree rot and the techniques to prevent it, let’s dive deeper into some insights on tree rot prevention.
Insights on Tree Rot Prevention
Using proper pruning techniques and maintaining proper drainage around the tree can significantly reduce the risk of tree rot. Tree rot prevention techniques are essential for the health and longevity of your trees. One of the most common causes of tree rot is improper pruning. When pruning, it is important to make clean cuts at the appropriate angle and location. This helps the tree heal properly and reduces the chances of rot-causing organisms entering the tree. Another common cause of tree rot is poor drainage. Excess water around the base of the tree can lead to root rot, which can then spread to the rest of the tree. To prevent this, ensure that the tree is planted in well-draining soil and avoid overwatering. Additionally, it is important to remove any dead or decaying wood from the tree. Dead wood provides a breeding ground for rot-causing organisms and can spread the infection to the rest of the tree. Regular inspections and prompt removal of dead wood can help prevent tree rot. By implementing these tree rot prevention techniques, you can ensure the health and vitality of your trees for years to come.
Benefits of Preventing Tree Rot
To maintain the health and longevity of your trees, you’ll enjoy a multitude of benefits by implementing effective techniques to prevent tree rot. By adopting good habits for preventing tree rot, you can safeguard your trees against this destructive condition and reap the rewards in return. One of the key benefits of preventing tree rot is the preservation of the tree’s structural integrity. When rot sets in, it weakens the tree from within, making it more susceptible to breakage and collapse. By taking proactive measures to prevent rot, such as regular inspections and prompt removal of dead or decaying branches, you can ensure that your trees remain strong and stable for years to come.
Another benefit of preventing tree rot is the preservation of the tree’s aesthetics. A healthy, vibrant tree adds beauty and value to your property. Tree rot, on the other hand, can lead to unsightly dead branches, mushrooms growing at the base, and even hollow trunk or limbs. By implementing preventive measures, such as proper pruning techniques and maintaining good tree hygiene, you can keep your trees looking their best.
In addition to structural integrity and aesthetics, preventing tree rot also benefits the surrounding ecosystem. Healthy trees provide shade, shelter, and food for various animals, as well as help purify the air and control soil erosion. By preventing tree rot, you are contributing to the overall health and balance of the environment.
Now that you understand the benefits of preventing tree rot, let’s delve into some valuable lessons that will help you effectively combat this condition.
Lessons
When it comes to maintaining the health and longevity of your trees, there are several key points to keep in mind. Firstly, preventing future rot is crucial in ensuring the overall well-being of your trees. This involves implementing proper pruning techniques to promote healthy growth and reduce the risk of rot occurring. Additionally, if you already have existing tree rot, it is important to know how to effectively treat it to prevent further damage and potential tree loss.
Preventing Future Rot
You can prevent future rot by ensuring proper tree care and maintenance. One of the key aspects of preventing decay and maintaining tree health is to start with a strong foundation. This means planting the right tree in the right location, considering its specific needs for sunlight, soil type, and water. Regularly inspect your trees for any signs of disease or damage, such as cracked branches or discolored leaves. Promptly address any issues to prevent further deterioration. Additionally, proper watering, fertilization, and mulching techniques can help promote tree health and resilience against rot. By taking these proactive measures, you can create a healthy environment for your trees and reduce the risk of future decay. Speaking of maintenance, let’s now move on to discussing proper pruning techniques.
Proper Pruning Techniques
Now that you have learned how to prevent future rot by properly maintaining your trees, let’s delve into the importance of using proper pruning techniques. Tree pruning is an essential aspect of tree maintenance, as it helps promote healthy growth and prevent disease. When pruning, it is crucial to make clean cuts at the branch collar, which is the swollen area where the branch meets the trunk. This promotes faster healing and reduces the risk of rot. Additionally, it is important to remove any dead, damaged, or diseased branches to prevent the spread of infection. By using the right techniques and tools, such as sharp and clean pruning shears, you can ensure that your trees remain healthy and strong. Now, let’s explore the next step in treating existing tree rot.
Treating Existing Tree Rot
To effectively treat existing tree rot, it’s essential to identify the affected areas and promptly remove any infected branches or parts of the tree. Treating decayed wood is crucial to prevent the spread of fungal infection and ensure the health of your tree. Start by using a sharp pruning tool to cut away the decayed wood, making clean cuts just outside the affected area. Be sure to sterilize your tools between cuts to prevent further contamination. After removing the infected parts, apply a fungicide to the exposed areas to inhibit the growth of fungi. This will help in preventing the rot from spreading and causing further damage to your tree. By taking these steps, you can effectively treat existing tree rot and promote the overall health and longevity of your tree. Now let’s dive into some routines that can help maintain the health of your tree.
Routines
After limb removal, it’s important to establish regular routines to prevent tree rot. Preventing decay and providing post removal care are essential for maintaining the health and longevity of your trees. Implementing these routines will ensure that your trees recover properly and remain strong.
First, it is crucial to clean the wound left by the removed limb. Use a clean, sharp tool to trim any jagged edges or torn bark. This will promote proper healing and prevent the entry of pathogens. Next, apply a wound dressing or sealant to protect the exposed area from insects, fungi, and other potential sources of infection.
In addition to wound care, regular inspection is essential. Regularly examine the tree for any signs of decay, such as discolored or soft wood, fungal growth, or oozing sap. If you notice any of these symptoms, take immediate action to address the issue.
Furthermore, maintaining healthy soil conditions is crucial. Ensure that the tree is properly watered and fertilized according to its specific needs. Proper nutrition will enhance the tree’s ability to heal and resist rot.
By establishing these routines, you can effectively prevent tree rot and promote the overall health of your trees.
Moving on to the pros and cons of different tree rot treatments…
Pros and Cons
Implementing regular routines for tree rot treatments can have both advantages and disadvantages. Let’s explore the pros and cons of incorporating these routines into your tree care regimen.
One of the major benefits of implementing regular routines for tree rot treatments is the prevention of further decay. By regularly inspecting and treating your trees for rot, you can catch the problem early on and take the necessary steps to address it before it spreads. This can help preserve the health and structural integrity of your trees, ensuring their longevity.
Another advantage is the potential for cost savings. By catching and treating tree rot early, you can avoid costly tree removal and potential property damage that can result from falling branches or collapsing trees. Regular routines can also help you identify any underlying issues that may be contributing to tree rot, such as poor drainage or excessive pruning.
However, there are also drawbacks to consider. Implementing regular routines for tree rot treatments may require a significant investment of time and resources. Regular inspections and treatments can be time-consuming, especially if you have a large number of trees on your property. Additionally, some treatments may involve the use of chemicals, which can have negative environmental impacts if not used properly.
In conclusion, while there are benefits to implementing regular routines for tree rot treatments, there are also drawbacks to consider. It is important to weigh the pros and cons and determine if these routines are suitable for your specific situation and resources. By doing so, you can make informed decisions to maintain the health and vitality of your trees.
Moving on to the dos and don’ts of tree rot treatments…
Dos and Dont’s
Make sure you do regular inspections of your trees for signs of rot and take immediate action if you notice any symptoms. Tree rot can spread quickly and cause extensive damage if left untreated. To help you effectively stop tree rot after limb removal, here are some dos and don’ts to keep in mind:
| Dos | Don’ts |
|---|---|
| Inspect the tree thoroughly for any signs of rot or decay before removing any limbs | Neglect regular inspections and maintenance |
| Use proper pruning techniques to remove the affected limbs, cutting just outside the branch collar | Leave stubs or make improper cuts that can invite rot |
| Clean and sterilize your pruning tools before and after each use to prevent the spread of disease | Use dirty or dull tools, which can increase the risk of infection |
| Apply a tree wound dressing or sealant to the cut area after limb removal | Ignore the wound, as it can provide a gateway for rot to enter |
| Monitor the tree closely after limb removal for any signs of re-infection or spreading rot | Assume the problem is solved once the limbs are removed |
Mistakes to Avoid
To effectively address tree rot, it’s important to be aware of the common mistakes to avoid. Preventing decay and taking proper care of the tree after limb removal are crucial steps in maintaining its health and longevity. One common mistake is leaving stubs after pruning. These stubs create an entry point for decay-causing organisms, which can quickly spread throughout the tree. To prevent this, make sure to cut limbs flush with the main trunk or lateral branch. Another mistake to avoid is over-pruning. While it’s important to remove dead or damaged limbs, excessive pruning can weaken the tree and make it more susceptible to rot. Be mindful of the 25% rule, which advises against removing more than a quarter of the tree’s live branches in a single year. Additionally, failing to properly clean and sanitize pruning tools can introduce harmful pathogens to the tree. After each use, clean the tools with a solution of one part bleach to nine parts water to prevent the spread of diseases. By avoiding these common mistakes, you can effectively prevent tree rot and ensure the health of your trees.
Now that you are aware of the mistakes to avoid when addressing tree rot, let’s move on to the key takeaways for effectively stopping tree rot after limb removal.
Key Takeaways
Now that you’re aware of the mistakes to avoid, it’s important to remember these key takeaways for effectively preventing tree rot. One of the most crucial steps in preventing decay is to regularly inspect your trees for signs of rot. Look for soft spots, discoloration, or fungal growth on the trunk and branches. Pay close attention to any areas where limbs have been removed, as these are vulnerable spots for rot to develop. Promptly address any signs of rot by removing affected branches or calling a professional arborist for assistance. Additionally, ensure that your trees are properly pruned to promote good airflow and reduce the risk of moisture accumulation, which can contribute to rot. Keep the area around the base of the tree clear of debris and avoid piling mulch against the trunk, as this can create a moist environment that favors rot development. By staying vigilant and taking these preventative measures, you can greatly reduce the risk of tree rot after limb removal. In the next section, we will discuss specific action steps to prevent tree rot after limb removal.
Specific Action Steps to Prevent Tree Rot After Limb Removal
To prevent tree rot after limb removal, it is important to follow proper pruning techniques. This includes making clean cuts just outside the branch collar and avoiding leaving stubs. Additionally, applying a protective sealant to the cut area can help prevent pathogens from entering and causing decay. Finally, it is crucial to carefully monitor the tree for any signs of rot, such as soft or discolored wood, and take prompt action if necessary to prevent further damage.
Proper Pruning Techniques
Make sure you’re using clean and sharp pruning shears to prevent further damage when cutting tree limbs. Proper tree pruning techniques are essential for maintaining tree health and preventing tree rot after limb removal. Start by removing any dead, diseased, or damaged branches. Cut just outside the branch collar, where the branch connects to the trunk. Avoid leaving stubs, as they can become entry points for pests and diseases. Make sure to remove any branches that are crossing or rubbing against each other, as they can cause wounds and create opportunities for rot to develop. It’s also important to maintain a balanced canopy by thinning out overcrowded branches. By following these proper pruning techniques, you can help promote tree health and reduce the risk of tree rot. Now, let’s move on to the next step of applying protective sealant.
Applying Protective Sealant
You should apply a protective sealant to the freshly pruned tree limbs to prevent pests and diseases from entering the wounds. Applying a protective sealant is an important step in ensuring the health and longevity of your trees. There are various types of protective sealants available in the market, such as tree wound paint, pruning sealer, or latex-based sealants. When applying the sealant, make sure to clean the pruning tools to prevent the spread of any potential pathogens. Begin by trimming any ragged edges of the wound, then apply a thin layer of the sealant over the cut surface. Be careful not to smother the wound with excessive sealant, as this can hinder the healing process. Once the sealant is applied, it forms a protective barrier that prevents pests and diseases from entering the wound. Transitioning into the subsequent section, it is also crucial to monitor for signs of any potential problems or infections.
Monitoring for Signs
Once the sealant is applied, it’s important to regularly check for any signs of pests or diseases. Tree rot prevention is crucial for maintaining the health and longevity of your trees. Regular monitoring for signs of decay is essential in identifying and addressing any issues promptly. When inspecting your trees, keep an eye out for visible symptoms such as soft or decaying wood, fungal growth, or cavities in the trunk or branches. Look for any cracks or splits in the bark, as these can be entry points for pests or pathogens. Additionally, watch for wilting leaves, excessive leaf drop, or stunted growth, which could indicate an underlying issue. By staying vigilant and taking swift action when necessary, you can effectively prevent tree rot and ensure the vitality of your landscape.
Frequently Asked Questions
What Is the Average Cost of Tree Rot Treatment After Limb Removal?
The average cost of tree rot treatment after limb removal varies depending on the severity of the rot and the size of the tree. There are natural remedies available that can help stop tree rot and prevent further damage.
Can Tree Rot Spread to Neighboring Trees?
Tree rot can spread to neighboring plants, causing negative effects on their health. However, through proper tree care like regular pruning and maintenance, you can prevent tree rot and protect neighboring trees.
Are There Any Natural Remedies That Can Prevent Tree Rot After Limb Removal?
To prevent tree rot after removing a limb, there are natural remedies you can try. These remedies help protect the tree from rot by promoting healthy growth and preventing disease.
How Long Does It Take for a Tree to Fully Recover After Limb Removal?
After limb removal, a tree’s recovery time depends on various factors such as its species, age, and overall health. The effects of limb removal can potentially harm the tree’s health, so proper care and monitoring are essential.
Is It Necessary to Hire a Professional Arborist to Prevent Tree Rot After Limb Removal, or Can It Be Done by Homeowners Themselves?
You can prevent tree rot after limb removal by using DIY methods. It’s not necessary to hire a professional arborist, as homeowners can take proper care of their trees to avoid rot.
About Murray, Utah
Murray is a city situated on the Wasatch Front in the core of Salt Lake Valley in the U.S. state of Utah. Named for territorial governor Eli Murray, it is the state's fourteenth largest city. According to the 2020 census, Murray had a population of 50,637. Murray shares borders with Taylorsville, Holladay, South Salt Lake and West Jordan, Utah. Once teeming with heavy industry, Murray's industrial sector now has little trace and has been replaced by major mercantile sectors. Known for its central location in Salt Lake County, Murray has been called the Hub of Salt Lake County. Unlike most of its neighboring communities, Murray operates its own police, fire, power, water, library, and parks and recreation departments and has its own school district. While maintaining many of its own services, Murray has one of the lowest city tax rates in the state.
Neighborhoods in Murray, Utah
Murray Oakes, Grant Park, Southwood Park, Murray Park, Murray Park Restrooms, Willow Pond Park, Neighborhood Veterinary Care
Things To Do in Murray, Utah


Bus Stops in Murray, Utah to Truco Services, Inc.
Bus Stop in Murray Central Station (Bay C) Murray, Utah to Truco Services, Inc.
Bus Stop in State St @ 4801 S Murray, Utah to Truco Services, Inc.
Bus Stop in Murray North Station Murray, Utah to Truco Services, Inc.
Bus Stop in State St @ 4949 S Murray, Utah to Truco Services, Inc.
Bus Stop in Murray Central Frontrunner/Trax Station Murray, Utah to Truco Services, Inc.
Bus Stop in Murray Blvd / Vine St (SB) Murray, Utah to Truco Services, Inc.
Bus Stop in State St @ 3925 S Murray, Utah to Truco Services, Inc.
Bus Stop in State St @ 4824 S Murray, Utah to Truco Services, Inc.
Bus Stop in State St @ 5223 S Murray, Utah to Truco Services, Inc.
Bus Stop in Murray Blvd / Allendale Dr (NB) Murray, Utah to Truco Services, Inc.
Bus Stop in Murray Blvd @ 5039 S Murray, Utah to Truco Services, Inc.
Bus Stop in State St @ 4721 S Murray, Utah to Truco Services, Inc.
Driving Directions in Murray, Utah to Truco Services, Inc.
Driving Directions from Woodruff Tree Trimming and Removal to 4640 Commerce Dr, Murray, UT 84107, USA
Driving Directions from Reliable Tree Care to 4640 Commerce Dr, Murray, UT 84107, USA
Driving Directions from Tree Pro-Tech to 4640 Commerce Dr, Murray, UT 84107, USA
Driving Directions from Prestige Tree And Landscape to 4640 Commerce Dr, Murray, UT 84107, USA
Driving Directions from Excellence Tree & Landscape to 4640 Commerce Dr, Murray, UT 84107, USA
Driving Directions from Amen Trees to 4640 Commerce Dr, Murray, UT 84107, USA
Driving Directions from Tim's Tree Care to 4640 Commerce Dr, Murray, UT 84107, USA
Driving Directions from Jordan Tree Service - Murray to 4640 Commerce Dr, Murray, UT 84107, USA
Driving Directions from Arbor Works to 4640 Commerce Dr, Murray, UT 84107, USA
Driving Directions from Diamond Tree Experts to 4640 Commerce Dr, Murray, UT 84107, USA
Driving Directions from Green Tree Arborist to 4640 Commerce Dr, Murray, UT 84107, USA
Driving Directions from TruCo Services to 4640 Commerce Dr, Murray, UT 84107, USA
Reviews for Truco Services, Inc. Murray, Utah

Emily Abercrombie
We had a great experience with TruCo! They were well priced, responsive and prompt. Michael was a pleasure to work with and gave us advice on which plants to put in where we took out our ugly old shrubs. I would highly recommend this company!!!

Michelle Turpin
TruCo Services gets 5 stars from us for customer service. We experienced a few issues with their services this last year and Rob Eccles in senior management, stepped in and immediately handled our issues. He was very committed to making sure they understood our expectations and would execute to make us happy.

Siobhan Billingsley
I work for a property management company and have the pleasure of working with Rob at a community in Sandy. He has been incredible to work with and always responds in a timely manner. He knows all the homeowners by name and address and is aware of all the "problem" areas when it comes to sprinklers. I never have to worry about following up with him because he always reaches out to provide me with an update. If you're looking to work with someone who takes pride in their job, is professional, and can solve the worst landscaping problems thrown your way, Rob is your guy. Thank you, Rob for all you do!

Jaime S.
We have used Truco at 2 of the complexes we manage, they have been great to work with. Good quality service, outstanding customer service with good communication. That's hard to find these days. I highly recommend them. Travis has been awesome to work with.

Jerusha Smart
We use TruCo for a majority of our properties and our home. While other landscaping companies we use come and go for various reasons like cost, communication issues, work performance, etc., TruCo is always consistent in price and work. Also, Rob is the best.